
用是最新的Android Studio 3.6.x的,下了新的QMUI Demo参考学习UI。
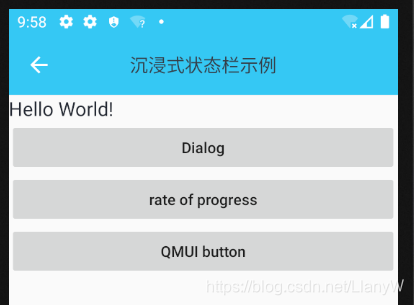
先上效果图:
如何添加QMUI框架并引用它的主题:
1. 添加框架: 在app.gradle里面添加依赖: implementation ‘com.qmuiteam:qmui:2.0.0-alpha08’
dependencies {
    implementation fileTree(include: ['*.jar'], dir: 'libs')
    implementation 'androidx.appcompat:appcompat:1.1.0'
    implementation 'androidx.constraintlayout:constraintlayout:1.1.3'
    implementation 'com.google.android.material:material:1.1.0'
    testImplementation 'junit:junit:4.12'
    androidTestImplementation 'androidx.test:runner:1.2.0'
    androidTestImplementation 'androidx.test.espresso:espresso-core:3.2.0'
    testImplementation  project(path: ':FastBleLib')
    implementation 'com.qmuiteam:qmui:2.0.0-alpha08'
}
修改引用的主题2个方法:
方法一:去改AndroidMainfest.xml
2.修改AndroidMainfest.xml主题: android:theme=”@style/QMUI.Compat”,同时在activity里也设置了theme:
<activity android:name=”.MainActivity” android:label=”@string/app_name” android:theme=”@style/QMUI.Compat“>
 <application
        android:allowBackup="true"
        android:icon="@mipmap/ic_launcher"
        android:label="@string/app_name"
        android:roundIcon="@mipmap/ic_launcher_round"
        android:supportsRtl="true"
        android:theme="@style/QMUI.Compat">
        <activity
            android:name=".MainActivity"
            android:label="@string/app_name"
            android:theme="@style/QMUI.Compat">
            <intent-filter>
                <action android:name="android.intent.action.MAIN" />
                <category android:name="android.intent.category.LAUNCHER" />
            </intent-filter>
        </activity>
</application>
方法二:修改style.xml的AppTheme主题,将parent指向QMUI.Compat
3. 修改style.xml主题:
<style name=”AppTheme” parent=”QMUI.Compat”>
<!– 重写系统 或者 QMUI 提供的 attr –> </style>
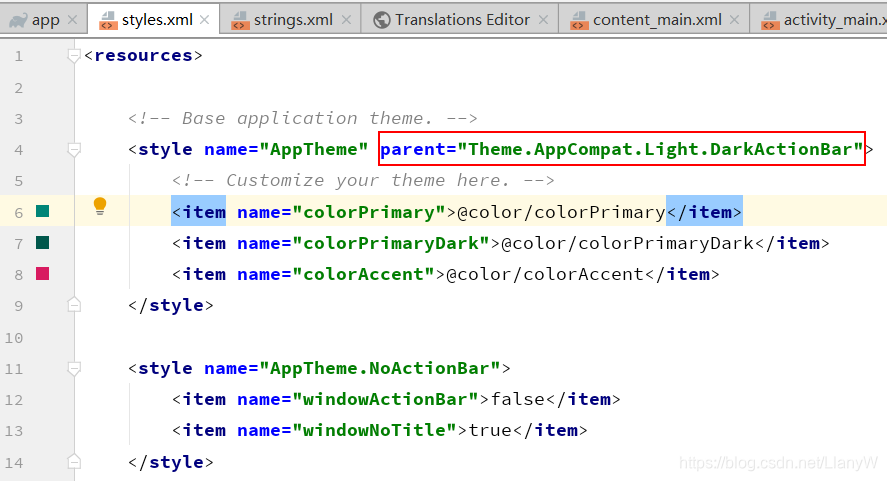
将以上的Theme修改:style name=”AppTheme” parent=”QMUI.Compat.NoActionBar”:
<resources>
<!-- Base application theme. -->
<style name="AppTheme" parent="QMUI.Compat.NoActionBar">
<!-- <!– Customize your theme here. –>-->
<!-- <item name="colorPrimary">@color/colorPrimary</item>-->
<!-- <item name="colorPrimaryDark">@color/colorPrimaryDark</item>-->
<!-- <item name="colorAccent">@color/colorAccent</item>-->
<!-- <item name="qmui_background_color">@color/qmui_config_color_background</item>-->
</style>
...
</resources>这样二个地方选择其中一个改都可以将QMUI的主题引入。
源码:
activity_main.xml :
<?xml version="1.0" encoding="utf-8"?>
<com.qmuiteam.qmui.widget.QMUIWindowInsetLayout
    xmlns:android="http://schemas.android.com/apk/res/android"
    android:layout_width="match_parent"
    android:layout_height="match_parent">

    <com.qmuiteam.qmui.widget.QMUITopBarLayout
        android:id="@+id/topbar"
        android:layout_width="match_parent"
        android:layout_height="wrap_content"

        android:fitsSystemWindows="true">
    </com.qmuiteam.qmui.widget.QMUITopBarLayout>

    <com.qmuiteam.qmui.widget.webview.QMUIWebViewContainer
        android:id="@+id/webview_container"
        android:fitsSystemWindows="true"
        android:layout_marginTop="?attr/qmui_topbar_height"
        android:layout_width="match_parent"
        android:layout_height="wrap_content">
        <include layout="@layout/content_main"/>

    </com.qmuiteam.qmui.widget.webview.QMUIWebViewContainer>


</com.qmuiteam.qmui.widget.QMUIWindowInsetLayout>
按上面的修改出来的主题如下,感觉还是与QMUI主题不符,怎么不是蓝色的标题栏???:
 对比他的Demo
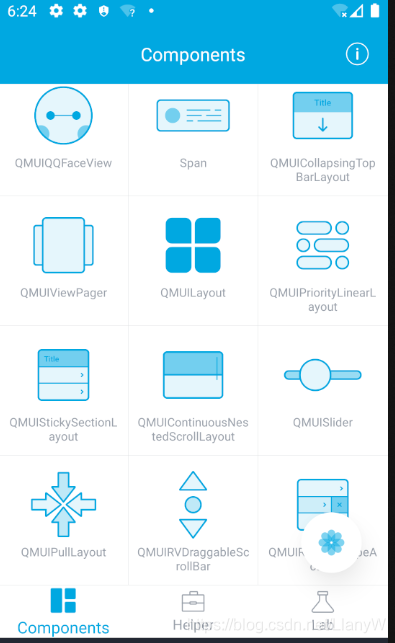
问题1: 标题栏的app名字显示出来了。
原因1: MainAcitivity.class:原来继承
public class MainActivity extends AppCompactActivity 改成: public class MainActivity extends Activity然后设置topBar颜色:
        在MainActivity.class里面设置topBar的方法里面添加:
         mTopBar.setBackgroundColor(ContextCompat.getColor(this, R.color.app_color_theme_4));
       防止设置颜色调用失败,然后在res-values目录下的colors.xml添加此颜色:<color name="app_color_theme_4">#36C8F4</color>


 MainActivity.class
private void initTopBar() {
mTopBar.setBackgroundColor(ContextCompat.getColor(this, R.color.app_color_theme_4));
mTopBar.addLeftBackImageButton().setOnClickListener(new View.OnClickListener() {
@Override
public void onClick(View v) {
finish();
overridePendingTransition(R.anim.slide_still, R.anim.slide_out_right);
}
});
mTopBar.setTitle("沉浸式状态栏示例");
}colors.xml
<?xml version="1.0" encoding="utf-8"?>
<resources>
    <color name="colorPrimary">#008577</color>
    <color name="colorPrimaryDark">#00574B</color>
    <color name="colorAccent">#D81B60</color>
    <color name="app_color_theme_4">#36C8F4</color>
</resources>
最终运行效果如文章开关图片。
版权声明:本文内容由互联网用户自发贡献,该文观点仅代表作者本人。本站仅提供信息存储空间服务,不拥有所有权,不承担相关法律责任。如发现本站有涉嫌侵权/违法违规的内容, 请发送邮件至 举报,一经查实,本站将立刻删除。
文章由极客之音整理,本文链接:https://www.bmabk.com/index.php/post/101685.html

