
SpringBoot集成JavaMail发送邮件
项目环境
- IDEA 2019.1
- SpringBoot 2.1.5
- Gradle 4.10
技术介绍
操作步骤
添加依赖
SpringBoot集成JavaMail需要先在build.gradle中添加依赖
dependencies {
    implementation 'org.springframework.boot:spring-boot-starter-web'
    compile (group: 'org.springframework.boot', name: 'spring-boot-starter-mail', version: '1.5.9.RELEASE'){
        exclude group: 'org.springframework.boot', module: 'spring-boot-starter-logging'
    }
    testImplementation 'org.springframework.boot:spring-boot-starter-test'
}
添加配置
配置P邮箱OP3服务
这里我采用的是163邮箱。在使用JavaMail发送前,需要开启邮箱的pop3设置。具体流程如下:
- 点击设置,选择
POP3/SMTP/IMAP
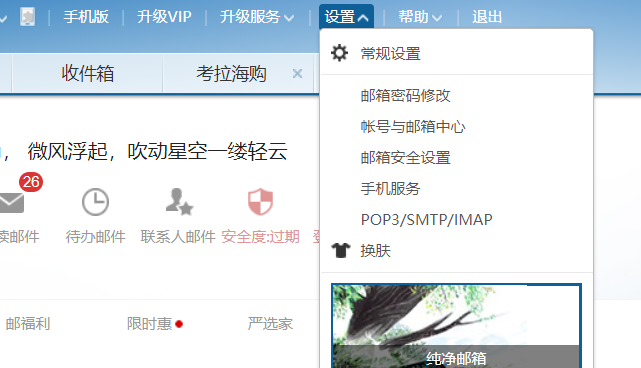

- 勾选途中的POP3服务,弹出的框中点击确定
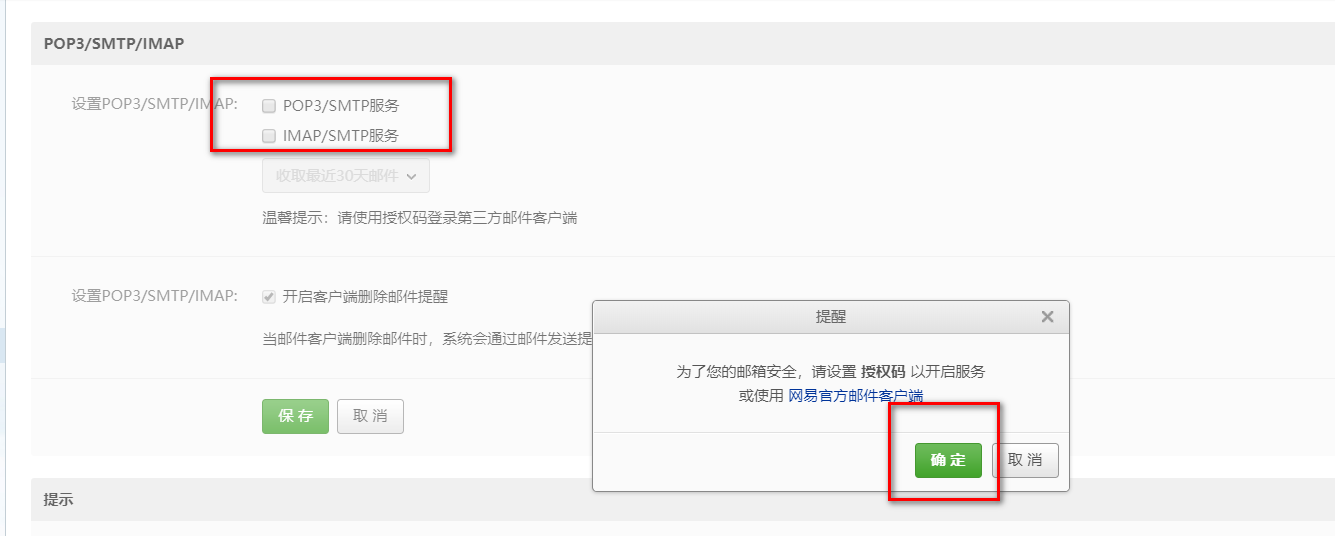
- “设置客户端授权码”中选择“开启”
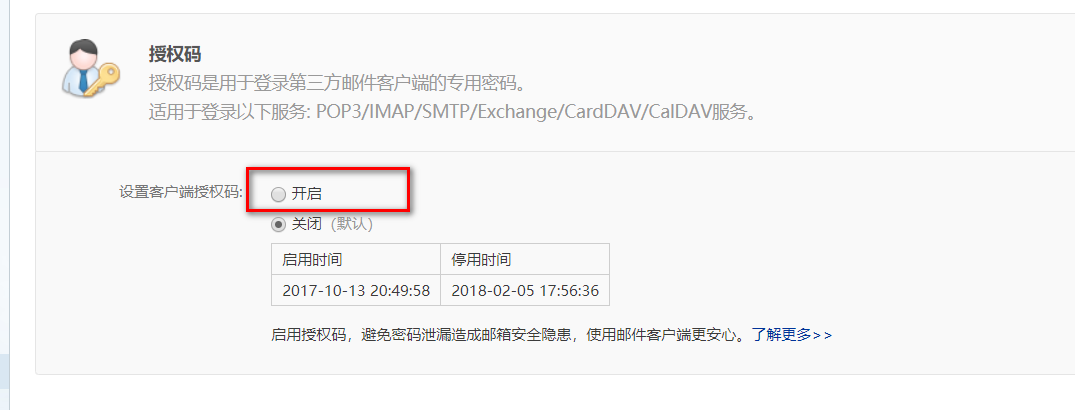
- 接下来会发送验证码到手机上,输入正确的验证码即可进入设置
授权码的页面,输入完成后点击确定
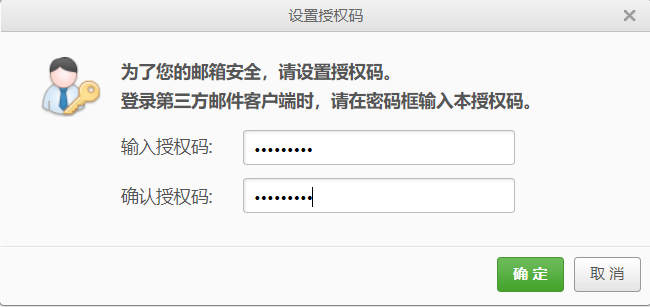
- 在弹出的狂中点击确定即可
修改配置文件
在application.yml中增加发信邮箱的信息,
server:
  port: 8880
spring:
  mail:
    host: smtp.163.com
    username: xda265856@163.com
    password: xda265856
    properties:
      mail:
        smtp:
          auth: true
          timeout: 25000
- host:163请使用示例中的,如果是其他邮箱如QQ等请自行百度
- username:邮箱账号
- password:这里是刚才设置的授权码,而不是登陆密码
编写代码
- MailService.java
@Service
public class MailService {
    Logger logger = LoggerFactory.getLogger(MailService.class.getName());
    @Autowired
    private JavaMailSender mailSender;
    /**
     * 发件邮箱
     */
    @Value("${spring.mail.username}")
    private String emailFrom;

    public String getEmailFrom() {
        return emailFrom;
    }

    public void setEmailFrom(String emailFrom) {
        this.emailFrom = emailFrom;
    }

    public void sendAttachmentsMail(String to, String subject, String content,String filePath){
        MimeMessage message = mailSender.createMimeMessage();

        try {
            MimeMessageHelper helper = new MimeMessageHelper(message, true);
            helper.setFrom(emailFrom);
            helper.setTo(to);
            helper.setSubject(subject);
            helper.setText(content, true);
            FileSystemResource file=new FileSystemResource(new File(filePath));
            //添加多个附件可以使用多条
            //helper.addAttachment(fileName,file);
            helper.addAttachment(filePath.substring(filePath.indexOf("/")+1),file);
            mailSender.send(message);
            logger.info("带附件的邮件已经发送。");
        } catch (MessagingException e) {
            logger.error("发送带附件的邮件时发生异常!", e);
        }
    }

    public void sendMail(String to, String subject, String content){
        MimeMessage message = mailSender.createMimeMessage();

        try {
            MimeMessageHelper helper = new MimeMessageHelper(message, true);
            helper.setFrom(emailFrom);
            helper.setTo(to);
            helper.setSubject(subject);
            helper.setText(content, true);
            mailSender.send(message);
            logger.info("普通的邮件已经发送。");
        } catch (MessagingException e) {
            logger.error("发送带附件的邮件时发生异常!", e);
        }
    }

}
- HelloController.java
@Controller
public class HelloController {
Logger logger = LoggerFactory.getLogger(HelloController.class);
@Autowired
MailService mailService;
@ResponseBody
@RequestMapping(value = "/common/mail", method = {RequestMethod.GET})
public String sendMail(){
try {
logger.debug("发送邮件");
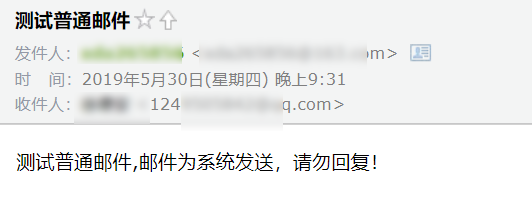
String subject = "测试普通邮件";
String content = "测试普通邮件,邮件为系统发送,请勿回复!";
mailService.sendMail("1249505842@qq.com", subject, content);
} catch (Exception e) {
logger.error("邮件发送失败,原因:{}",e.getMessage(),e);
}
return "success";
}
@ResponseBody
@RequestMapping(value = "/attatch/mail", method = {RequestMethod.GET})
public String sendAttatchMail(){
try {
logger.debug("附件邮件");
SimpleDateFormat dateFormat = new SimpleDateFormat("yyyy-MM-dd");
String format = dateFormat.format(new Date());
String filePath = "file/attatch.txt";
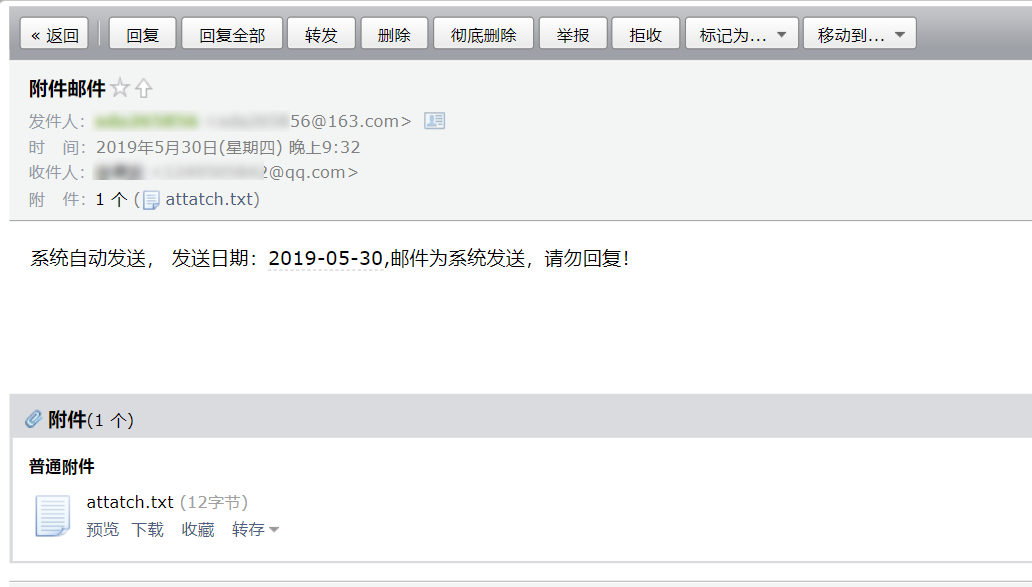
String content = "系统自动发送,"+" 发送日期:"+format+",邮件为系统发送,请勿回复!";
mailService.sendAttachmentsMail("1249505842@qq.com", "附件邮件", content,filePath);
} catch (Exception e) {
logger.error("邮件发送失败,原因:{}",e.getMessage(),e);
}
return "success";
}
}
测试
这里我们通过postman通过url请求来触发发邮件的动作。
发送普通邮件
- 请求地址:
http://127.0.0.1:8880/common/mail - 效果:

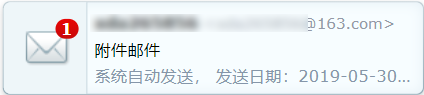
发送带附件的邮件
- 请求地址:
http://127.0.0.1:8880/attatch/mail - 效果
项目代码
- github:点击这里
版权声明:本文内容由互联网用户自发贡献,该文观点仅代表作者本人。本站仅提供信息存储空间服务,不拥有所有权,不承担相关法律责任。如发现本站有涉嫌侵权/违法违规的内容, 请发送邮件至 举报,一经查实,本站将立刻删除。
文章由极客之音整理,本文链接:https://www.bmabk.com/index.php/post/13166.html

