
一、Pytest概述
pytest是一个非常成熟的全功能的Python测试框架,主要特点有以下几点:
- 简单灵活,容易上手,文档丰富;
- 支持参数化,可以细粒度地控制要测试的测试用例;
- 能够支持简单的单元测试和复杂的功能测试,还可以结合selenium/appnium实现UI自动化测试、结合requests库实现接口自动化测试;
- pytest具有很多第三方插件,并且可以自定义扩展,比较好用的如pytest-selenium(集成selenium)、pytest-html(完美html测试报告生成)、pytest-rerunfailures(失败case重复执行)、pytest-xdist(多CPU分发)等;
- pytest还支持多种断言风格,包括Python自带的assert关键字、Nose断言库以及第三方库如Hypothesis等。
- 测试用例的skip和xfail处理;
- 可以很好的和CI工具结合,例如jenkins
二、Pytest安装和入门
2.1.安装pytest
要想使用Pytest直接执行 如下命令即可安装 pytest
pip install pytest
2.2.pytest 自动化的测试用例编写规则
官方文档 给出了 pytest 寻找 测试项 的 具体规则:
-
如果未指定命令行参数,则从 testpath(如果已配置)或当前目录开始收集。
- 如果命令行参数, 指定了 目录、文件名 或 node id 的任何组合,则按参数来找
-
寻找过程会递归到目录中,除非它们匹配上 norecursedirs。
-
在这些目录中,搜索由其测试包名称导入的
test_*.py或*_test.py文件。 -
从这些文件中,收集如下测试项:
- test为前缀 的
函数 - Test为前缀的
类里面的 test为前缀的方法
- test为前缀 的
2.3.测试用例代码
编写的测试用例代码文件, 必须以 test_ 开头,或者以 _test 结尾,比如,我们创建一个 文件名为 demo.py ,放在包 autotest 下面。内容如下:
class Test_case:

    def test_01(self):
        print("----------test_01--------")
        assert 1 == 1

    def test_02(self):
        print("----------test_02--------")
        assert 3 > 1

    def test_03(self):
        print("----------test_03--------")
        assert "hello" in ["world", "hello", "hi"]
上面的案例需要注意:
- 如果把测试用例存放在类中, 类名必须以
Test为前缀的类,用例对应的方法必须以test为前缀的方法。 - pytest 中用例的检查点 直接用 Python 的 assert 断言。
- assert 后面的表达式结果 为 True ,就是 检查点 通过,结果为False ,就是检查点 不通过。
2.3.执行参数运行测试
2.3.1.执行用例
执行测试非常简单,打开命令行窗口,进入项目根目录(我们这里就是 autotest),执行命令程序 pytest ./autotest/test1.py 即可,上面的示例执行结果如下

显示找到3个测试项,3个执行通过。通过的用例 是用一个小点表示, 不通过的用例用一个F表示,并且会在后面显示具体不通过的用例 和不通过的检查点 代码细节。
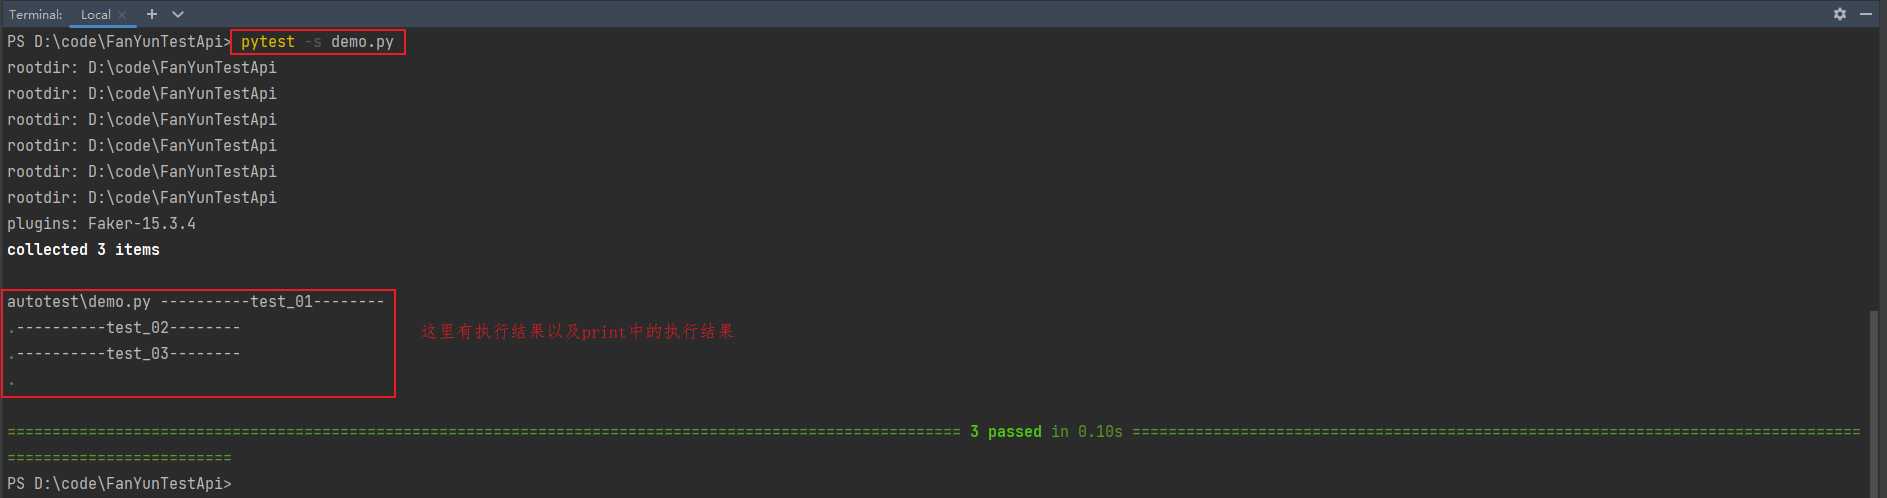
2.3.2.-s 输出用例中print语言
pytest 不会使用print打印的内容。如果我们希望 显示测试代码中print的内容,因为这些打印语句在调试代码时很有用,可以加上命令行参数 -s,例如:
pytest -s ./autotest/test1.py
如下图所示
2.3.3.-v 输出执行信息
如果我们希望得到更详细的执行信息,包括每个测试类、测试函数的名字,可以加上参数 -v,这个参数可以和 -s 合并为 -sv,如下:
#指定是从项目根目录下的autotest中查找执行
pytest -sv ./autotest/test1.py
执行 pytest 时, 如果命令行没有指定目标目录 或者 文件, 它会自动搜索当前目录下所有符合条件的文件、类、函数。为了防止 pytest 到其他目录中找测试用例项,执行测试时,我们可以在命令行加上目标目录名字 ,就像上面这样:

2.4.pytest.main 执行的参数传递
在代码中执行pytest可以通过main函数加参数来指定运行规则时,参数需要放在列表或者元祖中
pytest.main() # 运行当前目录下所有(test_*.py  和 *_test.py)
pytest.main(['./']) # 运行./目录下所有(test_*.py  和 *_test.py)
pytest.main(['./autotest'])    # 运行./autotest 目录下用例
pytest.main(['./autotest/demo.py'])    # 运行指定模块
pytest.main(['./autotest/demo.py::Test_case'])  # 运行指定类中的用例
pytest.main(['./autotest/demo.py::Test_case::test_02'])  # 运行类中的指定用例
pytest.main(['-k','3'])  # 匹配包含3的用例(匹配目录名、模块名、类名、用例名)
pytest.main(['-k','2','./autotest/demo.py'])     # 匹配demo.py模块下包含3的用例
pytest.main(['-k','3','./autotest/demo.py::Test_case'])   # 匹配Test_case类中包含3的用例
2.4.产生报告
前面在安装pytest,我们需要安装 pytest-html 插件,这个插件就是pytest用来产生测试报告的。
pip install pytest-html
要产生报告,在命令行加上 参数 --html=report.html --self-contained-html ,如下
pytest ./autotest/dem0.py --html=report.html --self-contained-html
# 或者通过pytest.main()方法执行
pytest.main(['-sv', './autotest/demo.py', "--html=report.html", "--self-contained-html"])
这样就会产生名为 report.html 的测试报告文件,可以在浏览器中打开
三、初始化清除
3.1.模块级别
模块级别 的初始化、清除 分别 在整个模块的测试用例 执行前后执行,并且 只会执行1次 。如下定义 setup_module 和 teardown_module 全局函数
import pytest


def setup_module():
    print('-----------初始化-模块-----------')


def teardown_module():
    print('-----------清除-模块-----------')


class Test_case:

    def test_01(self):
        print("----------test_01--------")
        assert 1 == 1

    def test_02(self):
        print("----------test_02--------")
        assert 3 > 1

    def test_03(self):
        print("----------test_03--------")
        assert "hello" in ["world", "hello", "hi"]


if __name__ == '__main__':
    pytest.main(['-vs'])
执行后如下:
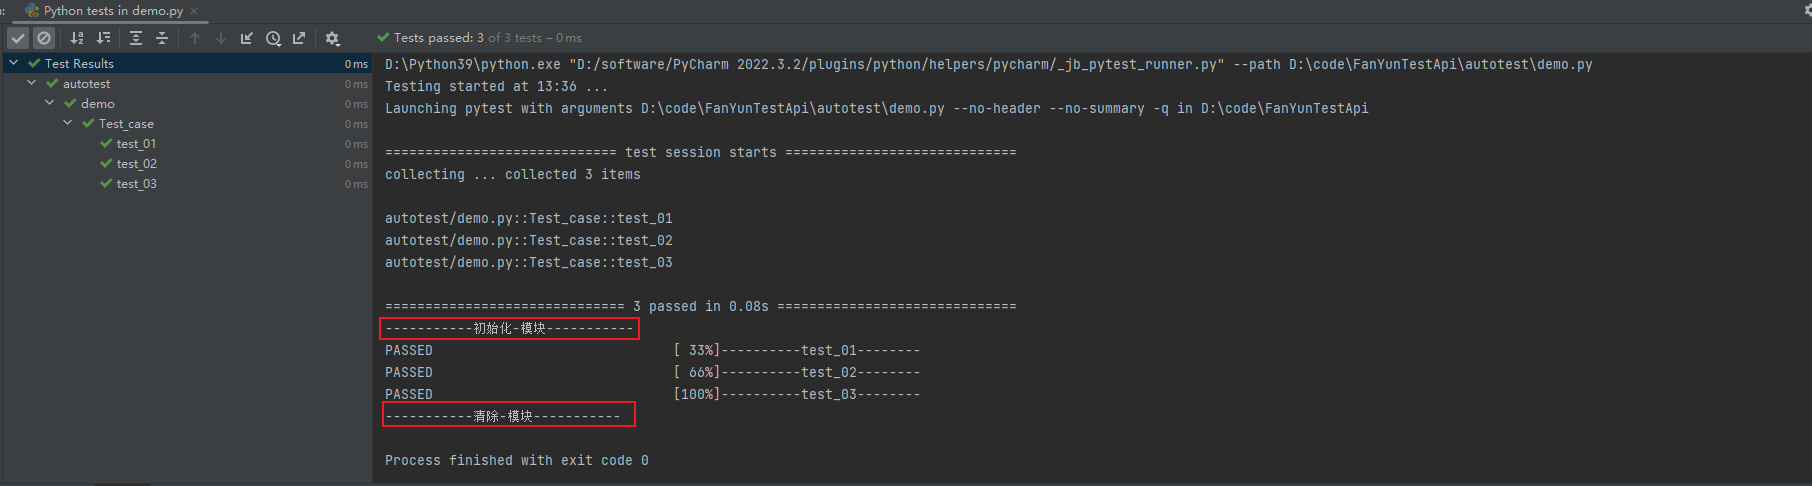
可以发现,模块级别的初始化、清除 在 整个模块所有用例 执行前后 分别 执行1次,它主要是用来为该 模块 中 所有的测试用例做 公共的 初始化 和 清除
3.2.类级别
类级别 的初始化、清除 分别 在整个类的测试用例 执行前后执行,并且 只会执行1次,如下定义 setup_class 和 teardown_class 类方法:
import pytest


def setup_module():
    print('-----------初始化-模块-----------')


def teardown_module():
    print('-----------清除-模块-----------')


class Test_case:
    @classmethod
    def setup_class(cls):
        print('-----------初始化-类-----------')

    @classmethod
    def teardown_class(cls):
        print('-----------清除-类-----------')

    def test_01(self):
        print("----------test_01--------")
        assert 1 == 1

    def test_02(self):
        print("----------test_02--------")
        assert 3 > 1

    def test_03(self):
        print("----------test_03--------")
        assert "hello" in ["world", "hello", "hi"]


if __name__ == '__main__':
    pytest.main(['-vs'])
执行运行结果如下
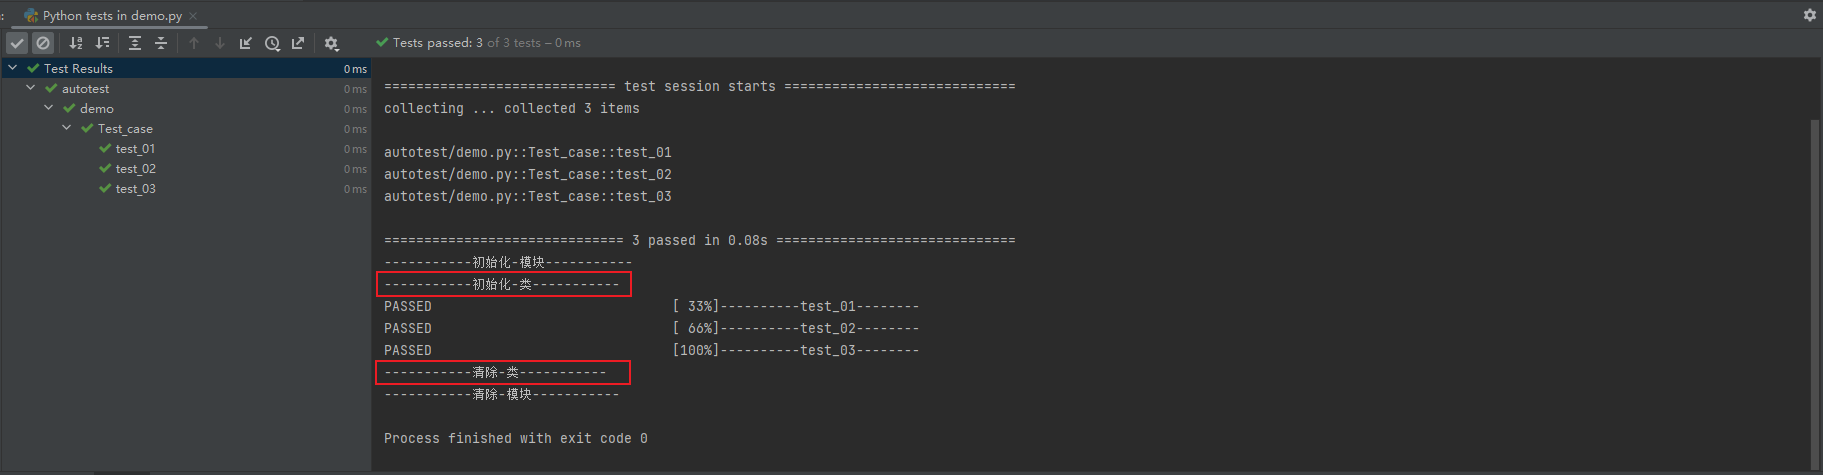
可以发现,类级别的初始化、清除 在 整个模块每一个类的用例 执行前后 分别 执行1次 。它主要是用来为该 类 中的所有测试用例做 公共的 初始化 和 清除
3.3.方法级别
方法级别 的初始化、清除 分别 在类的 每个测试用例方法 执行前后执行,并且 每个用例分别执行1次,如下定义 setup_method 和 teardown_method 实例方法:
import pytest


def setup_module():
    print('-----------初始化-模块-----------')


def teardown_module():
    print('-----------清除-模块-----------')


class Test_case:
    @classmethod
    def setup_class(cls):
        print('-----------初始化-类-----------')

    @classmethod
    def teardown_class(cls):
        print('-----------清除-类-----------')

    def setup_method(self):
        print('-----------初始化-方法-----------')

    def teardown_method(self):
        print('-----------清除-方法-----------')

    def test_01(self):
        print("----------test_01--------")
        assert 1 == 1

    def test_02(self):
        print("----------test_02--------")
        assert 3 > 1

    def test_03(self):
        print("----------test_03--------")
        assert "hello" in ["world", "hello", "hi"]


if __name__ == '__main__':
    pytest.main(['-vs'])
执行命令运行结果如下:
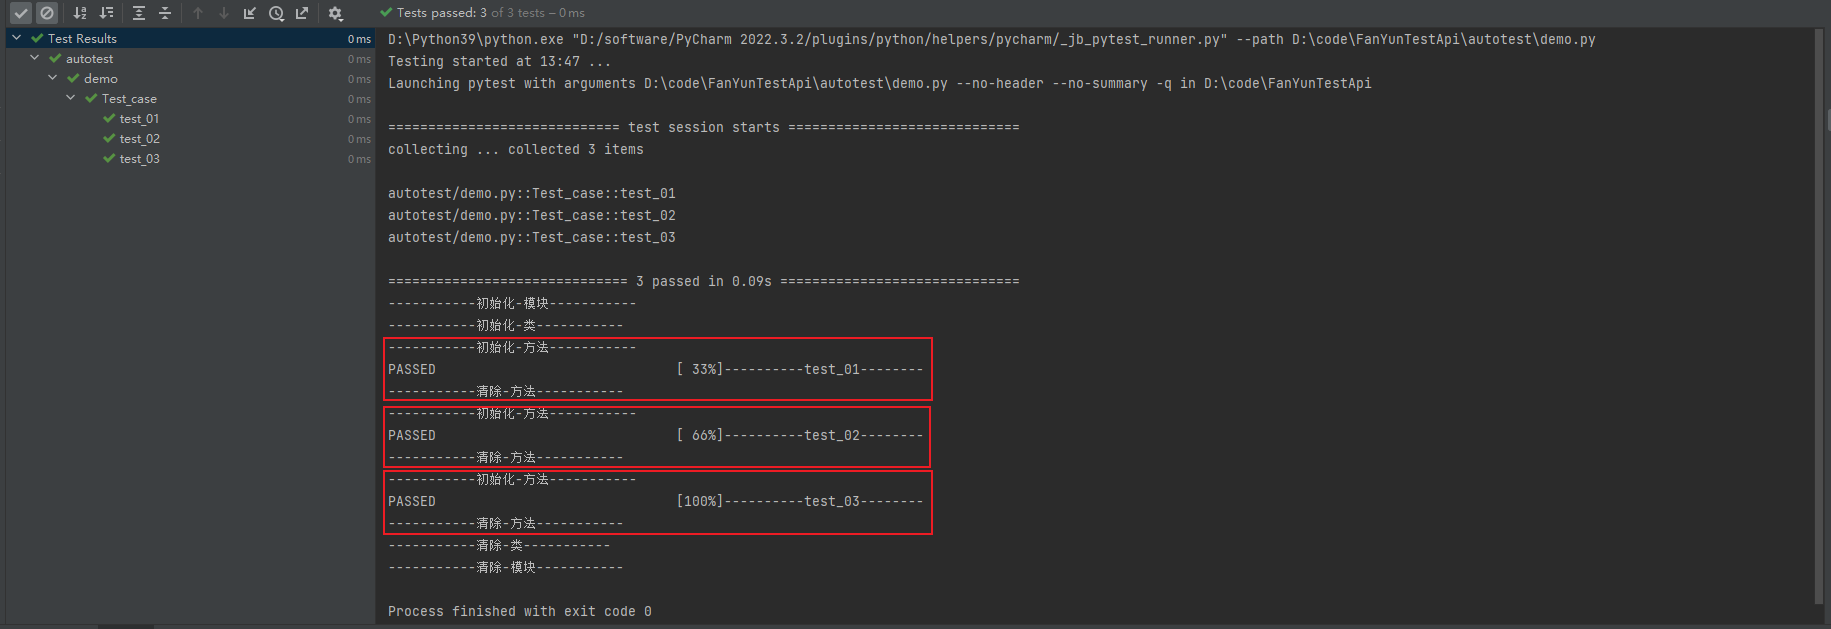
可以发现,方法别的初始化、清除 在 整个模块所有用例 执行前后 分别 执行一次
3.4.目录级别
目标级别的 初始化清除,就是针对整个目录执行的初始化、清除。需要初始化的目录下面创建 一个名为 conftest.py 的文件,里面内容如下所示
import pytest

@pytest.fixture(scope='package', autouse=True)
def emptyEnv():
    print(f'\n*****************初始化-目录***********************')
    yield
    print(f'\n*****************清除-目录甲***********************')
注意:这里清除环境的代码就是 yield 之后的代码。 这是一个生成器。我们可以在多个目录下面放置这样的文件,定义该目录的初始化清除。pytest 在执行测试时,会层层调用。如下图:

四、挑选用例执行
pytest 可以灵活的挑选测试用例执行
4.1.指定一个模块
可以像这样只挑选一个模块执行
pytest autotest\test1.py
4.2.指定目录
可以像这样只挑选一个目录执行
pytest autotest
也可以指定多个目录
pytest autotest autotest1
4.3.指定模块里面的函数或者类
指定一个类
pytest autotest\test_01.py::Test_pass
也可以指定类里面的方法
pytest autotest\test_01.py::Test_pass::test_02
4.4.根据名字
可以使用 命令行参数 -k 后面加名字来挑选要执行的测试项,比如像这样后面跟测试函数名字的一部分:
pytest -k test_33 -s
注意,-k 后面的名字
-
可以是测试函数的名字,可以是类的名字,可以是模块文件名,可以是目录的名字
-
是大小写敏感的
-
不一定要完整,只要能有部分匹配上就行
-
可以用 not 表示选择名字中不包含,比如
pytest -k “not test_03” demo.py
-
可以用 and 表示选择名字同时包含多个关键字,比如
pytest -k "2 and test" demo.py
-
可以用 or 表示选择名字 包含指定关键字之一即可,比如
pytest -k “2 or 3” demo.py
4.5.根据标签
可以这样给test_01方法加上标签 webtest
import pytest


class Test_case:

    @pytest.mark.webtest
    def test_01(self):
        print("----------test_01--------")
        assert 1 == 1

    def test_02(self):
        print("----------test_02--------")
        assert 3 > 1

    def test_03(self):
        print("----------test_03--------")
        assert "hello" in ["world", "hello", "hi"]
然后,可以这样运行指定标签的用例
pytest .\autotest\demo.py -m webtest -s
也可以这样给整个类加上标签
import pytest


@pytest.mark.weblogtest
class Test_case:

    def test_01(self):
        print("----------test_01--------")
        assert 1 == 1

    def test_02(self):
        print("----------test_02--------")
        assert 3 > 1

    def test_03(self):
        print("----------test_03--------")
        assert "hello" in ["world", "hello", "hi"]
可以这样同时添加多个标签
import pytest


@pytest.mark.webapilogintest
@pytest.mark.weblogtest
class Test_case:

    def test_01(self):
        print("----------test_01--------")
        assert 1 == 1

    def test_02(self):
        print("----------test_02--------")
        assert 3 > 1

    def test_03(self):
        print("----------test_03--------")
        assert "hello" in ["world", "hello", "hi"]
可以定义一个全局变量 pytestmark 为 整个模块文件 设定标签
import pytest
pytestmark = pytest.mark.login
如果你需要定义多个标签,可以定义一个列表
import pytest

pytestmark = [pytest.mark.login, pytest.mark.weblogintest, pytest.mark.webapilogintest]
4.6.Pytest 跳过
使用跳过装饰器 ,我们可以跳过指定的测试。 跳过测试有多种原因。 例如,数据库/在线服务目前不可用
import pytest


@pytest.mark.webapilogintest
@pytest.mark.weblogtest
class Test_case:

    def test_01(self):
        print("----------test_01--------")
        assert 1 == 1

    @pytest.mark.skip
    def test_02(self):
        print("----------test_02--------")
        assert 3 > 1

    def test_03(self):
        print("----------test_03--------")
        assert "hello" in ["world", "hello", "hi"]


if __name__ == '__main__':
    pytest.main(['-vs'])
在示例中test_02()被跳过,不会执行

五、数据驱动
有这样一个场景,登录的测试用例,共同的特点是,它们测试步骤是一模一样的,只是输入的数据(用户名、密码)不同,要检查的输出数据(错误提示)不同。这批测试用例,就是典型的 可以用 数据驱动 方式进行自动化的用例。如果有一批测试用例,具有 相同的测试步骤 ,只是 测试参数数据不同 。自动化测试时,把测试数据从用例代码中 分离 开来,以后增加新的测试用例,只需要修改数据。这就是数据驱动。
这种情况可以使用 pytest 用例 的 数据驱动格式,只需如下定义即可
import pytest


class Test_login:
    @pytest.mark.parametrize('a, b, result', [
        (2, 3, 5),
        (4, 7, 11)
    ])
    def test_04(self, a, b, result):
        c = a + b
        assert c == result

if __name__ == '__main__':
    pytest.mark("-sv")
这样,我们就不需要定义那么多的测试用例方法了, 而且测试数据也可以集中存放。参考pytest官方文档
六、结合allure生成测试报告
由于pytest-html 生成的测试报告过于简陋,可以借助于allure生成可视化的测试报告更加的美观同时易用性也不错,allure是一个通用的测试报告框架,
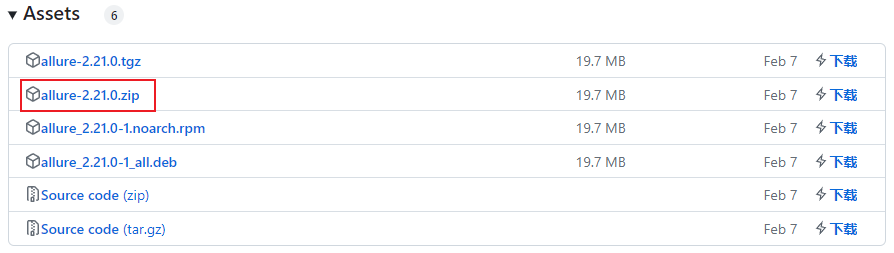
6.1.下载allure
GitHub下载地址:https://github.com/allure-framework/allure2/releases,进入后选择版本下载即可:
6. 2.安装allure
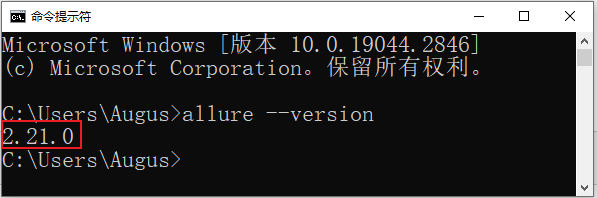
需要java8+,JDK 1.8+环境,所以提前配置好java环境,将安装包解压后配置allure环境变量,在系统变量path中添加到bin,例如:
D:\allure-2.21.0\bin
配置成功后在命令窗口输入allure或者allure –version,可以看到我的allure版本是2.21.0
6.3.在pycharm中下载allure插件
pip install allure-pytest
6.4.allure中常见装饰器
@allure 装饰器中的一些功能点:
@allure.feature :用于定义被测试的功能,被测产品的需求点
@allure.story : 用于定义被测功能的用户场景,即子功能点
@allure.step :用于将一个测试用例,分成几个步骤在报告中输出
@allure.attach : 用于向测试报告中输入一些附加的信息,通常是一些测试数据信息
6.5.使用allure生成测试报告
#获取生成allure测试报告的执行信息
pytest test_case -m webtest --alluredir=./tmp
#生成测试报告
allure generate ./tmp -o ./report --clean
版权声明:本文内容由互联网用户自发贡献,该文观点仅代表作者本人。本站仅提供信息存储空间服务,不拥有所有权,不承担相关法律责任。如发现本站有涉嫌侵权/违法违规的内容, 请发送邮件至 举报,一经查实,本站将立刻删除。
文章由极客之音整理,本文链接:https://www.bmabk.com/index.php/post/253622.html

