
环境准备
创建一个Maven项目,然后在pom.xml中添加spring-context包:
  <dependencies>
    <!-- https://mvnrepository.com/artifact/org.springframework/spring-context -->
		<dependency>
		    <groupId>org.springframework</groupId>
		    <artifactId>spring-context</artifactId>
		    <version>4.3.26.RELEASE</version>
		</dependency>
  </dependencies>
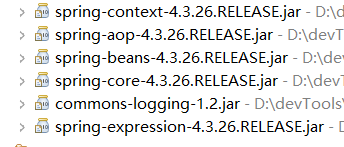
spring-context包是Spring IoC容器的基础,并依赖了以下几个包:
bean
含义:
在 Spring 中,构成应用程序主干的对象和由 Spring IoC 容器管理的对象称为 bean。 bean 是由 Spring IoC 容器实例化、组装和管理的对象。 否则,bean 只是应用程序中的许多对象之一。
属性:
- id 属性是用于标识单个 bean 定义的字符串。 即为bean的名称。如果没有定义则会
- name 属性也可以定义 bean 的名称,并且可以与id属性同时使用,能以逗号或空格隔开起多个别名。
- class 属性定义 bean 的类型并且要使用类的全限定名。
- peoperty属性是定义类的属性,其中的 name 属性定义的是属性的名称,而 value 是它的值。
一、传统的XML方式注册
1.首先创建一个实体类Person,如下:
package com.learn.bean;
public class Person {
	private int id;
	private String name;
	@Override
	public String toString() {
		return "Person [id=" + id + ", name=" + name + "]";
	}
	public Person(int id, String name) {
		super();
		this.id = id;
		this.name = name;
	}
		public Person() {
	}
	//Getters and Setters
}
这里需要注意的是由于javaBean的规范,在没有申明构造函数时,java将自动创建构造函数。但是若已申明带参数构造函数,必须申明无参数构造函数,否则当你Spring注册Bean时调用无参数构造函数,将会编译错误。
2.创建一个applicationContext.xml用于配置Bean,如下:
<?xml version="1.0" encoding="UTF-8"?>
<beans xmlns="http://www.springframework.org/schema/beans"
	xmlns:xsi="http://www.w3.org/2001/XMLSchema-instance"
	xsi:schemaLocation="http://www.springframework.org/schema/beans
        http://www.springframework.org/schema/beans/spring-beans.xsd">

    <bean id="person" class="com.learn.bean.Person">
        <property name="id" value="1"></property>
        <property name="name" value="xiaomin"></property>
    </bean>
 </beans>
这样就成功将person注入到Spring容器中。
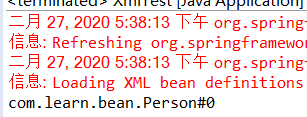
这里需要注意的是:id或name属性不是必须的,当id和name属性没有声明时, Spring 将会采用 “全限定名#{number}” 的格式生成编号。全限定名即为定义的class属性值。 例如这里,如果没有声明 “id=“person”” 的话,那么 Spring 为其生成的id就是 “com.learn.bean.Person#0”,当它第二次声明没有 id 属性的 同类型bean 时,id就是 “com.learn.bean.Person#1”,以此类推。
删除上面bean配置的id,此时查看Spring IoC容器中的所有的id:
public class XmlTest {
	public static void main(String[] args) {
		ApplicationContext applicationContext=new ClassPathXmlApplicationContext("applicationContext.xml");
		//获取Ioc容器中所有Bean的id
       String[] names= applicationContext.getBeanDefinitionNames();
       for(String i:names) {
    	   System.out.println(i);
       }
	}
}
二、注解方式注册
1.@Configuration注解+@Bean注解的方式
@Configuration注解:
从Spring3.0,@Configuration用于定义配置类,可替换xml配置文件,被注解的类内部包含有一个或多个被@Bean注解的方法,这些方法将会被AnnotationConfigApplicationContext或AnnotationConfigWebApplicationContext类进行扫描,并用于构建bean定义,初始化Spring容器。
注意:@Configuration注解的配置类有如下要求:
- @Configuration不可以是final类型;
- @Configuration不可以是匿名类;
- 嵌套的configuration必须是静态类。
@Bean注解:
- @Bean注解在返回实例的方法上,如果未通过@Bean指定bean的名称,则默认与标注的方法名相同。
- 可以使用属性value或name指定bean的多个名称。如:
@Bean(value = {"a","b","c"}) - @Bean注解默认作用域为单例singleton作用域,可通过
@Scope(“prototype”)设置为原型作用域。
下面来用这两个注解来注册bean:
1.创建一个类名为SpringConfig,@Configuration标注在类上,相当于把该类作为spring的xml配置文件中的,作用为配置spring容器(应用上下文)。
2.@Bean标注在方法上(返回某个实例的方法),等价于spring的xml配置文件中的,作用为注册bean对象。如下:
@Configuration
public class SpringConfig {
	@Bean
	public Person person() {
		return new Person(1,"张三");
	}
}
3.创建测试类,这里使用 AnnotationConfigApplicationContext 类去初始化 Spring IoC 容器。参数是 StudentConfig 类,这样 Spring IoC 就会根据注解的配置去解析对应的资源,来生成 IoC 容器了。
public class AnnotationTest {
	public static void main(String[] args) {
		//获取Spring的IOC容器
		ApplicationContext applicationContext=new AnnotationConfigApplicationContext(SpringConfig.class);
		//从容器中获取bean
		Person person=(Person) applicationContext.getBean("person");
		System.out.println(person);
	}
}
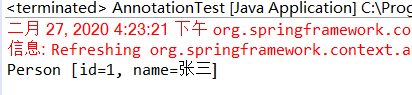
4.查看输出:
2.@Compoent 注解+@ComponentScan注解方式
@Compoent 注解:
表示 Spring IoC 会把这个类扫描成一个 bean 实例,而其中的 value 属性代表这个类在 Spring 中的 id,这就相当于在 XML 中定义的 Bean 的 id:,也可以简写成 @Component(“student1”)或@Component ,对于不写的,Spring IoC 容器就默认以类名来命名作为 id,只不过首字母小写,配置到容器中。
@ComponentScan注解:
代表进行扫描,默认是扫描当前包的路径中带有或间接使用了 @Component 、@Service、@Controller、@Repository注解的类。
它有两个配置项用来指定扫描的包和类:
- basePackages:它可以配置一个 Java 包的数组,Spring 会根据它的配置扫描对应的包和子包,将配置好的 Bean 装配进来
- basePackageClasses:它可以配置多个类。这个较少使用。
使用这两个注解,Spring 会根据@ComponentScan注解为包和子包进行扫描装配对应配置的 Bean。
下面来验证这两个注解:
1.在Person类上加上@Compoent 注解
@Component
public class Person {
	private int id;
	private String name;
	...省略
2.SpringConfig类中只加上@ComponentScan(basePackages = "com.learn"),这里等价于xml配置中的<context:component-scan base-package="com.learn"/>。
@ComponentScan(basePackages = "com.learn")
public class SpringConfig {
//	@Bean(value = {"a","b","c"})
//	public Person person() {
//		return new Person(1,"张三");
//	}
}
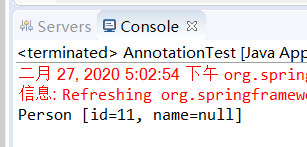
3.结果可以看到配置成功,可以取到person这个bean:
参考:
https://www.cnblogs.com/duanxz/p/7493276.html
https://www.cnblogs.com/wmyskxz/p/8830632.html
版权声明:本文内容由互联网用户自发贡献,该文观点仅代表作者本人。本站仅提供信息存储空间服务,不拥有所有权,不承担相关法律责任。如发现本站有涉嫌侵权/违法违规的内容, 请发送邮件至 举报,一经查实,本站将立刻删除。
文章由极客之音整理,本文链接:https://www.bmabk.com/index.php/post/44343.html

