
文章目录
1. Maven私有仓库安装
1.1 本机配置
- Windows 10 x64
1.2 官网下载地址
我这里下载的是Windows的版本
1.3 解压
解压得到两个文件夹
- nexus-3.30.1-01
- sonatype-work

1.4 启动
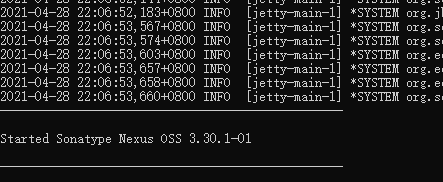
进到 nexus-3.30.1-01/bin 目录下,使用cmd窗口执行命令:nexus.exe /run
看到下面的日志时,启动完成:
1.5 登陆界面
默认登陆页面地址:http://localhost:8081

1.5.1 登陆
点击右上角的 Sign in,会提示你对应的账号密码是什么,如下图
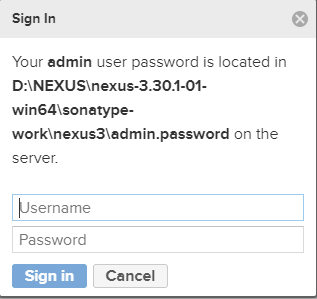
- 第一次登录后会提醒你换admin账号的密码,我这里设置成admin/admin
- 记得勾选Allow anonymous users to access the server
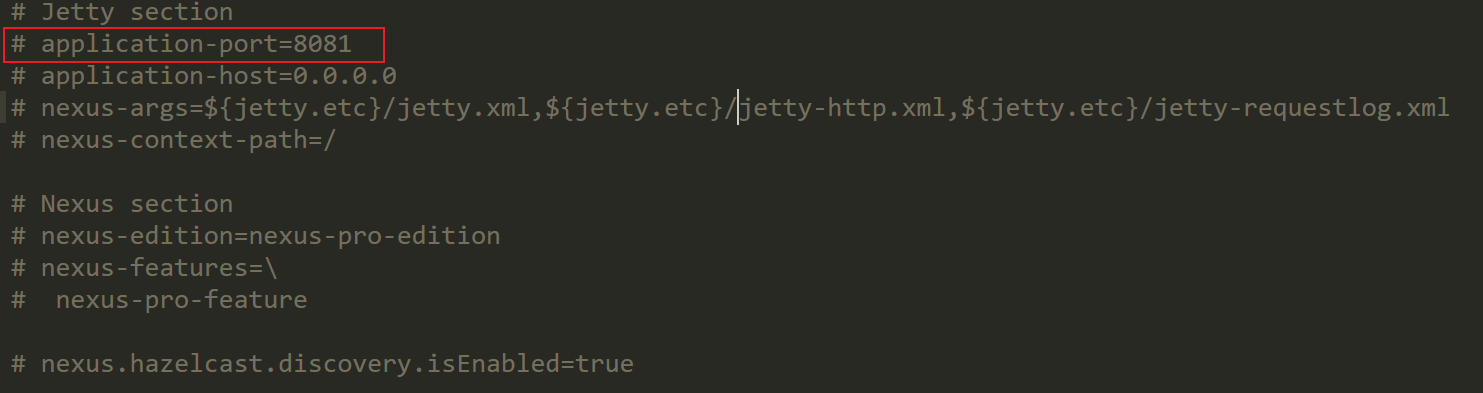
1.5.2 更改端口号
此端口可在 sonatype-work\nexus3\etc\nexus.propertis 文件里更改
至此,nexus3就安装完成了
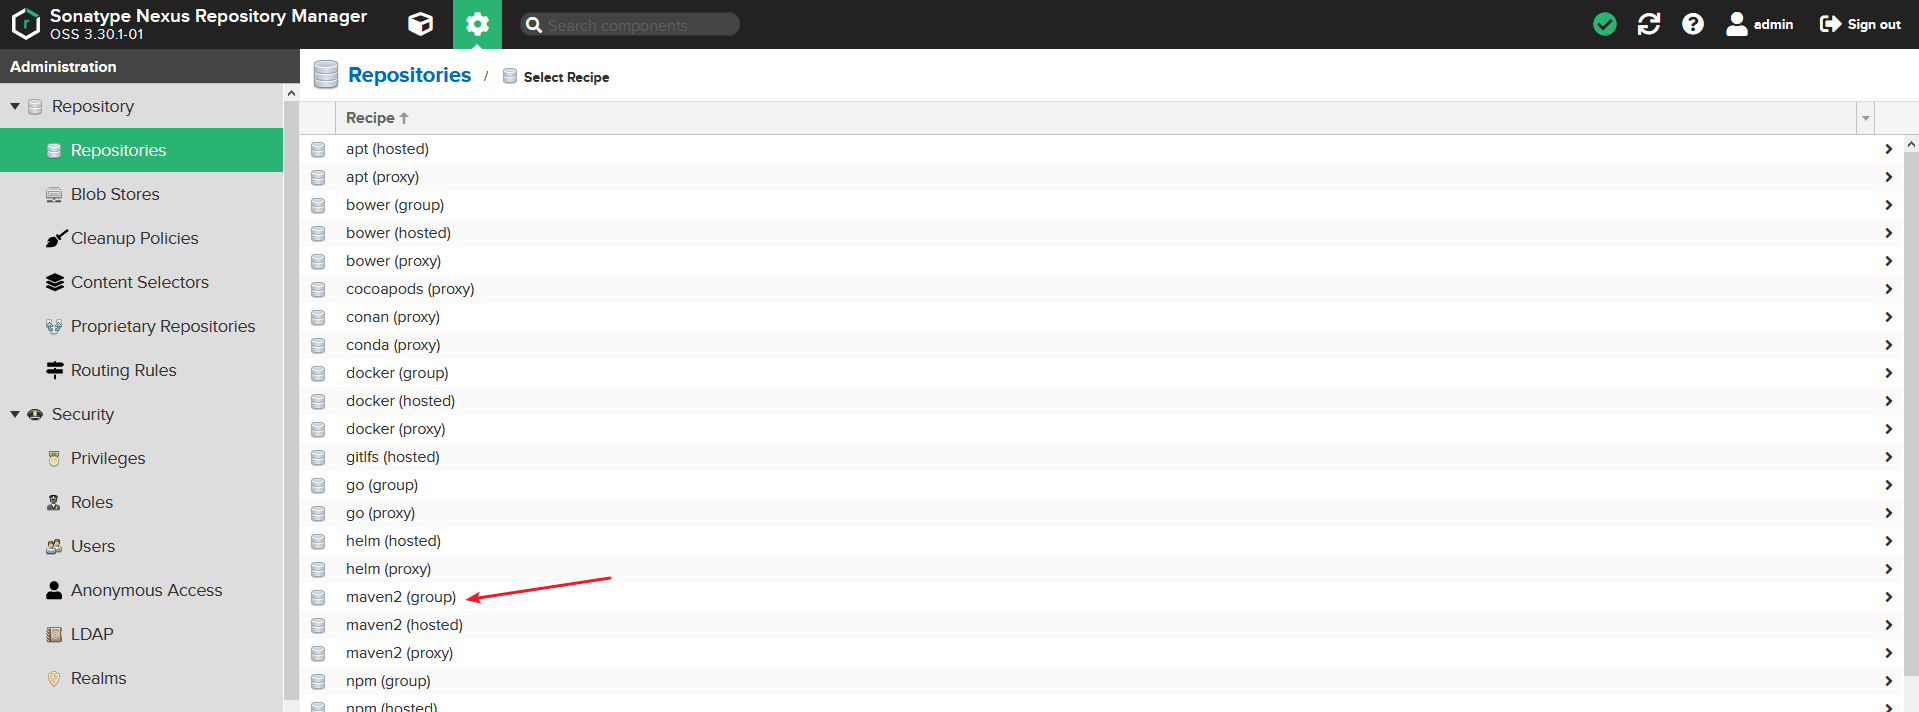
2. 搭建
2.1 主要Type介绍
- group:
- Public Repositories,仓库组
- hosted:
- 3rd party:无法从公共仓库获得的第三方发布版本的构件仓库,比如oracle jar包等(版权保护无法从官网免费下载)
- Snapshot:用于存放快照版本(Snapshots)的仓库
- Releases:用于存放稳定版本的jar和war或者插件的仓库
- proxy:
- Central:用来代理maven中央仓库中发布版本构件的仓库
- Apache Snapshots:用了代理ApacheMaven仓库快照版本的构件仓库
后面创建测试组件的时候,会进一步了解到它们的作用
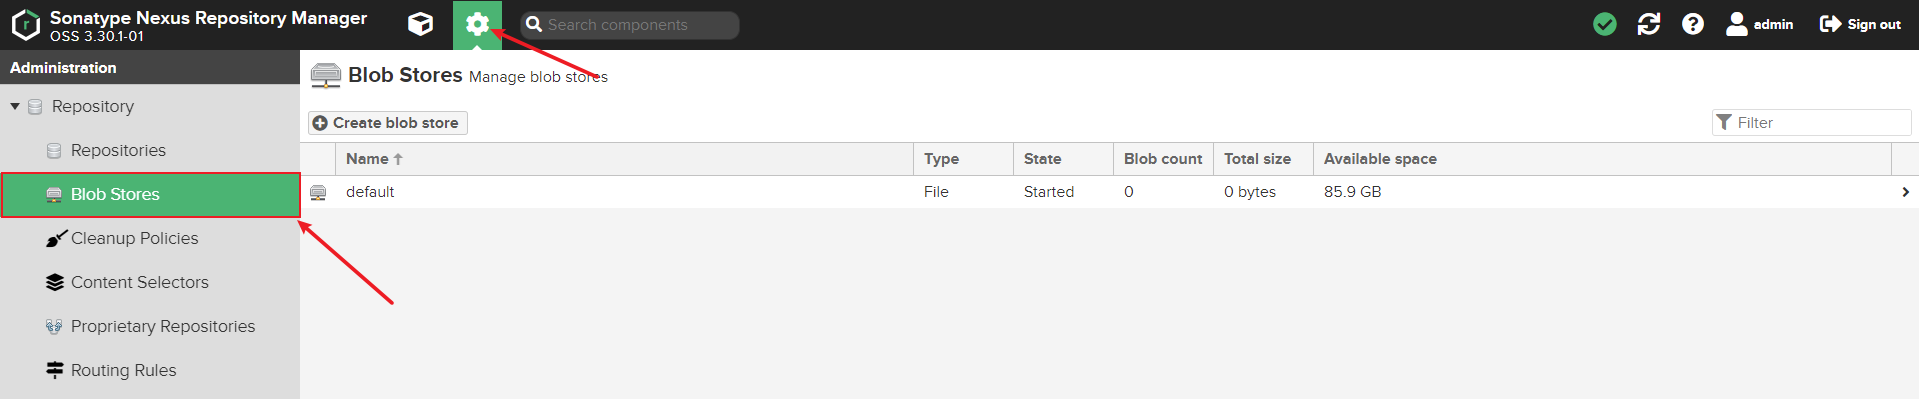
2.2 创建物理存储库
-
进到管理界面,可以看到默认已经有一个名为default的存储库

-
填写必要条件,点击
Create blob store即可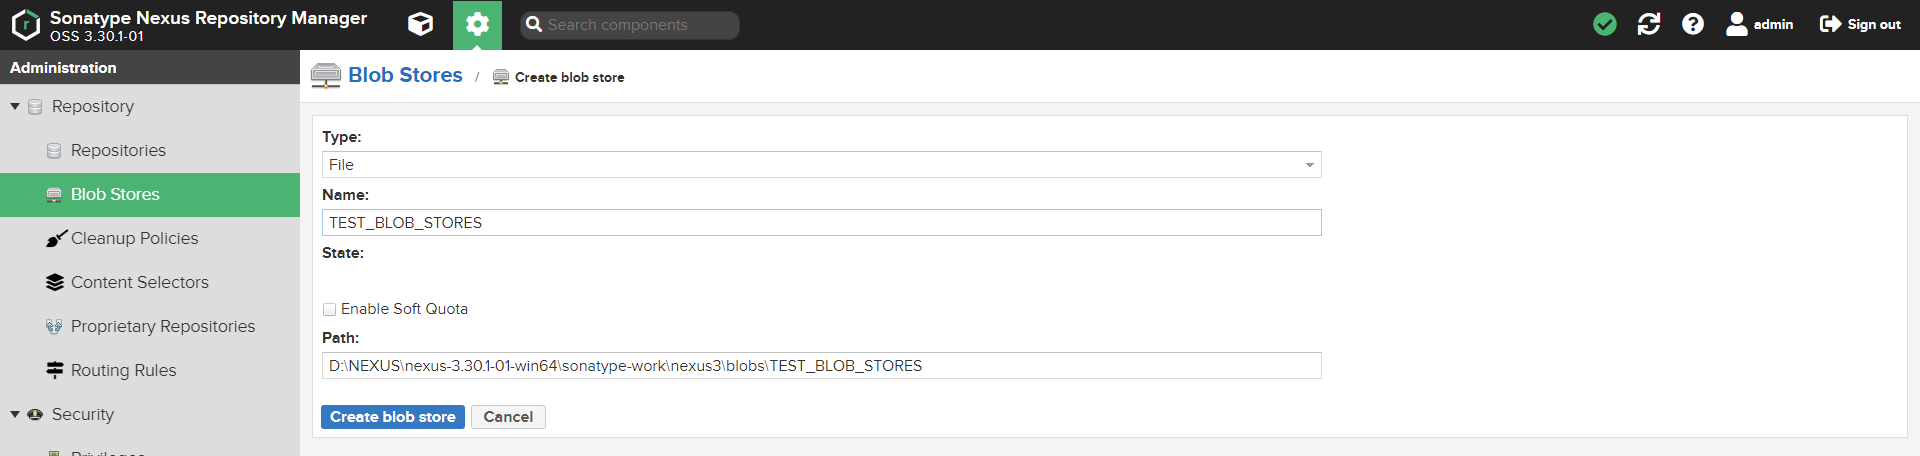

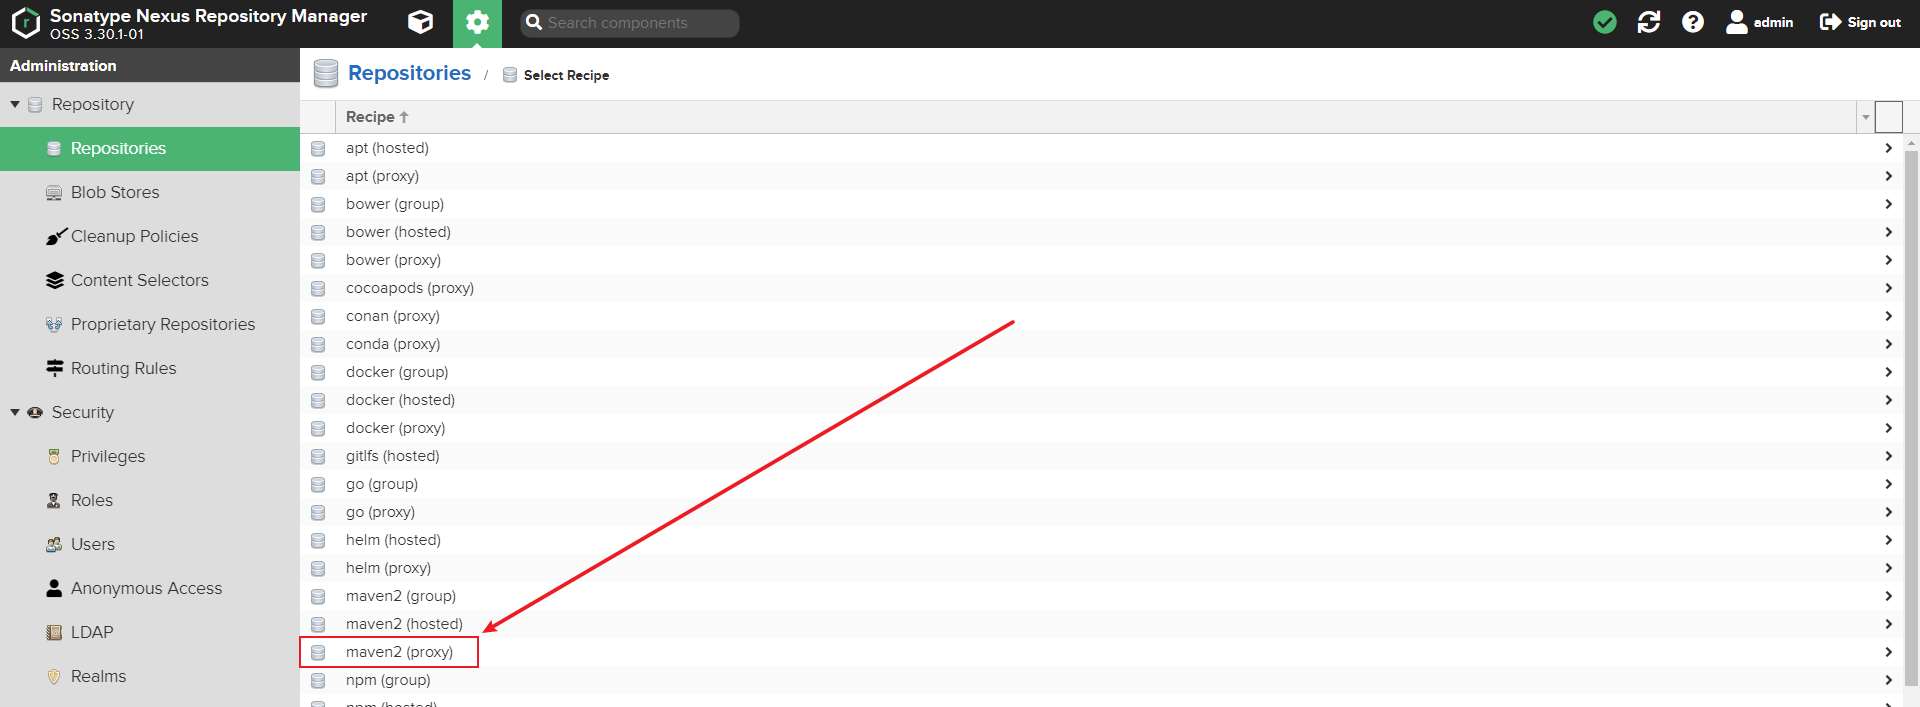
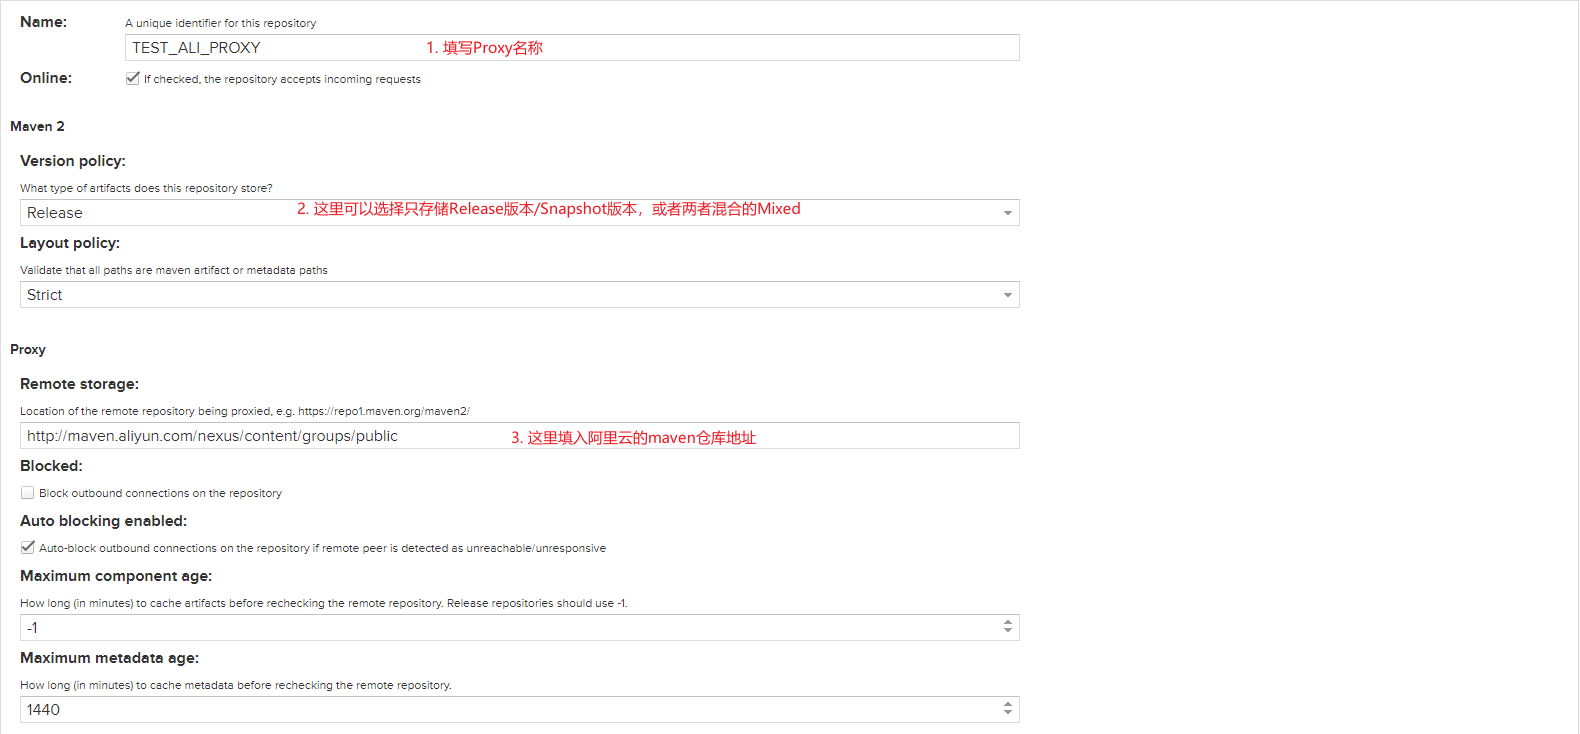
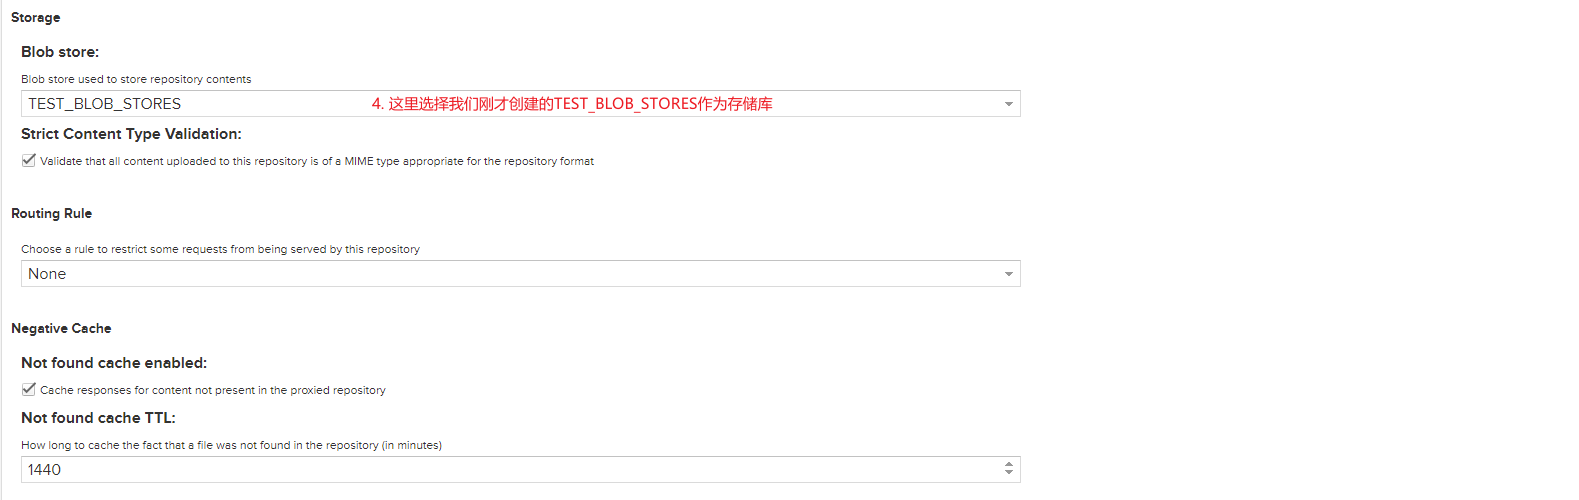
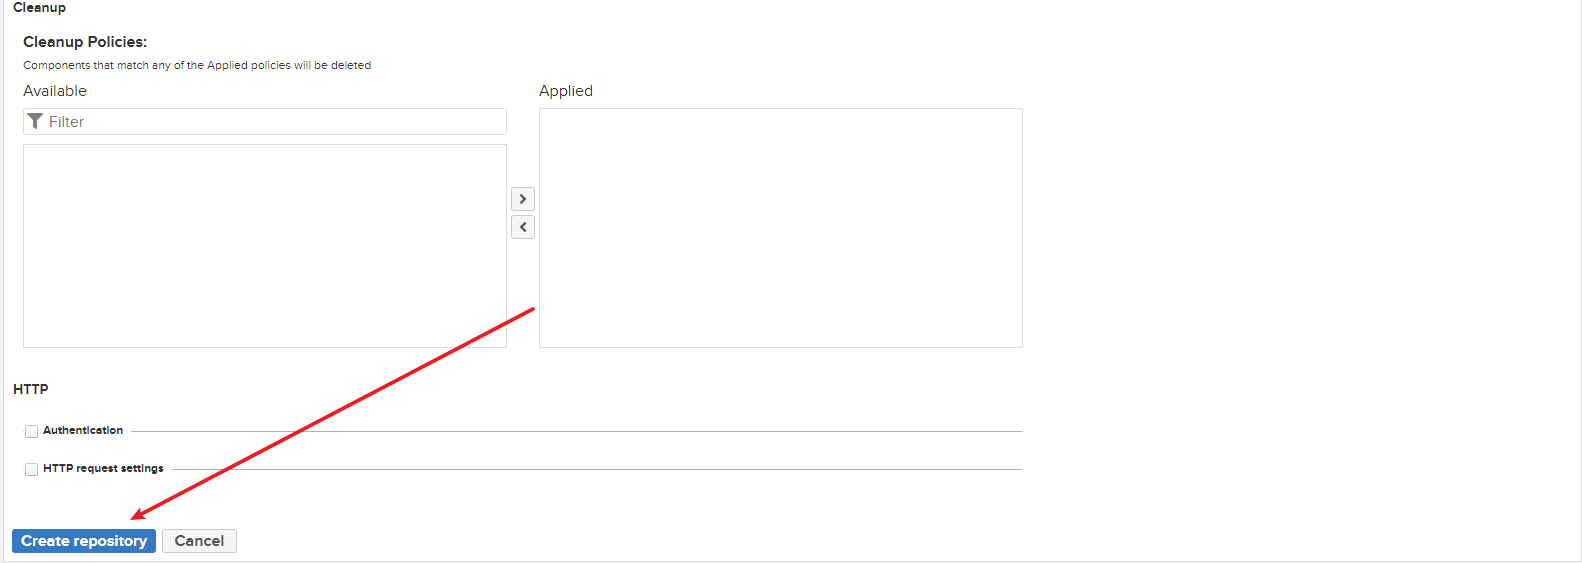
2.3 创建Proxy
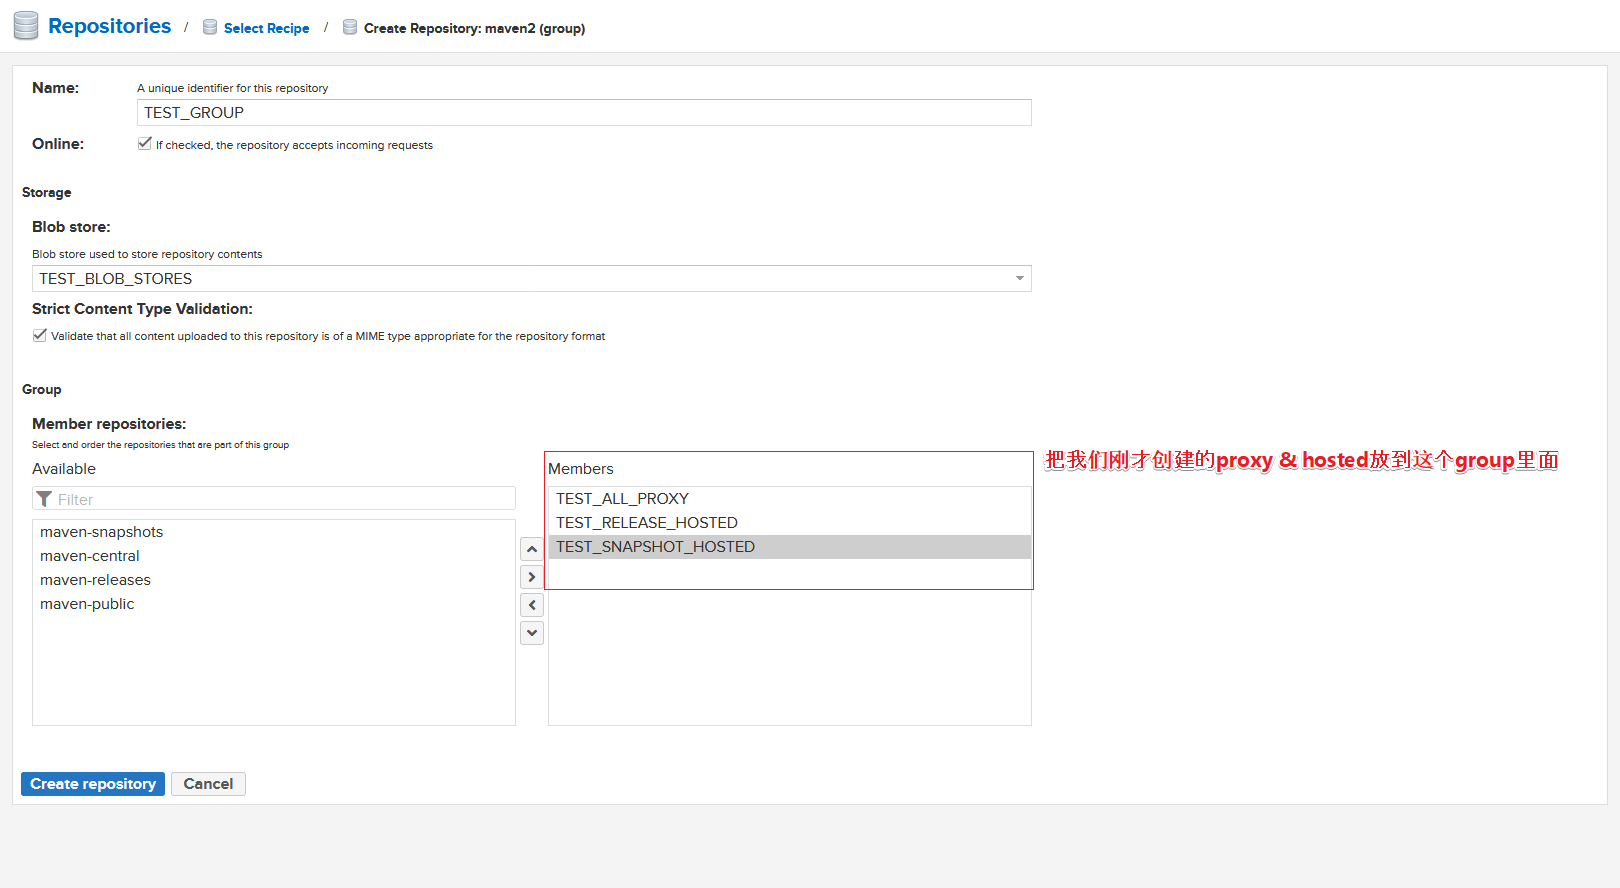
现在我们的私有仓库是空的,设置我们的proxy连向阿里云仓库地址。当在私有仓库中拿不到对应的jar包,则会去proxy对应的仓库拉取jar包。
2.4 创建hosted
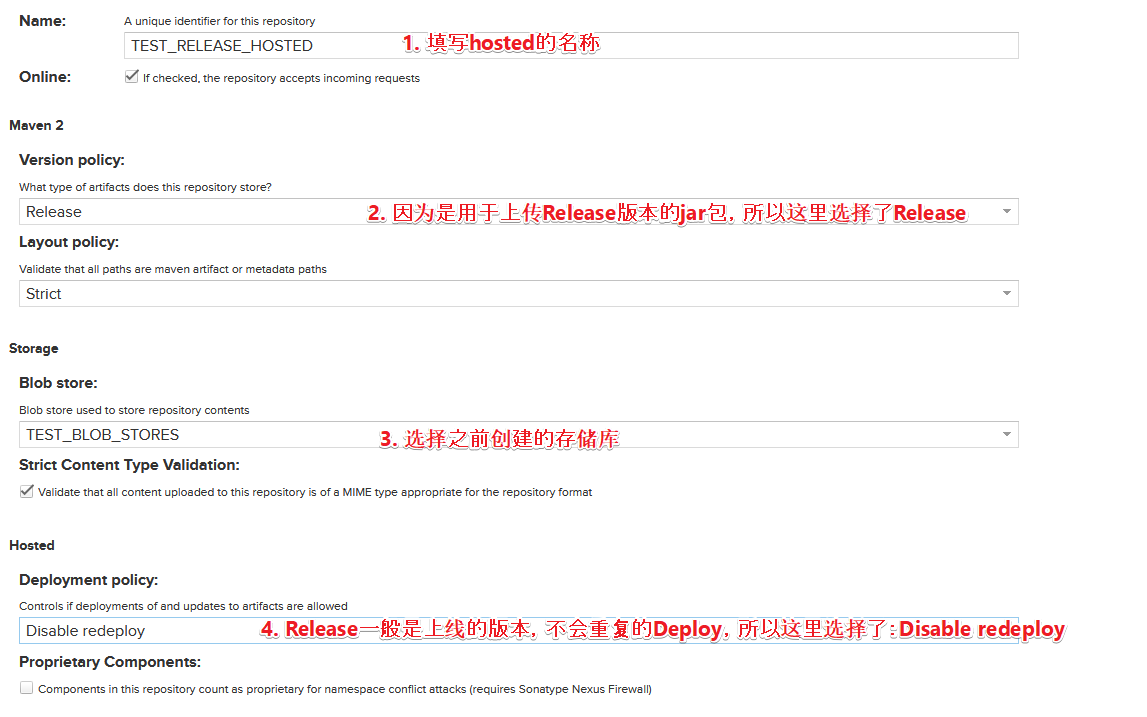
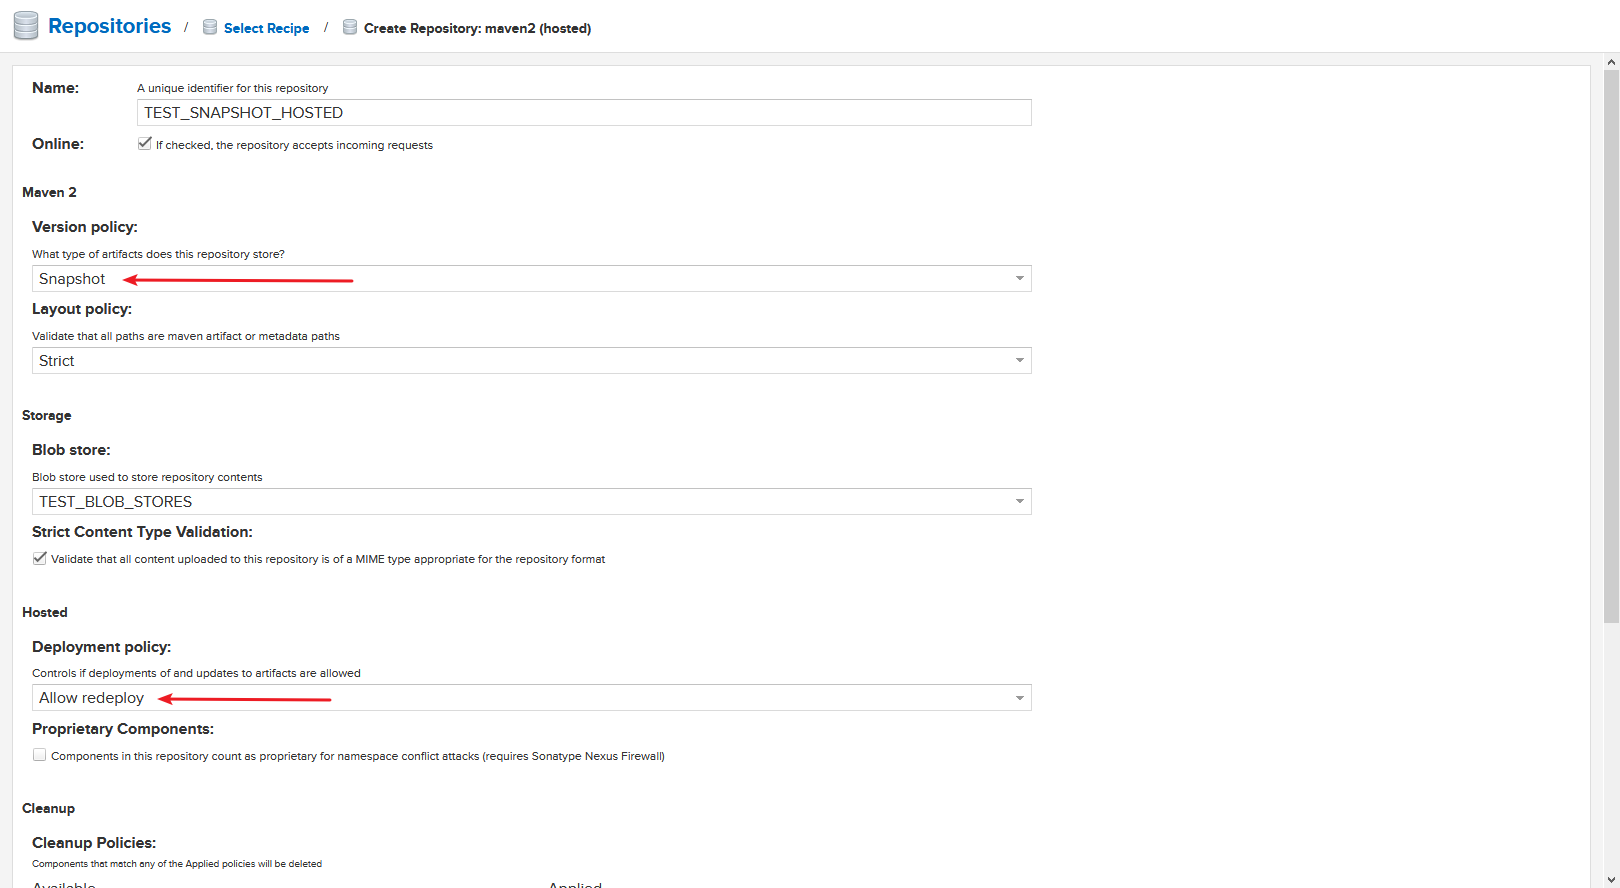
用于:当我们要将本地jar包通过maven命令上传到私有库,我们这里会创建两个hosted:Release + Snapshot。
2.4.1 release hosted

2.4.2 snapshot hosted
2.5 创建group

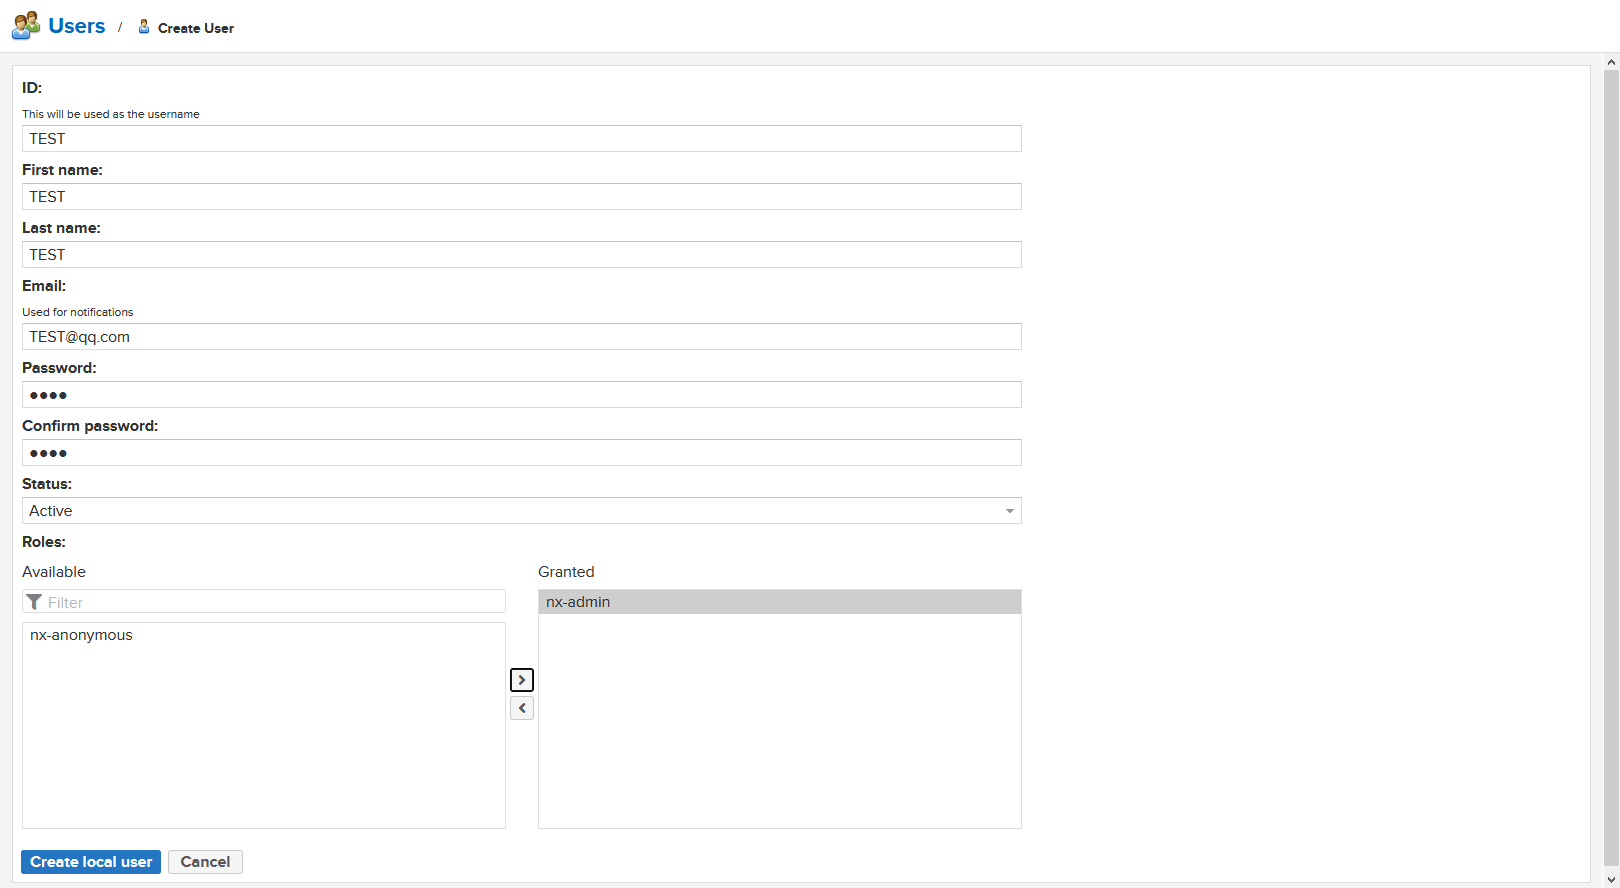
2.6 创建用户

2.7 小结
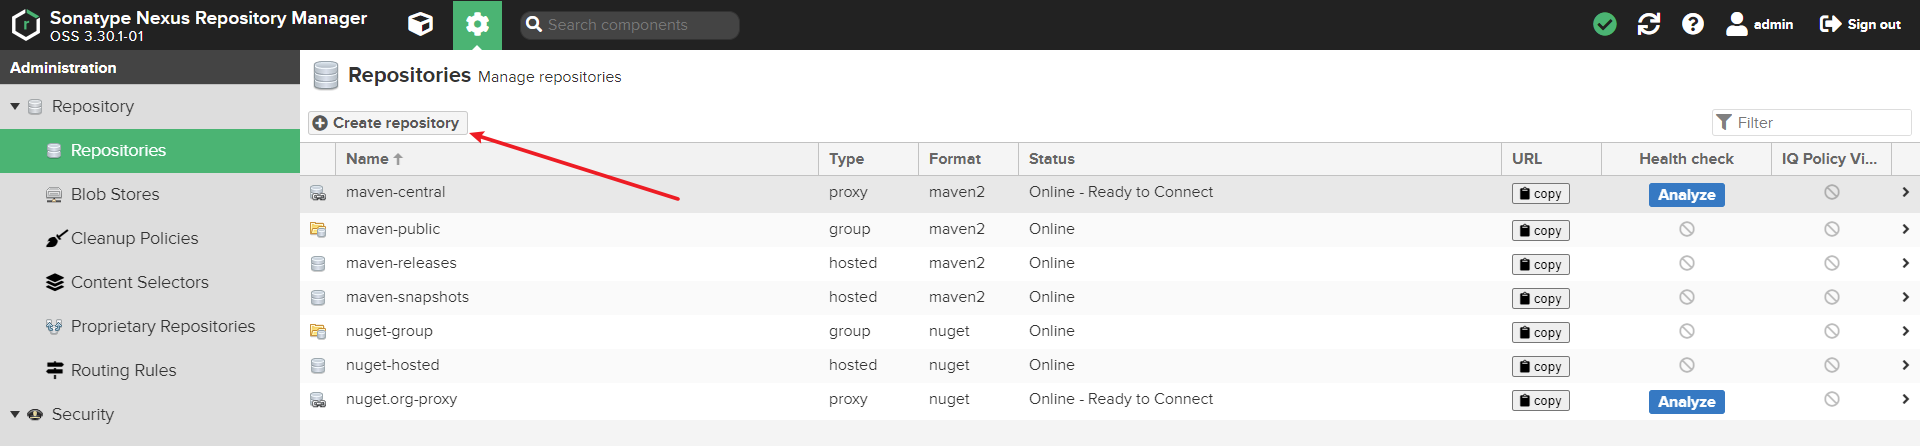
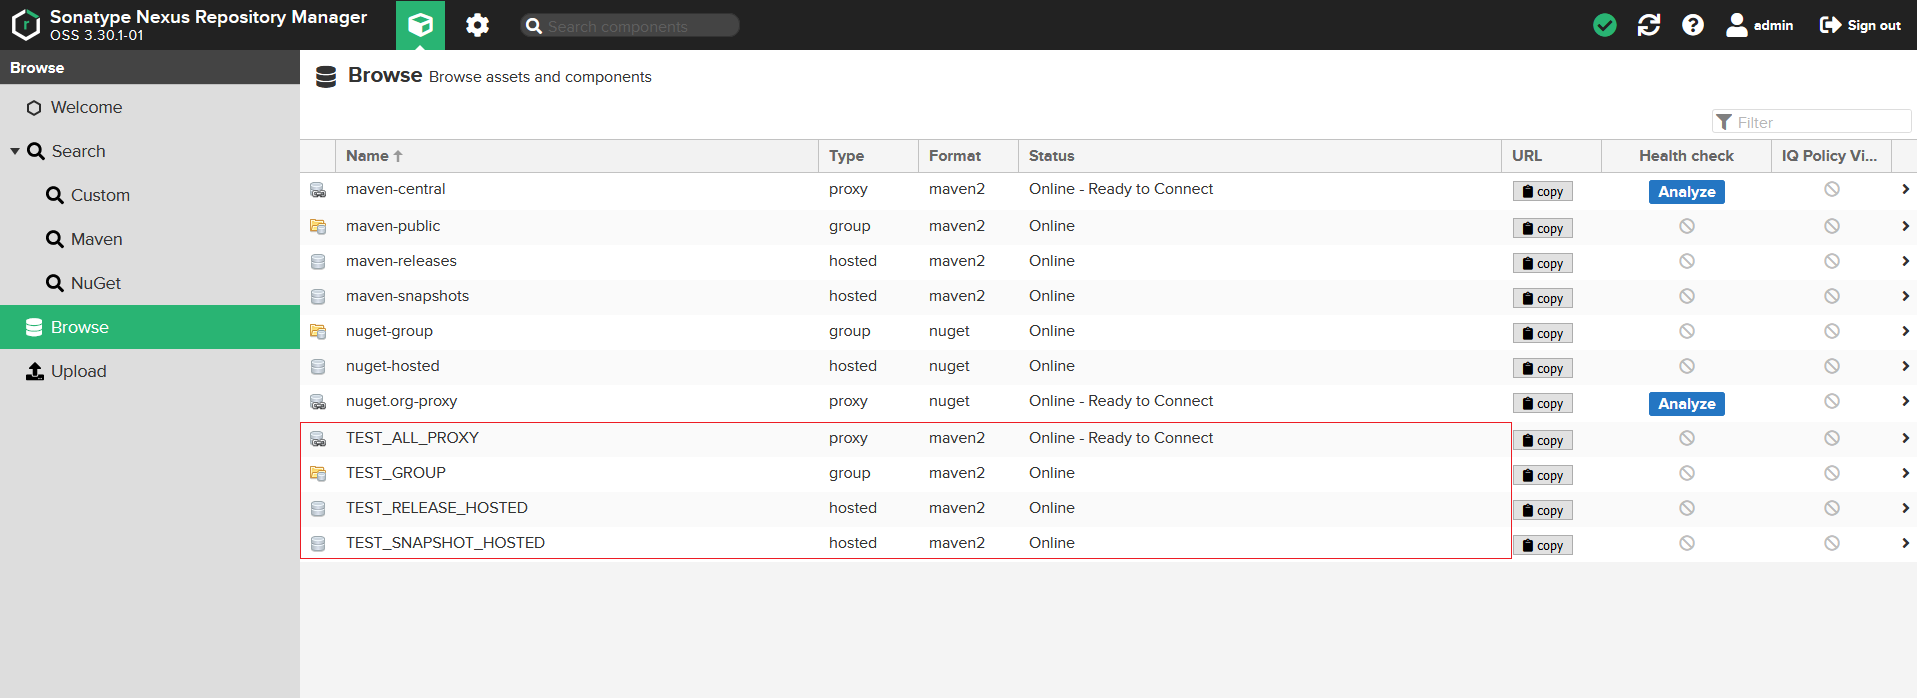
至此,目前我们需要的都创建完了,结果如图:
3. 使用
3.1 项目目录介绍
我们有两个模块:
- ModuleA:
- 用于演示拉取阿里云仓库的依赖;
- 用于演示上传ModuleA的jar包到我们的私有库中;
- ModuleB
- 用于演示从私有库中拉取ModuleA的jar包下来;
3.2 拉取阿里云仓库的依赖
3.2.1 修改settings.xml
<?xml version="1.0" encoding="UTF-8"?>
<!--
Licensed to the Apache Software Foundation (ASF) under one
or more contributor license agreements. See the NOTICE file
distributed with this work for additional information
regarding copyright ownership. The ASF licenses this file
to you under the Apache License, Version 2.0 (the
"License"); you may not use this file except in compliance
with the License. You may obtain a copy of the License at
http://www.apache.org/licenses/LICENSE-2.0
Unless required by applicable law or agreed to in writing,
software distributed under the License is distributed on an
"AS IS" BASIS, WITHOUT WARRANTIES OR CONDITIONS OF ANY
KIND, either express or implied. See the License for the
specific language governing permissions and limitations
under the License.
-->
<settings xmlns="http://maven.apache.org/SETTINGS/1.0.0"
xmlns:xsi="http://www.w3.org/2001/XMLSchema-instance"
xsi:schemaLocation="http://maven.apache.org/SETTINGS/1.0.0 http://maven.apache.org/xsd/settings-1.0.0.xsd">
<pluginGroups></pluginGroups>
<proxies></proxies>
<!--http://www.cnblogs.com/sxdcgaq8080/p/7580964.html 有详细教程-->
<!--就是配置maven本地仓库的地址为自定义的地址-->
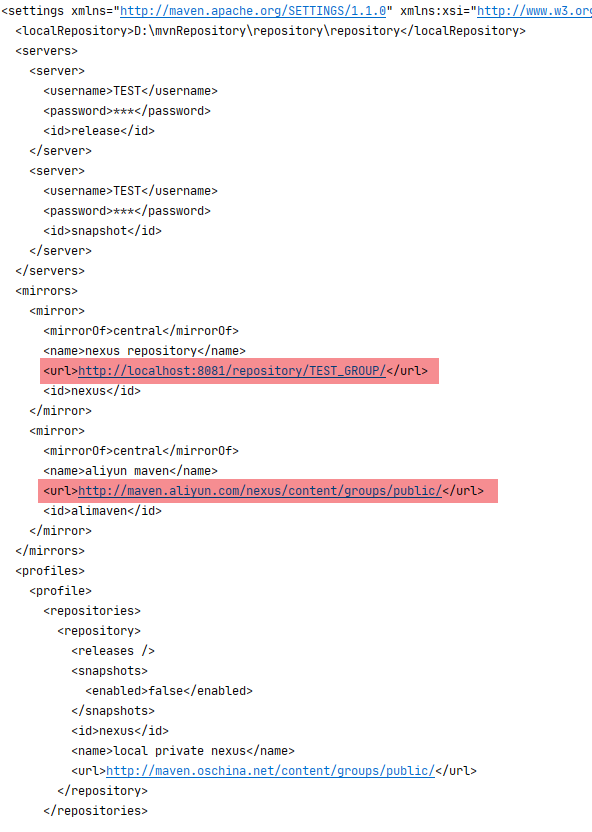
<localRepository>D:\mvnRepository\repository\repository\</localRepository>
<!--nexus服务器-->
<servers>
<server>
<id>release</id>
<username>TEST</username>
<password>TEST</password>
</server>
<server>
<id>snapshot</id>
<username>TEST</username>
<password>TEST</password>
</server>
</servers>
<!--组资源库的url地址 id和name自定义,mirrorOf的值设置为central,写死的-->
<mirrors>
<mirror>
<id>nexus</id>
<name>nexus repository</name>
<url>http://localhost:8081/repository/TEST_GROUP/</url>
<mirrorOf>central</mirrorOf>
</mirror>
</mirrors>
</settings>
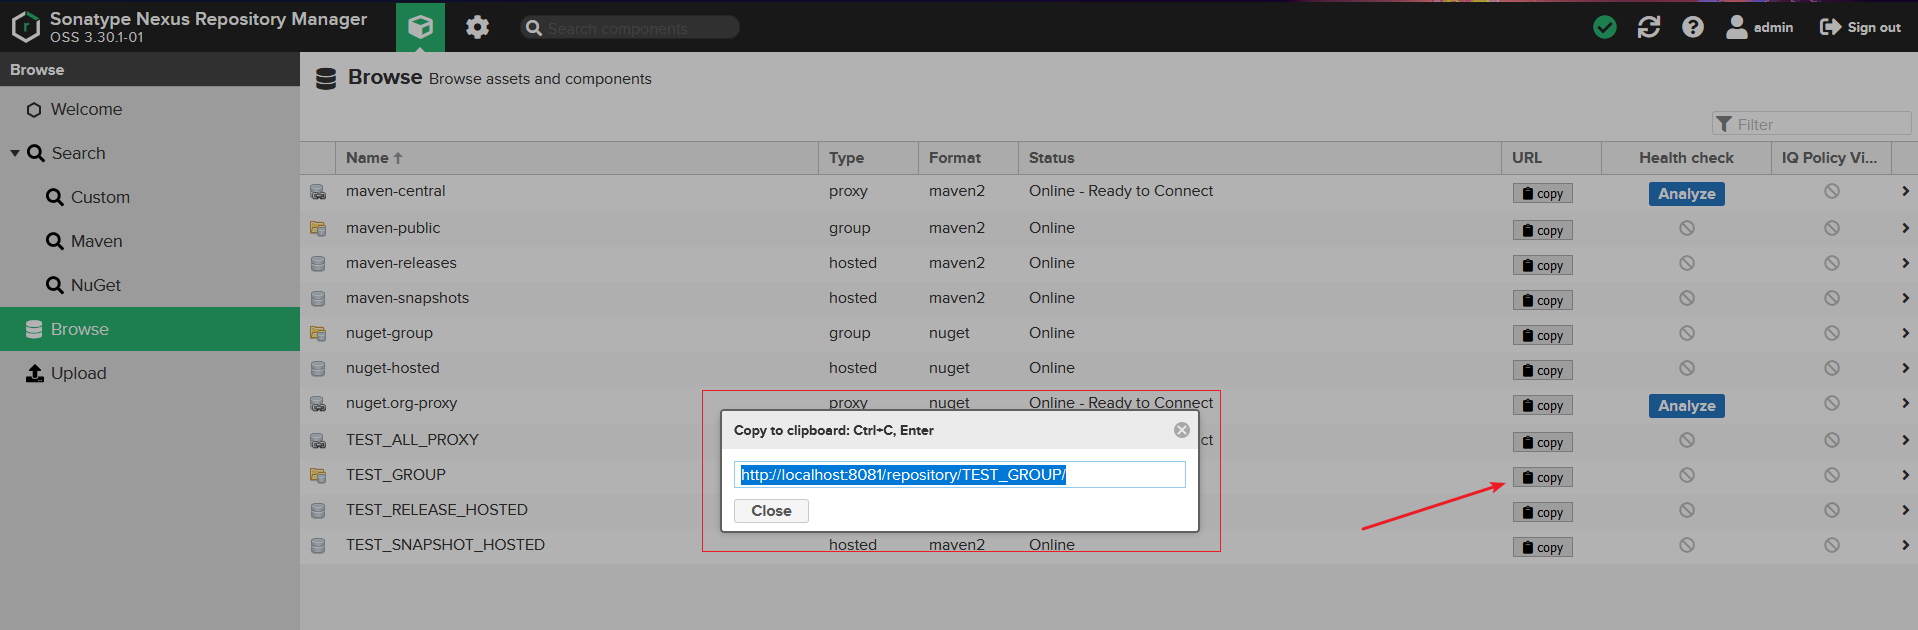
mirror的地址在这里找:
3.2.2 查看当前生效的settings.xml
命令:mvn help:effective-settings
3.2.3 往ModuleA引入本地仓库没有的jar包
<dependency>
    <groupId>org.springframework.boot</groupId>
    <artifactId>spring-boot-starter-batch</artifactId>
    <version>2.4.5</version>
</dependency>
执行命令:mvn clean install

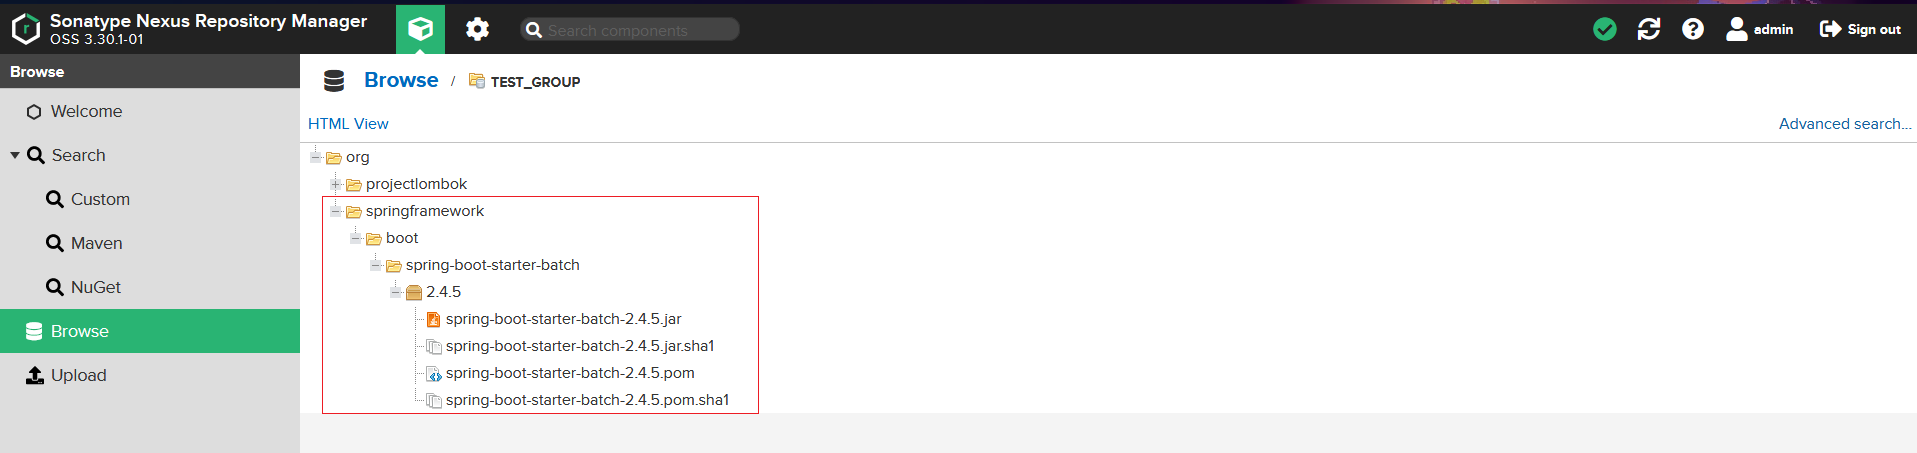
3.2.4 查看私有库的情况
回到nexus3 UI上,进到TEST_GROUP中,可以看到对应的jar包也已经存在库里了
3.3 上传ModuleA至私有库
3.3.1 更改pom.xml配置
添加下面配置,里面的id与settings.xml中server的id一致
<distributionManagement>
    <snapshotRepository>
        <id>snapshot</id>
        <name>Nexus Snapshot Repository</name>
        <url>http://localhost:8081/repository/TEST_SNAPSHOT_HOSTED/</url>
    </snapshotRepository>
    <repository>
        <id>release</id>
        <name>Nexus Release Repository</name>
        <url>http://localhost:8081/repository/TEST_RELEASE_HOSTED/</url>
    </repository>
</distributionManagement>
完整的pom.xml
<?xml version="1.0" encoding="UTF-8"?>
<project xmlns="http://maven.apache.org/POM/4.0.0"
         xmlns:xsi="http://www.w3.org/2001/XMLSchema-instance"
         xsi:schemaLocation="http://maven.apache.org/POM/4.0.0 http://maven.apache.org/xsd/maven-4.0.0.xsd">
    <modelVersion>4.0.0</modelVersion>

    <artifactId>ModuleA</artifactId>

    <properties>
        <maven.compiler.source>11</maven.compiler.source>
        <maven.compiler.target>11</maven.compiler.target>
    </properties>

    <dependencies>
        <dependency>
            <groupId>org.springframework.boot</groupId>
            <artifactId>spring-boot-starter-batch</artifactId>
            <version>2.4.5</version>
        </dependency>
    </dependencies>

    <distributionManagement>
        <snapshotRepository>
            <id>snapshot</id>
            <name>Nexus Snapshot Repository</name>
            <url>http://localhost:8081/repository/TEST_SNAPSHOT_HOSTED/</url>
        </snapshotRepository>
        <repository>
            <id>release</id>
            <name>Nexus Release Repository</name>
            <url>http://localhost:8081/repository/TEST_RELEASE_HOSTED/</url>
        </repository>
    </distributionManagement>
</project>
3.3.2 ModuleA中添加常量
public class StringConstant {
    public static final String TEST_STRING = "TEST";
}
3.3.3 deploy snapshot版本
执行命令:mvn deploy

3.3.3.1 查看snapshot hosted

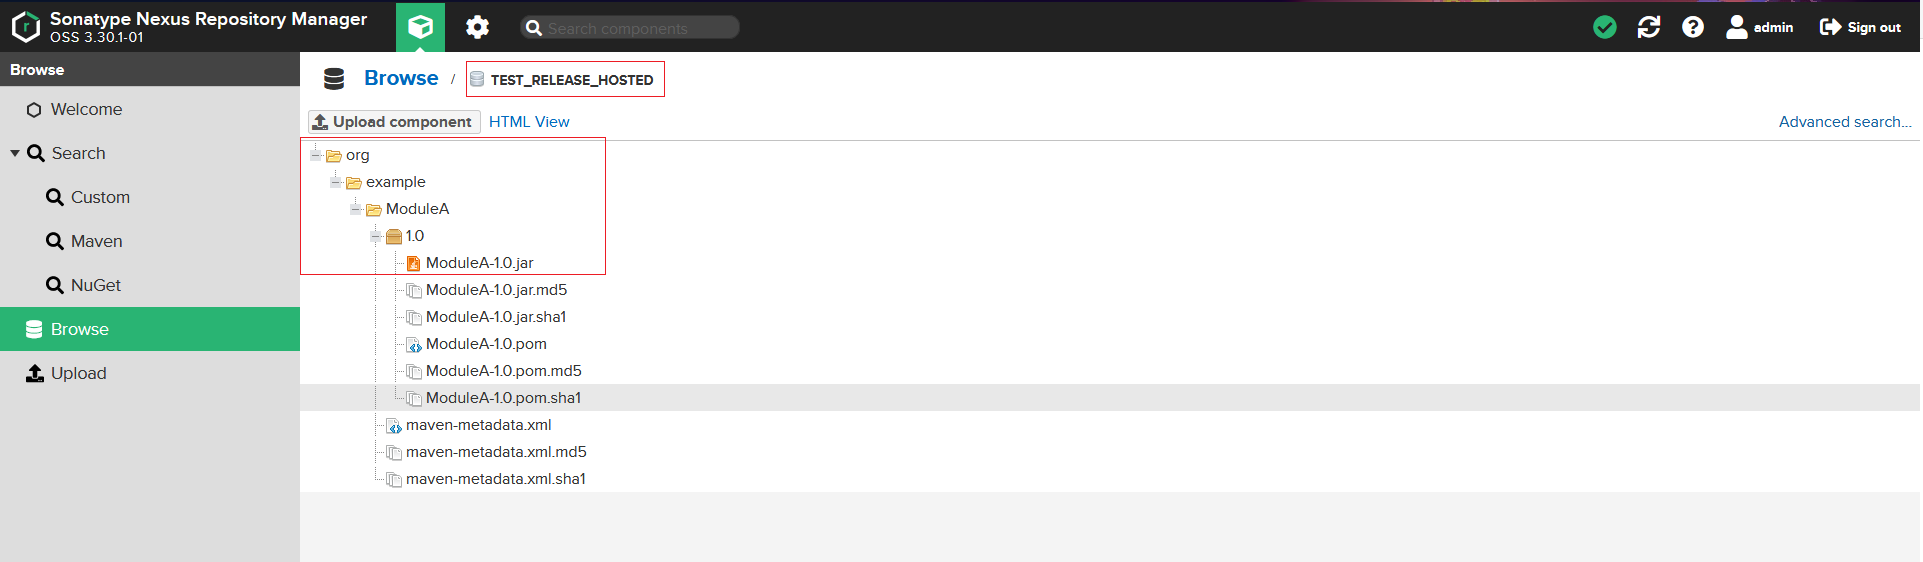
3.3.4 deploy release版本
将ModuleA中的version从1.0-SNAPSHOT改成1.0,再deploy
3.3.4.1 查看release hosted
3.4 ModuleB引入ModuleA依赖
3.4.1 pom.xml
<?xml version="1.0" encoding="UTF-8"?>
<project xmlns="http://maven.apache.org/POM/4.0.0"
xmlns:xsi="http://www.w3.org/2001/XMLSchema-instance"
xsi:schemaLocation="http://maven.apache.org/POM/4.0.0 http://maven.apache.org/xsd/maven-4.0.0.xsd">
<modelVersion>4.0.0</modelVersion>
<artifactId>ModuleB</artifactId>
<dependencies>
<dependency>
<groupId>org.example</groupId>
<artifactId>ModuleA</artifactId>
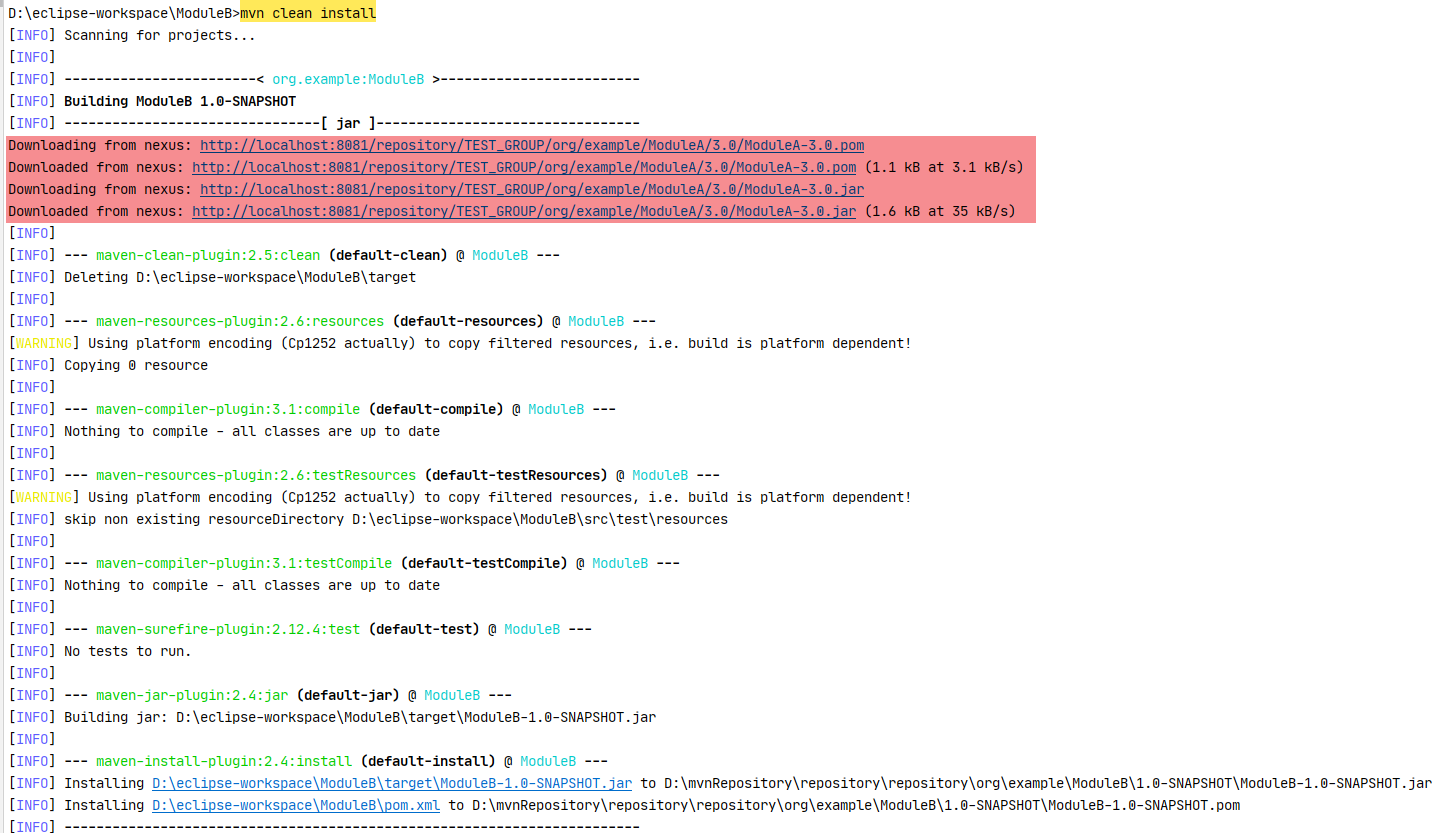
<version>3.0</version> <!-- 我后面重新deploy了一个3.0的,所以这里写的是3.0,不是1.0 -->
</dependency>
</dependencies>
</project>
3.4.2 执行install命令
3.5 小结
目前使用到的功能就这些,后面有用到其他的功能,再补充。
参考
版权声明:本文内容由互联网用户自发贡献,该文观点仅代表作者本人。本站仅提供信息存储空间服务,不拥有所有权,不承担相关法律责任。如发现本站有涉嫌侵权/违法违规的内容, 请发送邮件至 举报,一经查实,本站将立刻删除。
文章由极客之音整理,本文链接:https://www.bmabk.com/index.php/post/77876.html

