
首先在后端新建一个controller:
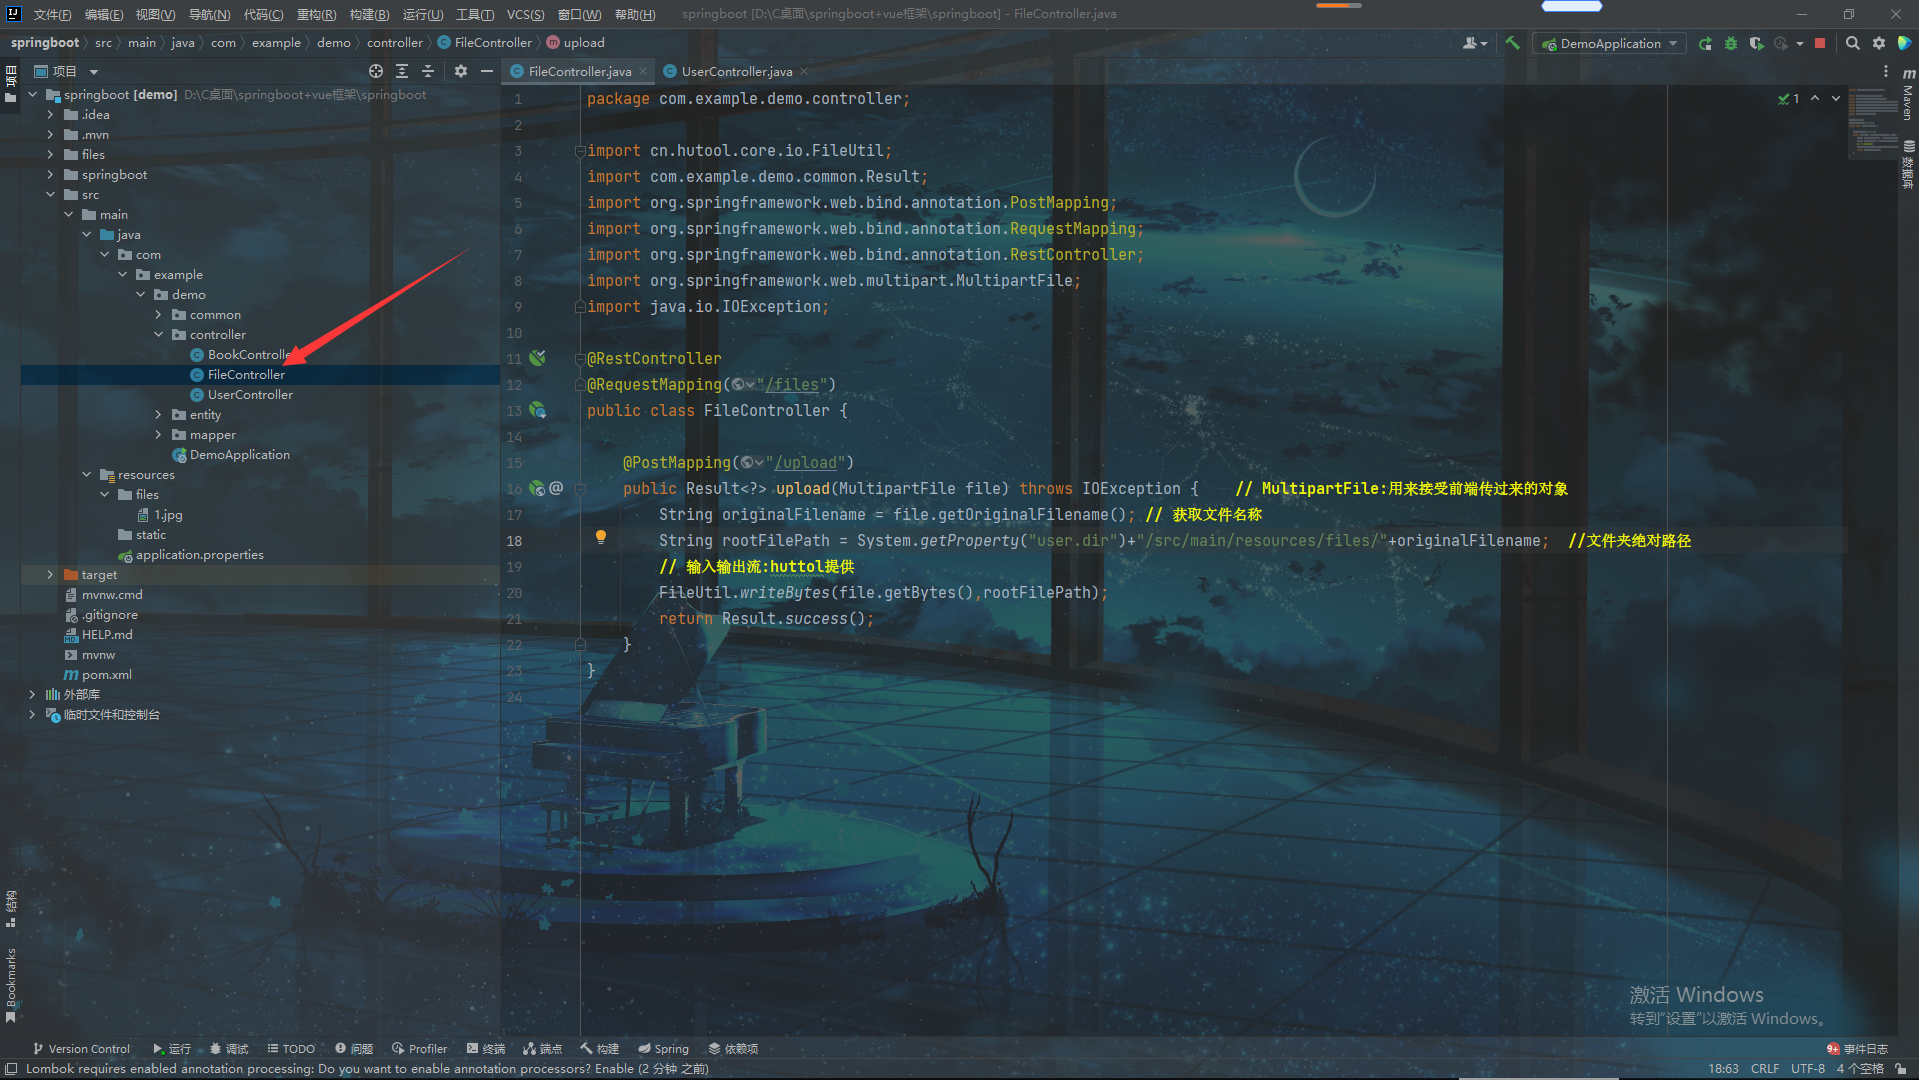
代码:
package com.example.demo.controller;

import cn.hutool.core.io.FileUtil;
import com.example.demo.common.Result;
import org.springframework.web.bind.annotation.PostMapping;
import org.springframework.web.bind.annotation.RequestMapping;
import org.springframework.web.bind.annotation.RestController;
import org.springframework.web.multipart.MultipartFile;
import java.io.IOException;

@RestController
@RequestMapping("/files")
public class FileController {

    @PostMapping("/upload")
    public Result<?> upload(MultipartFile file) throws IOException {    // MultipartFile:用来接受前端传过来的对象
        String originalFilename = file.getOriginalFilename(); // 获取文件名称
        String rootFilePath = System.getProperty("user.dir")+"/src/main/resources/files/"+originalFilename;  //文件夹绝对路径
        // 输入输出流:huttol提供
        FileUtil.writeBytes(file.getBytes(),rootFilePath);
        return Result.success();
    }
}
我们这里使用了hutool工具类里面封装的方法,可以直接文件上传
在代码中都写好了注释,同时我们需要新建一个files文件夹用来存放文件
然后我们使用postman测试:
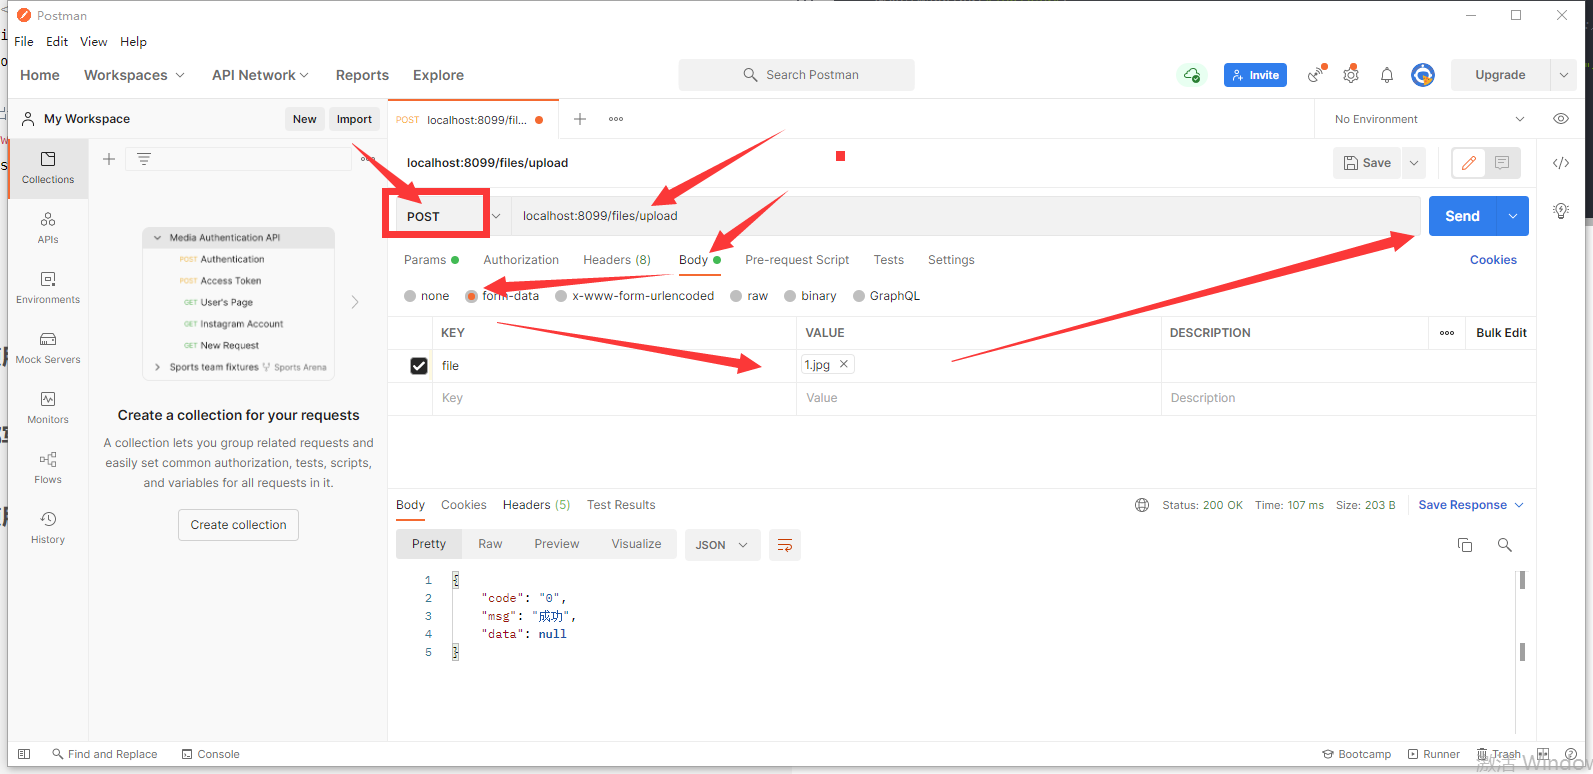
测试成功!后端已经写好了接口
下载接口:
   /**
     * 下载接口
     * @param flag
     * @param response
     */
    @GetMapping("/{flag}")
    public void getFiles(@PathVariable String flag, HttpServletResponse response) {
        OutputStream os;  // 新建一个输出流对象
        String basePath = System.getProperty("user.dir") + "/src/main/resources/files/";  // 定于文件上传的根路径
        List<String> fileNames = FileUtil.listFileNames(basePath);  // 获取所有的文件名称
        String fileName = fileNames.stream().filter(name -> name.contains(flag)).findAny().orElse("");  // 找到跟参数一致的文件
        try {
            if (StrUtil.isNotEmpty(fileName)) {
                response.addHeader("Content-Disposition", "attachment;filename=" + URLEncoder.encode(fileName, "UTF-8"));
                response.setContentType("application/octet-stream");
                byte[] bytes = FileUtil.readBytes(basePath + fileName);  // 通过文件的路径读取文件字节流
                os = response.getOutputStream();   // 通过输出流返回文件
                os.write(bytes);
                os.flush();
                os.close();
            }
        } catch (Exception e) {
            System.out.println("文件下载失败");
        }
    }
postman测试:
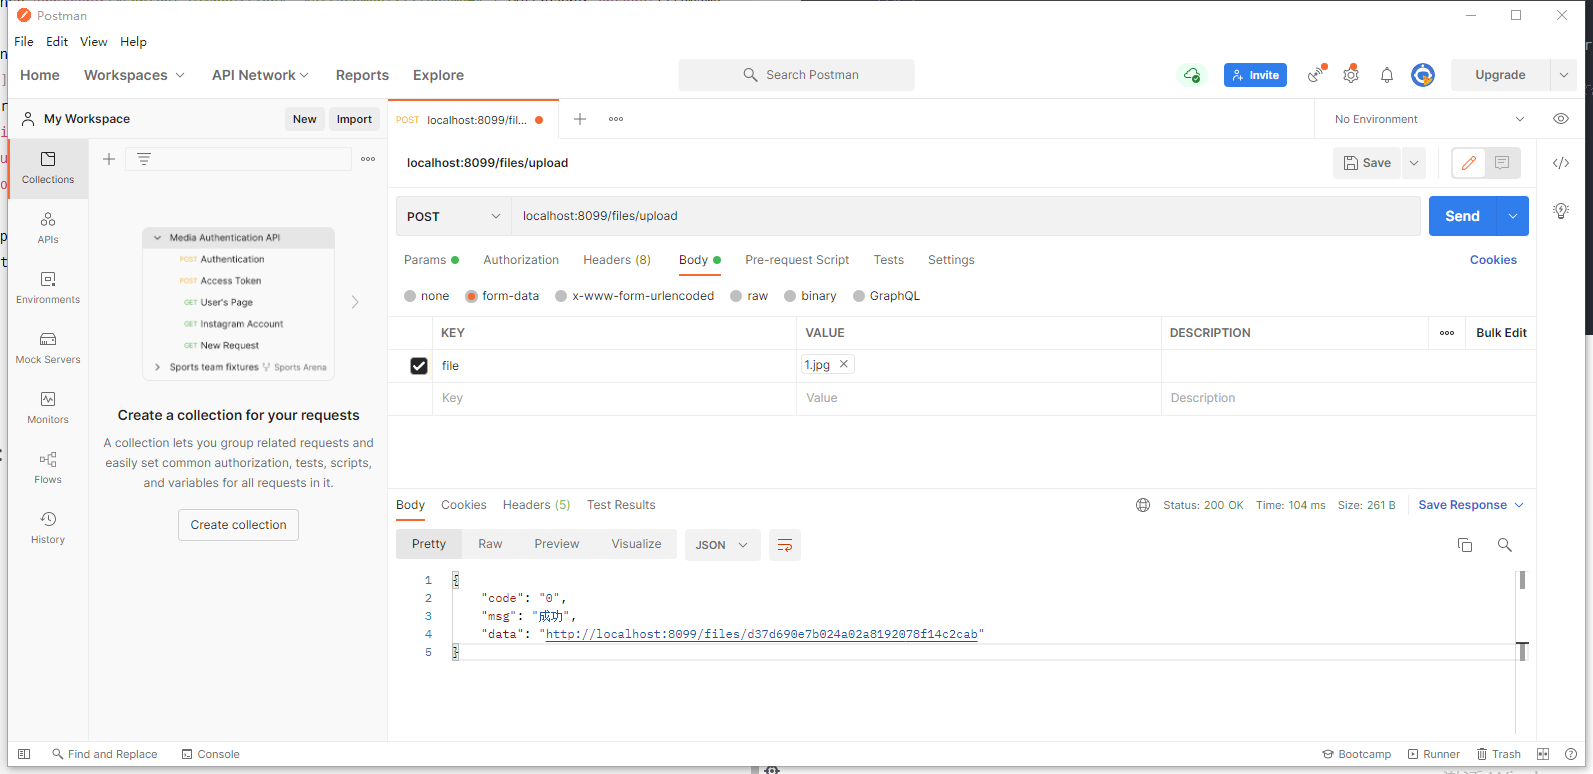
然后将data地址搜索就会自动下载图片
然后写前台代码:
首先新增图片展示:
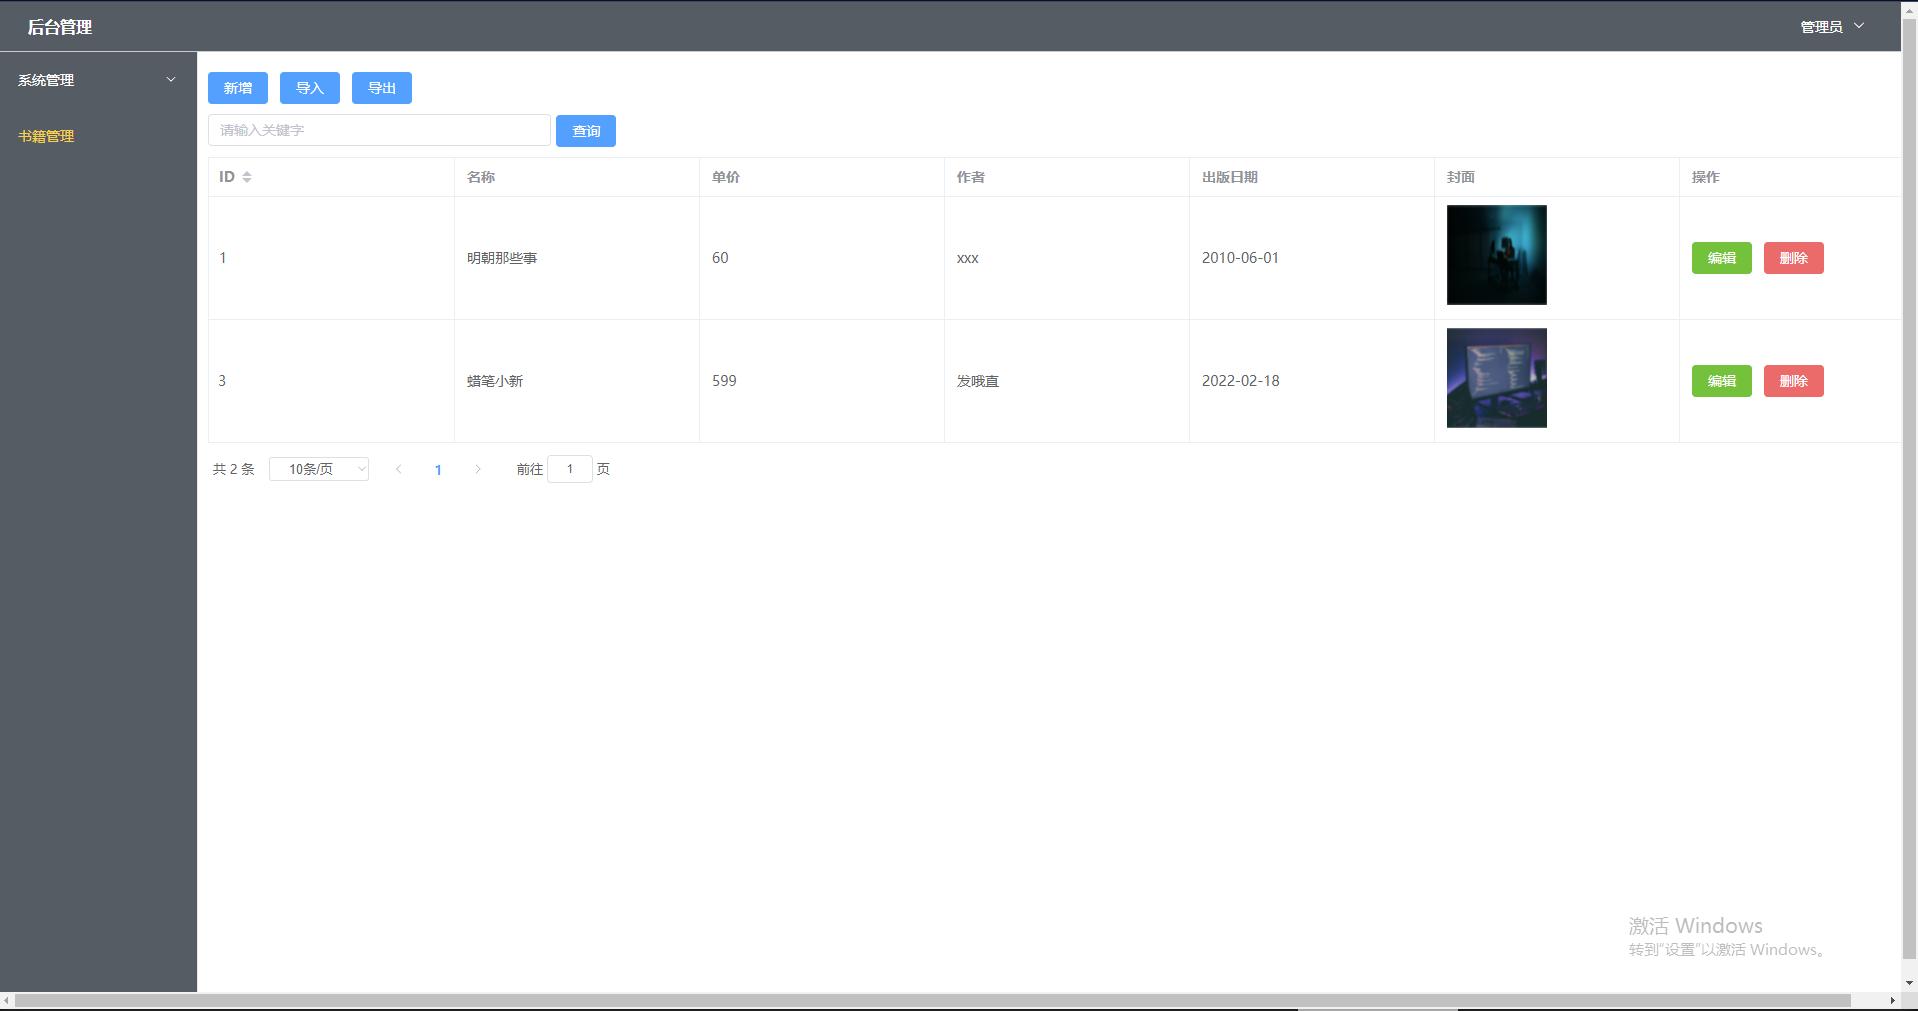
使用element-plus中的图片和上传就可以实现:
  <el-form-item label="封面">
            <el-upload ref="upload" action="http://localhost:8099/files/upload" :on-success="filesUploadSuccess">
              <el-button  type="primary">点击上传</el-button>
            </el-upload>
          </el-form-item>
展示:
 <el-table-column
          label="封面">
      <template #default="scope">
        <el-image
            style="width: 100px; height: 100px"
            :src="scope.row.cover"
            :preview-src-list="[scope.row.cover]"
            :initial-index="4"
            fit="cover"
        >
        </el-image>
      </template>
      </el-table-column>
版权声明:本文内容由互联网用户自发贡献,该文观点仅代表作者本人。本站仅提供信息存储空间服务,不拥有所有权,不承担相关法律责任。如发现本站有涉嫌侵权/违法违规的内容, 请发送邮件至 举报,一经查实,本站将立刻删除。
文章由极客之音整理,本文链接:https://www.bmabk.com/index.php/post/80996.html

