
springcloud config配置中心步骤以及踩的坑
springcloud config配置中心步骤
一、springcloud config服务端
1.配置application.yml
uri为git仓库的ssh地址
ssh形式连接github需要配置SSH密钥见 => 配置github的ssh密钥,
rabbitMQ安装见 => docker安装rabbitMQ
server:
port: 3344
spring:
application:
name: cloud-config-center
cloud:
config:
server:
git:
uri: git@github.com: #github仓库上面的git仓库名字
##搜索目录
search-paths: springcloud-config
# force-pull: true
username:
password:
strict-host-key-checking: false
ignore-local-ssh-settings: true
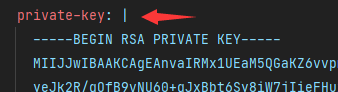
private-key: |
-----BEGIN RSA PRIVATE KEY-----
-----END RSA PRIVATE KEY-----
#读取分支
label: main
#rabbit相关配置
rabbitmq:
host:
port: 5672
username:
password:
eureka:
client:
service-url:
defaultZone: http://localhost:7001/eureka #注册进eureka
#rabbitmq相关配置,暴露bus刷新配置的端点
management:
endpoints: #暴露bus刷新配置的端点
web:
exposure:
include: 'bus-refresh' #凡是暴露监控、刷新的都要有actuator依赖,bus-refresh就是actuator的刷新操作
2. pom.xml引入依赖
依赖参考,我的是子工程,没有规定版本号
	<dependencies>
        <!--添加消息总线RbbitMQ支持-->
        <dependency>
            <groupId>org.springframework.cloud</groupId>
            <artifactId>spring-cloud-starter-bus-amqp</artifactId>
        </dependency>
        <dependency>
            <groupId>org.springframework.cloud</groupId>
            <artifactId>spring-cloud-config-server</artifactId>
        </dependency>
        <dependency>
            <groupId>org.springframework.cloud</groupId>
            <artifactId>spring-cloud-starter-netflix-eureka-client</artifactId>
        </dependency>
        <dependency>
            <groupId>org.springframework.boot</groupId>
            <artifactId>spring-boot-starter-web</artifactId>
        </dependency>
        <dependency>
            <groupId>org.springframework.boot</groupId>
            <artifactId>spring-boot-starter-actuator</artifactId>
        </dependency>
        <dependency>
            <groupId>org.springframework.boot</groupId>
            <artifactId>spring-boot-devtools</artifactId>
            <scope>runtime</scope>
            <optional>true</optional>
        </dependency>
        <dependency>
            <groupId>org.projectlombok</groupId>
            <artifactId>lombok</artifactId>
            <optional>true</optional>
        </dependency>
        <dependency>
            <groupId>org.springframework.boot</groupId>
            <artifactId>spring-boot-starter-test</artifactId>
            <scope>test</scope>
        </dependency>
        <!-- 避免Config的Git插件报错:org/eclipse/jgit/api/TransportConfigCallback -->
        <dependency>
            <groupId>org.eclipse.jgit</groupId>
            <artifactId>org.eclipse.jgit</artifactId>
            <version>4.10.0.201712302008-r</version>
        </dependency>
    </dependencies>
3. 配置ConfigCenterMain3344启动类
@SpringBootApplication
@EnableConfigServer
public class ConfigCenterMain3344 {

    public static void main(String[] args) {
        SpringApplication.run(ConfigCenterMain3344.class,args);
    }

}
二、springcloud config客户端
1.配置bootstarp.yml
server:
  port: 3355

spring:
  application:
    name: config-client
  cloud:
    #Config客户端配置
    config:
      label: main #分支名称
      name: config #配置文件名称
      profile: dev #读取后缀名称 上述3个综合:master分支上config-dev.yml的配置文件被读取 http://config-3344.com:3344/master/config-dev.yml
      uri: http://localhost:3344 #配置中心地址
  #rabbit相关配置
  rabbitmq:
    host:
    port: 5672
    username:
    password:

#服务注册到eureka地址
eureka:
  client:
    service-url:
      defaultZone: http://localhost:7001/eureka

#暴露监控端点
management:
  endpoints:
    web:
      exposure:
        include: "*"
2. pom.xml引入依赖
	<dependencies>
        <!--添加消息总线rabbitMQ支持-->
        <dependency>
            <groupId>org.springframework.cloud</groupId>
            <artifactId>spring-cloud-starter-bus-amqp</artifactId>
        </dependency>
        <!--不带server了,说明是客户端-->
        <dependency>
            <groupId>org.springframework.cloud</groupId>
            <artifactId>spring-cloud-starter-config</artifactId>
        </dependency>
        <dependency>
            <groupId>org.springframework.cloud</groupId>
            <artifactId>spring-cloud-starter-netflix-eureka-client</artifactId>
        </dependency>
        <dependency>
            <groupId>org.springframework.boot</groupId>
            <artifactId>spring-boot-starter-web</artifactId>
        </dependency>
        <dependency>
            <groupId>org.springframework.boot</groupId>
            <artifactId>spring-boot-starter-actuator</artifactId>
        </dependency>
        <dependency>
            <groupId>org.springframework.boot</groupId>
            <artifactId>spring-boot-devtools</artifactId>
            <scope>runtime</scope>
            <optional>true</optional>
        </dependency>
        <dependency>
            <groupId>org.projectlombok</groupId>
            <artifactId>lombok</artifactId>
            <optional>true</optional>
        </dependency>
        <dependency>
            <groupId>org.springframework.boot</groupId>
            <artifactId>spring-boot-starter-test</artifactId>
            <scope>test</scope>
        </dependency>
    </dependencies>
3. 配置ConfigCenterMain3344启动类
@SpringBootApplication
@EnableEurekaClient
public class ConfigClientMain3355 {

    public static void main(String[] args) {
        SpringApplication.run(ConfigClientMain3355.class,args);
    }

}
三、测试结果
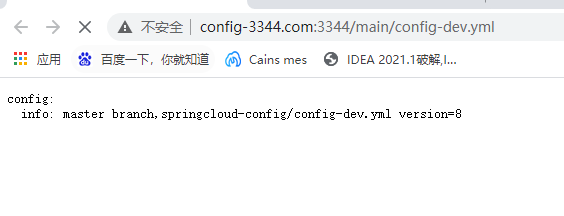
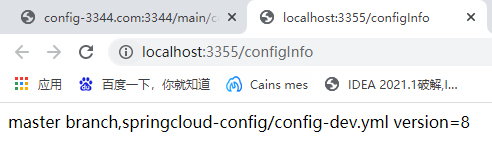
1.查看端口3344和3355都是version:8
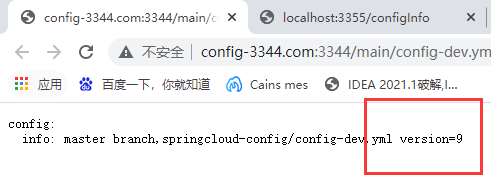
2.修改github仓库的config中心的文件为version:9

3.打开cmd命令行,输入,
通知配置中心 => 全局通知配置刷新
curl -X POST "http://localhost:3344/actuator/bus-refresh"

通知配置中心 => 精确到某个服务:端口  => 定点通知配置刷新
curl -X POST "http://localhost:3344/actuator/bus-refresh/{destination}"
4.重新观察端口3344和3355都变为了version:9

四、springcloud config服务端遇到的坑
1. 连接github方式
用户名密码方式和公私钥方式都可以。
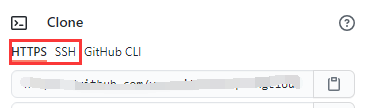
如果uri是https形式,那么使用用户名和密码方式即可
如果uri是ssh形式,则使用公私钥形式。
重点说下公私钥形式的坑:
首先要加上这两行:
strict-host-key-checking: false
ignore-local-ssh-settings: true
2. git.privateKey’ is not a valid private key报错
可能的原因:github不接受以—–BEGIN OPENSSH PRIVATE KEY开头的私钥形式,你需要生成以—-BEGIN RSA PRIVATE KEY开头的形式。生成方式见 => 配置github的ssh密钥
可能原因二:private-key空格后加一个真实的 | 才行
3. Cannot clone or checkout repository报错
原因一:仓库地址不对或仓库不存在
原因二:连接github仓库认证没有通过
原因三:配置的yml属性不对应
按上面步骤走完应该没啥大问题了,有问题请留言
版权声明:本文内容由互联网用户自发贡献,该文观点仅代表作者本人。本站仅提供信息存储空间服务,不拥有所有权,不承担相关法律责任。如发现本站有涉嫌侵权/违法违规的内容, 请发送邮件至 举报,一经查实,本站将立刻删除。
文章由极客之音整理,本文链接:https://www.bmabk.com/index.php/post/91022.html

