
【狂神说Java】SpringBoot最新教程IDEA版通俗易懂_哔哩哔哩_bilibili
微信文档【狂神说Java】SpringBoot最新教程IDEA版通俗易懂
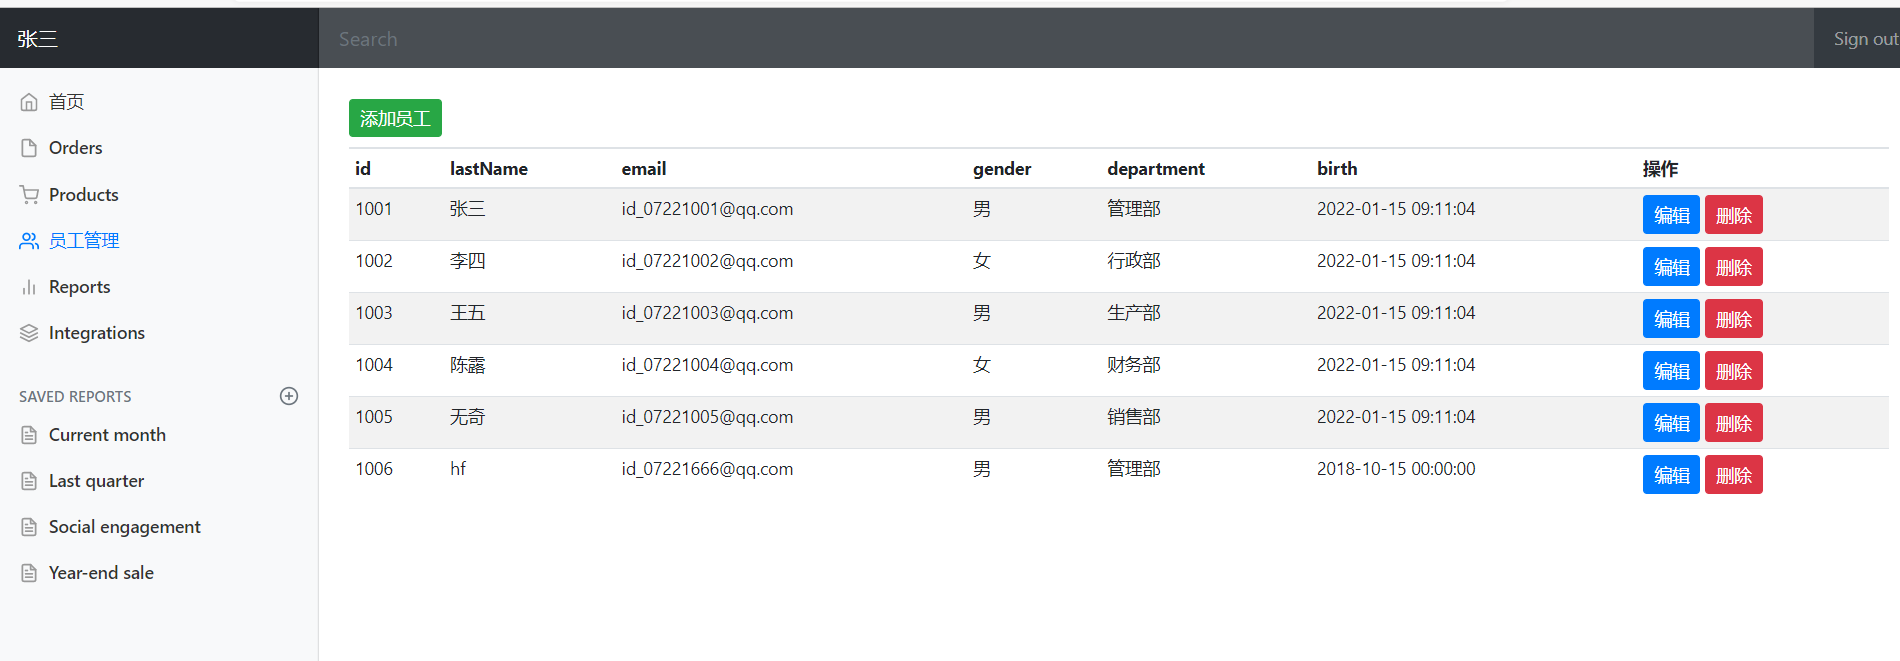
8、员工信息列表
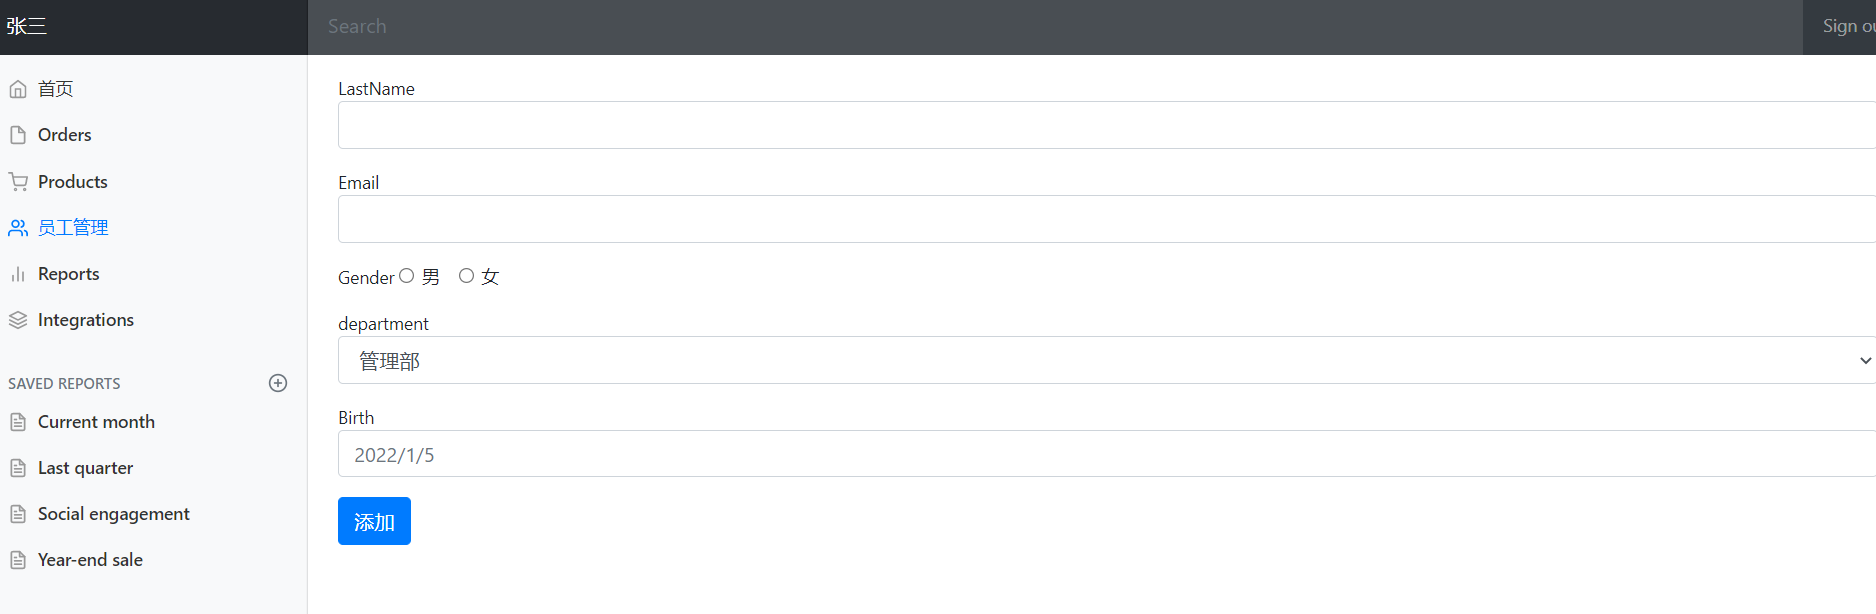
8.1 增加员工
- list.html(跳转按钮)
<div class="table-responsive">
        <h2><a class="btn btn-success btn-sm" th:href="@{/emps/addemp}">添加员工</a></h2>
        <table class="table table-striped table-sm">
          <thead>
          <tr>
            <th>id</th>
            <th>lastName</th>
            <th>email</th>
            <!--    。。。。。。        -->
- addEmp.html(添加页面)
<!doctype html>
<html lang="en">
<head th:replace="~{commons/commons::head}"></head>

<body>
<!--头部-->
<nav th:replace="~{commons/commons::navbar}"></nav>

<div class="container-fluid">
    <div class="row">
        <!-- 侧边框-->
        <nav th:replace="~{commons/commons::sidebar(active='list.html')}"></nav>

        <main role="main" class="col-md-9 ml-sm-auto col-lg-10 pt-3 px-4">
            <form th:action="@{/emps/addemp}" method="post">
                <div class="form-group">
                    <lable>LastName</lable>
                    <input type="text" class="form-control" name="lastName"/>
                </div>
                <div class="form-group">
                    <lable>Email</lable>
                    <input type="email" class="form-control" name="email"/>
                </div>
                <div class="form-group">
                    <lable>Gender</lable>
                    <div class="form-check form-check-inline">
                        <input class="form-check-input" type="radio" name="gender" value="0" />
                        <lable class="form-check-label">男</lable>
                    </div>
                    <div class="form-check form-check-inline">
                        <input class="form-check-input" type="radio" name="gender" value="1" />
                        <lable class="form-check-label">女</lable>
                    </div>
                </div>
                <div class="form-group">
                    <lable>department</lable>
                    <select class="form-control" name="department.id">
                        <option th:each="dept:${departments}" th:text="${dept.getDepartmentName()}" th:value="${dept.getId()}"></option>
                    </select>
                </div>
                <div class="form-group">
                    <lable>Birth</lable>
                    <input type="text" class="form-control" name="birth" placeholder="2022/1/5" />
                </div>
                <button type="submit" class="btn btn-primary">添加</button>
            </form>

        </main>
    </div>
</div>


<div th:replace="~{commons/commons::js}"></div>


</body>
</html>
- EmployeeController(控制器)
 @PostMapping("/emps/addemp")
    public String addEmp(Employee employee){
        System.out.println("employee"+employee);
        employeeDao.save(employee);
        return "redirect:/emps";
    }
- EmployeeDao(存入)
public void save(Employee employee){
    employee.setId(employeeMap.size()+1001);
  employee.setDepartment(departmentDao.getDepartmentById(employee.getDepartment().getId()));
    employeeMap.put(employee.getId(),employee);
}
- 修改填入时间格式
spring.mvc.date-format=yyyy-MM-dd
8.2 修改和删除员工信息
- list.html
<td>
   <a class="btn btn-sm btn-primary" th:href="@{/emps/upemp/}+${emp.getId()}">编辑</a>
   <a class="btn btn-sm btn-danger"  th:href="@{/emps/delemp/}+${emp.getId()}">删除</a>
</td>
- upEmp.html (修改员工信息的页面)
<!doctype html>
<html lang="en">
<head th:replace="~{commons/commons::head}"></head>

<body>
<!--头部-->
<nav th:replace="~{commons/commons::navbar}"></nav>

<div class="container-fluid">
    <div class="row">
        <!-- 侧边框-->
        <nav th:replace="~{commons/commons::sidebar(active='list.html')}"></nav>

        <main role="main" class="col-md-9 ml-sm-auto col-lg-10 pt-3 px-4">
            <form th:action="@{/emps/upemp/}+${emp.getId()}" method="post">
                <div class="form-group">
                    <lable>LastName</lable>
                    <input th:value="${emp.getLastName()}" type="text" class="form-control" name="lastName"/>
                </div>
                <div class="form-group">
                    <lable>Email</lable>
                    <input th:value="${emp.getEmail()}" type="email" class="form-control" name="email"/>
                </div>
                <div class="form-group">
                    <lable>Gender</lable>
                    <div class="form-check form-check-inline">
                        <input th:checked="${emp.getGender() == 0}" class="form-check-input" type="radio" name="gender" value="0"/>
                        <lable class="form-check-label">男</lable>
                    </div>
                    <div class="form-check form-check-inline">
                        <input th:checked="${emp.getGender() == 1}" class="form-check-input" type="radio" name="gender" value="1" />
                        <lable class="form-check-label">女</lable>
                    </div>
                </div>
                <div class="form-group">
                    <lable>department</lable>
                    <select class="form-control" name="department.id">
                        <option th:selected="${dept.getId() == emp.getDepartment().getId()}" th:each="dept:${departments}" th:text="${dept.getDepartmentName()}" th:value="${dept.getId()}"></option>
                    </select>
                </div>
                <div class="form-group">
                    <lable>Birth</lable>
                    <input  th:value="${#dates.format(emp.getBirth(),'yyyy-MM-dd HH:mm:ss')}" type="text" class="form-control" name="birth" placeholder="2021-12-12" />
                </div>
                <button type="submit" class="btn btn-primary">修改</button>
            </form>

        </main>
    </div>
</div>

<div th:replace="~{commons/commons::js}"></div>

</body>
</html>
- 控制器 EmployeeController
@PostMapping("/emps/upemp/{id}")
public String UpEmp(Employee employee,@PathVariable("id")Integer id,Model model){
    employeeDao.upEmp(id,employee);
    return "redirect:/emps";
}

@RequestMapping("/emps/delemp/{id}")
public String DelEmp(Employee employee,@PathVariable("id")Integer id,Model model){
    employeeDao.delEmp(id,employee);
    return "redirect:/emps";
}
- Dao(模拟数据库操作)
public void upEmp(Integer id,Employee employee){
	employeeMap.remove(id);
	employeeMap.put(id, employee);
}

public void delEmp(Integer id,Employee employee){
	employeeMap.remove(id);
}
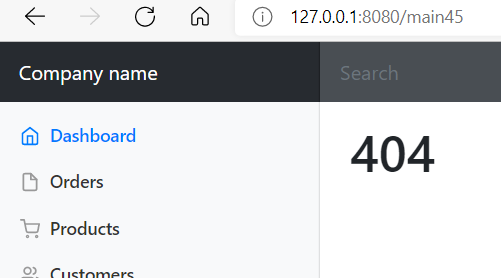
8.3 404.html和注销
404.html
只需要新建error目录,并把404.html 放入
注销
- commons.html
<!-- 头部-->
//...
<a class="nav-link" th:href="@{/user/logout}">注销</a>
//...
- LoginController
@RequestMapping("/user/logout")
public String userLogout(HttpSession session){
	session.removeAttribute("loginUser");
	return "redirect:/index";
}
semantic-ui,X-admin,rouyi
9 数据库相关
9.1 整合原生JDBC使用
网页直通数据库
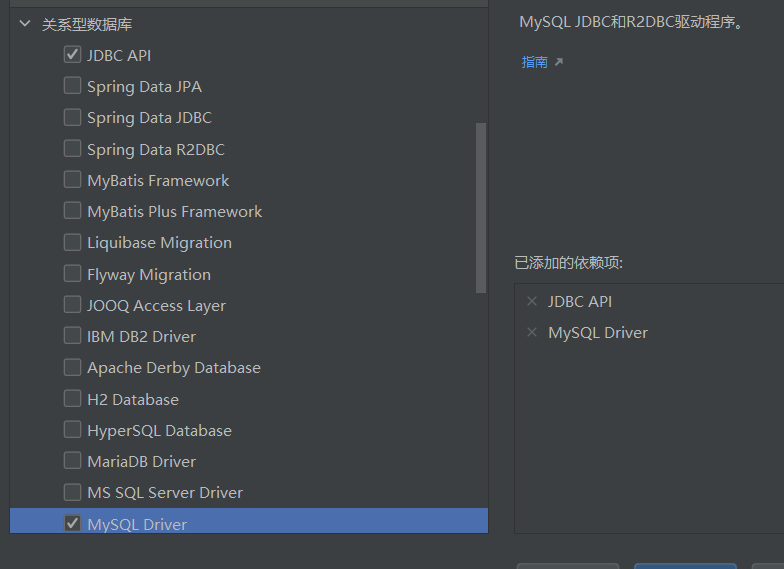
9.1.1 创建项目
- 解决在idea中创建spring boot项目start.spring.io初始化失败的问题
使用阿里云镜像 https://start.aliyun.com
1.创建项目,勾选 JDBC API , Mysql Driver

2.清空无需文件
3.配置application.yaml(yml)文件
spring:
  datasource:
    username: ssmbuild
    password: ssmbuild
    url: jdbc:mysql://localhost:3306/ssmbuild?useUnicode=true&characterEncoding=UTF-8&serverTimezone=UTC
    driver-class-name: com.mysql.jdbc.Driver
4.测试连接
package com.example.spring04;

import org.junit.jupiter.api.Test;
import org.springframework.beans.factory.annotation.Autowired;
import org.springframework.boot.test.context.SpringBootTest;

import javax.sql.DataSource;
import java.sql.Connection;
import java.sql.SQLException;

@SpringBootTest
class Demo04ApplicationTests {

    @Autowired
    DataSource dataSource;
    @Test
    void contextLoads() {
        try {
            Connection conn = dataSource.getConnection();
            System.out.println(conn);

            conn.close();
        } catch (SQLException throwables) {
            System.out.println(throwables);
        }

    }

}
9.1.2 查询数据库
1.导包
 <dependency>
     <groupId>org.springframework.boot</groupId>
     <artifactId>spring-boot-starter-web</artifactId>
 </dependency>
2.编写控制器 JDBCController
package com.example.spring04.controller;
import org.springframework.beans.factory.annotation.Autowired;
import org.springframework.jdbc.core.JdbcTemplate;
import org.springframework.web.bind.annotation.GetMapping;
import org.springframework.web.bind.annotation.RestController;
import java.util.List;
import java.util.Map;
@RestController
public class JDBCController {
@Autowired
JdbcTemplate jdbcTemplate;
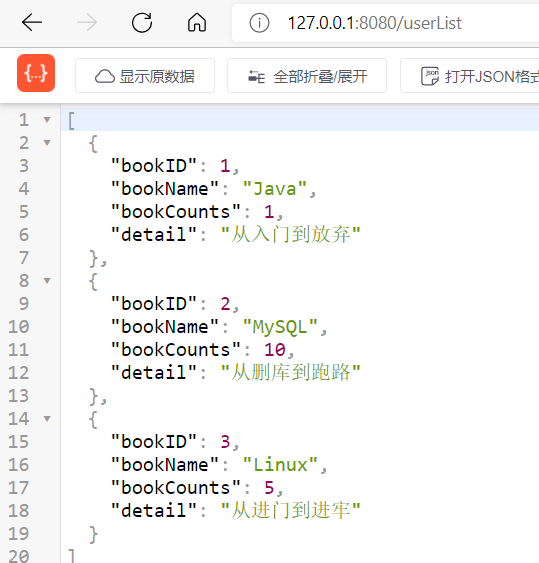
@GetMapping("userList")
public List<Map<String, Object>> userList(){
String sql = "select * from books";
return jdbcTemplate.queryForList(sql);
}
}
3.运行
- 其他方法可查看 JdbcTemplate.class
9.2 整合Druid数据源
9.2.1 配置Druid数据源
阿里巴巴的
1.导包
<!-- 阿里巴巴 数据源 -->
<dependency>
    <groupId>com.alibaba</groupId>
    <artifactId>druid</artifactId>
    <version>1.1.21</version>
</dependency>
2.配置
spring:
  datasource:
  #...
    type: com.alibaba.druid.pool.DruidDataSource
3.测试
System.out.println(dataSource.getClass());
//class com.alibaba.druid.pool.DruidDataSource
4、切换成功!既然切换成功,就可以设置数据源连接初始化大小、最大连接数、等待时间、最小连接数 等设置项;可以查看源码
spring:
  datasource:
    username: ssmbuild
    password: ssmbuild
    #?serverTimezone=UTC解决时区的报错
    url: jdbc:mysql://localhost:3306/ssmbuild?serverTimezone=UTC&useUnicode=true&characterEncoding=utf-8
    driver-class-name: com.mysql.cj.jdbc.Driver
    type: com.alibaba.druid.pool.DruidDataSource

    #Spring Boot 默认是不注入这些属性值的,需要自己绑定
    #druid 数据源专有配置
    initialSize: 5
    minIdle: 5
    maxActive: 20
    maxWait: 60000
    timeBetweenEvictionRunsMillis: 60000
    minEvictableIdleTimeMillis: 300000
    validationQuery: SELECT 1 FROM DUAL
    testWhileIdle: true
    testOnBorrow: false
    testOnReturn: false
    poolPreparedStatements: true

    #配置监控统计拦截的filters,stat:监控统计、log4j:日志记录、wall:防御sql注入
    #如果允许时报错  java.lang.ClassNotFoundException: org.apache.log4j.Priority
    #则导入 log4j 依赖即可,Maven 地址:https://mvnrepository.com/artifact/log4j/log4j
    filters: stat,wall,log4j
    maxPoolPreparedStatementPerConnectionSize: 20
    useGlobalDataSourceStat: true
    connectionProperties: druid.stat.mergeSql=true;druid.stat.slowSqlMillis=500
5、导入Log4j 的依赖
<!-- https://mvnrepository.com/artifact/log4j/log4j -->
<dependency>
    <groupId>log4j</groupId>
    <artifactId>log4j</artifactId>
    <version>1.2.17</version>
</dependency>
6、现在需要程序员自己为 DruidDataSource 绑定全局配置文件(application.yml)中的参数,再添加到容器中,而不再使用 Spring Boot 的自动生成了;我们需要 自己添加 DruidDataSource 组件到容器中,并绑定属性;
package com.example.spring04.config;

import com.alibaba.druid.pool.DruidDataSource;
import org.springframework.boot.context.properties.ConfigurationProperties;
import org.springframework.context.annotation.Bean;
import org.springframework.context.annotation.Configuration;

import javax.sql.DataSource;

@Configuration
public class DruidConfig {

    /*
       将自定义的 Druid数据源添加到容器中,不再让 Spring Boot 自动创建
       绑定全局配置文件中的 druid 数据源属性到 com.alibaba.druid.pool.DruidDataSource从而让它们生效
       @ConfigurationProperties(prefix = "spring.datasource"):作用就是将 全局配置文件中
       前缀为 spring.datasource的属性值注入到 com.alibaba.druid.pool.DruidDataSource 的同名参数中
     */
    @ConfigurationProperties(prefix = "spring.datasource")
    @Bean
    public DataSource druidDataSource() {
        return new DruidDataSource();
    }

}
7、去测试类中测试一下;看是否成功!
@SpringBootTest
class SpringbootDataJdbcApplicationTests {
//DI注入数据源
@Autowired
DataSource dataSource;
@Test
public void contextLoads() throws SQLException {
//看一下默认数据源
System.out.println(dataSource.getClass());
//获得连接
Connection connection = dataSource.getConnection();
System.out.println(connection);
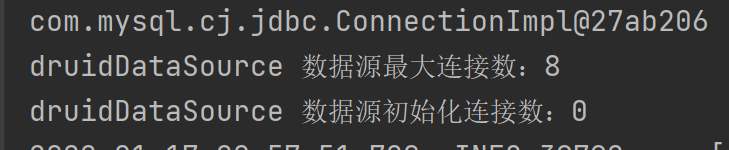
DruidDataSource druidDataSource = (DruidDataSource) dataSource;
System.out.println("druidDataSource 数据源最大连接数:" + druidDataSource.getMaxActive());
System.out.println("druidDataSource 数据源初始化连接数:" + druidDataSource.getInitialSize());
//关闭连接
connection.close();
}
}
输出结果 :可见配置参数已经生效!
9.2.2 配置Druid数据源监控
Druid 数据源具有监控的功能,并提供了一个 web 界面方便用户查看,类似安装 路由器 时,人家也提供了一个默认的 web 页面。
1.所以第一步需要设置 Druid 的后台管理页面,比如 登录账号、密码 等;配置后台管理;
package com.example.spring04.config;

import com.alibaba.druid.pool.DruidDataSource;
import com.alibaba.druid.support.http.StatViewServlet;
import org.springframework.boot.context.properties.ConfigurationProperties;
import org.springframework.boot.web.servlet.ServletRegistrationBean;
import org.springframework.context.annotation.Bean;
import org.springframework.context.annotation.Configuration;

import javax.sql.DataSource;
import java.util.HashMap;
import java.util.Map;

@Configuration
public class DruidConfig {

    @ConfigurationProperties(prefix = "spring.datasource")
    @Bean
    public DataSource druidDataSource() {
        return new DruidDataSource();
    }


    //配置 Druid 监控管理后台的Servlet;
	//内置 Servlet 容器时没有web.xml文件,所以使用 Spring Boot 的注册 Servlet 方式
    @Bean
    public ServletRegistrationBean statViewServlet() {
        ServletRegistrationBean bean = new ServletRegistrationBean(new StatViewServlet(), "/druid/*");

        // 这些参数可以在 com.alibaba.druid.support.http.StatViewServlet
        // 的父类 com.alibaba.druid.support.http.ResourceServlet 中找到
        Map<String, String> initParams = new HashMap<>();
        initParams.put("loginUsername", "admin"); //后台管理界面的登录账号
        initParams.put("loginPassword", "123456"); //后台管理界面的登录密码

        //后台允许谁可以访问
        //initParams.put("allow", "localhost"):表示只有本机可以访问
        //initParams.put("allow", ""):为空或者为null时,表示允许所有访问
        initParams.put("allow", "");
        //deny:Druid 后台拒绝谁访问
        //initParams.put("kuangshen", "192.168.1.20");表示禁止此ip访问

        //设置初始化参数
        bean.setInitParameters(initParams);
        return bean;
    }

}
2.配置完毕后,我们可以选择访问 :http://localhost:8080/druid/login.html
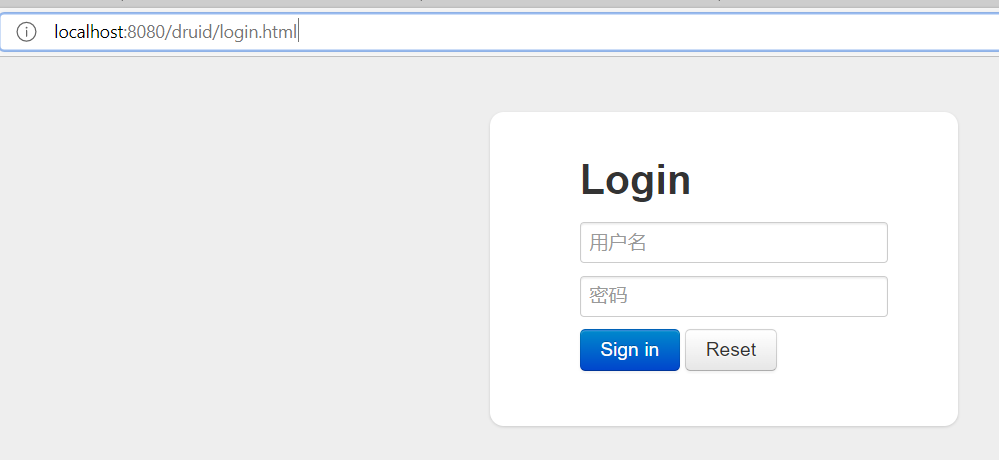
3.进入之后

9.2.3 配置 Druid web 监控 filter 过滤器
- DruidConfig
//配置 Druid 监控 之  web 监控的 filter
//WebStatFilter:用于配置Web和Druid数据源之间的管理关联监控统计
@Bean
public FilterRegistrationBean webStatFilter() {
    FilterRegistrationBean bean = new FilterRegistrationBean();
    bean.setFilter(new WebStatFilter());

    //exclusions:设置哪些请求进行过滤排除掉,从而不进行统计
    Map<String, String> initParams = new HashMap<>();
    initParams.put("exclusions", "*.js,*.css,/druid/*,/jdbc/*");
    bean.setInitParameters(initParams);

    //"/*" 表示过滤所有请求
    bean.setUrlPatterns(Arrays.asList("/*"));
    return bean;
}
平时在工作中,按需求进行配置即可,主要用作监控!
9.3 整合Mybatis框架
9.3.1 整合测试
1、导入 MyBatis 所需要的依赖
<dependency>
    <groupId>org.mybatis.spring.boot</groupId>
    <artifactId>mybatis-spring-boot-starter</artifactId>
    <version>2.1.1</version>
</dependency>
2、配置数据库连接信息(不变) 配置application.yaml(yml)文件
3、准备数据库数据,测试数据库是否连接成功!
CREATE TABLE ssmbuild.department ( id INT NOT NULL AUTO_INCREMENT , departmentName VARCHAR(225) NOT NULL , PRIMARY KEY (id)) ENGINE = MyISAM;
INSERT INTO `department` (`id`, `departmentName`) VALUES (NULL, '张三'), (NULL, '李四');
INSERT INTO `department` (`id`, `departmentName`) VALUES ('3', '王五'), ('4', '徐老师');
4、创建实体类 Department.java ,导入 Lombok!
Maven Repository: org.projectlombok » lombok » 1.18.20 (mvnrepository.com)
<dependency>
    <groupId>org.projectlombok</groupId>
    <artifactId>lombok</artifactId>
    <version>1.18.20</version>
    <scope>provided</scope>
</dependency>
Department.java
package com.example.spring04.pojo;

import lombok.AllArgsConstructor;
import lombok.Data;
import lombok.NoArgsConstructor;

@Data
@NoArgsConstructor
@AllArgsConstructor
public class Department {

    private Integer id;
    private String departmentName;

}
5、创建mapper目录以及对应的 Mapper 接口
DepartmentMapper.java
package com.example.spring04.mapper;

import com.example.spring04.pojo.Department;
import org.apache.ibatis.annotations.Mapper;
import org.springframework.stereotype.Repository;

import java.util.List;

//@Mapper : 表示本类是一个 MyBatis 的 Mapper
@Mapper
@Repository
public interface DepartmentMapper {

    // 获取所有部门信息
    List<Department> getDepartments();

    // 通过id获得部门
    Department getDepartment(Integer id);

}
6、对应的Mapper映射文件
**Resources/mybatis/mapper/**DepartmentMapper.xml
<?xml version="1.0" encoding="UTF-8" ?>
<!DOCTYPE mapper
        PUBLIC "-//mybatis.org//DTD Mapper 3.0//EN"
        "http://mybatis.org/dtd/mybatis-3-mapper.dtd">

<mapper namespace="com.example.spring04.mapper.DepartmentMapper">

    <select id="getDepartments" resultType="Department">
        select * from department;
    </select>

    <select id="getDepartment" resultType="Department" parameterType="int">
        select * from department where id = #{id};
    </select>

</mapper>
7、在yml配置 配置文件路径(整合Mybatis)
spring:
  datasource:
    username: ssmbuild
    password: ssmbuild
    url: jdbc:mysql://localhost:3306/ssmbuild?useUnicode=true&characterEncoding=UTF-8&serverTimezone=UTC
    driver-class-name: com.mysql.jdbc.Driver
    type: com.alibaba.druid.pool.DruidDataSource
# 整合Mybatis
mybatis:
  type-aliases-package: com.example.spring04
  mapper-locations: classpath:mybatis/mapper/*.xml
8、maven配置资源过滤问题
pom.xml
<!--在build中配置resources,来防止我们资源导出失败的问题-->
<build>
    //...

    <resources>
        <resource>
            <directory>src/main/java</directory>
            <includes>
                <include>**/*.xml</include>
                <include>**/*.properties</include>
            </includes>
        </resource>

        <resource>
            <directory>src/main/resources</directory>
            <includes>
                <include>**/*.xml</include>
                <include>**/*.properties</include>
            </includes>
        </resource>
    </resources>
</build>
8、编写部门的 DepartmentController 进行测试
package com.example.spring04.controller;
import com.example.spring04.mapper.DepartmentMapper;
import com.example.spring04.pojo.Department;
import org.springframework.beans.factory.annotation.Autowired;
import org.springframework.web.bind.annotation.GetMapping;
import org.springframework.web.bind.annotation.PathVariable;
import org.springframework.web.bind.annotation.RestController;
import java.util.List;
@RestController
public class DepartmentController {
@Autowired
DepartmentMapper departmentMapper;
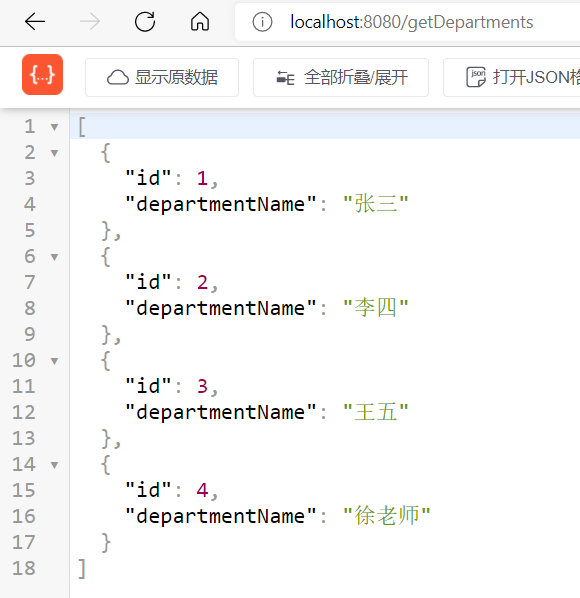
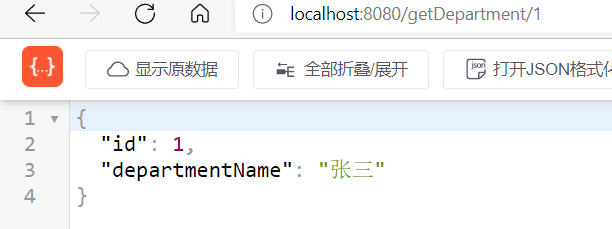
// 查询全部部门
@GetMapping("/getDepartments")
public List<Department> getDepartments(){
return departmentMapper.getDepartments();
}
// 查询全部部门
@GetMapping("/getDepartment/{id}")
public Department getDepartment(@PathVariable("id") Integer id){
return departmentMapper.getDepartment(id);
}
}
启动项目访问进行测试!
9.3.2 增删改查
- DepartmentMapper.java
package com.example.spring04.mapper;

import com.example.spring04.pojo.Department;
import org.apache.ibatis.annotations.Mapper;
import org.springframework.stereotype.Repository;

import java.util.List;

//@Mapper : 表示本类是一个 MyBatis 的 Mapper
@Mapper
@Repository
public interface DepartmentMapper {

    // 获取所有部门信息
    List<Department> getDepartments();

    // 通过id获得部门
    Department getDepartment(Integer id);

    // 增加部门
    Department addGept(String departmentName);

    // 删除部门
    Department delGept(Integer id);

    //更改部门
    Department upGept(Department department);
}
- DepartmentController.java
package com.example.spring04.controller;

import com.example.spring04.mapper.DepartmentMapper;
import com.example.spring04.pojo.Department;
import org.springframework.beans.factory.annotation.Autowired;
import org.springframework.web.bind.annotation.GetMapping;
import org.springframework.web.bind.annotation.PathVariable;
import org.springframework.web.bind.annotation.RestController;

import java.util.List;

@RestController
public class DepartmentController {

    @Autowired
    DepartmentMapper departmentMapper;

    // 查询全部部门
    @GetMapping("/getDepartments")
    public List<Department> getDepartments(){
        return departmentMapper.getDepartments();
    }

    // 查询全部部门
    @GetMapping("/getDepartment/{id}")
    public Department getDepartment(@PathVariable("id") Integer id){
        return departmentMapper.getDepartment(id);
    }

    // 增加部门
    @GetMapping("/addDept/{deptname}")
    public Department addGept(@PathVariable("deptname") String deptname){
        return departmentMapper.addGept(deptname);
    }

    // 删除部门
    @GetMapping("/delGept/{id}")
    public Department delGept(@PathVariable("id") Integer id){
        return departmentMapper.delGept(id);
    };

    //更改部门
    @GetMapping("/upGept/{id}/{deptname}")
    public Department upGept(@PathVariable("id") Integer id,@PathVariable("deptname") String deptname){
        return departmentMapper.upGept(new Department(id, deptname));
    };
}
- DepartmentMapper.xml
<?xml version="1.0" encoding="UTF-8" ?>
<!DOCTYPE mapper
        PUBLIC "-//mybatis.org//DTD Mapper 3.0//EN"
        "http://mybatis.org/dtd/mybatis-3-mapper.dtd">

<mapper namespace="com.example.spring04.mapper.DepartmentMapper">

    <select id="getDepartments" resultType="Department">
        select * from department;
    </select>

    <select id="getDepartment" resultType="Department" parameterType="int">
        select * from department where id = #{id};
    </select>

    <select id="addGept">
        insert into department (departmentName) value (#{deptname});
    </select>

    <select id="delGept">
        delete from department where id = #{id};
    </select>

    <select id="upGept" parameterType="com.example.spring04.pojo.Department" >
        update department
        set departmentName = #{departmentName}
        where id = #{id};
    </select>

</mapper>
10、安全框架SpringSecurity
10.1 准备
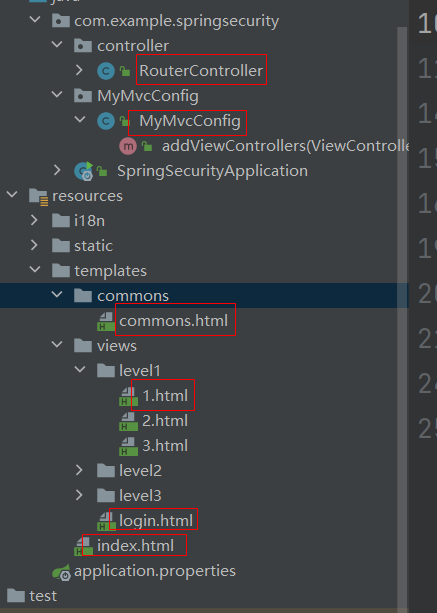
RouterController
package com.example.springsecurity.controller;

//导包...

@Controller
public class RouterController {

    @RequestMapping("/level1/{id}")
    public String level1(@PathVariable("id") int id){
        return "views/level1/"+id;
    }

    @RequestMapping("/level2/{id}")
    public String level2(@PathVariable("id") int id){
        return "views/level2/"+id;
    }

    @RequestMapping("/level3/{id}")
    public String level3(@PathVariable("id") int id){
        return "views/level3/"+id;
    }
}
MyMvcConfig
package com.example.springsecurity.MyMvcConfig;

//导包...

@Configuration
public class MyMvcConfig implements WebMvcConfigurer {
    @Override
    public void addViewControllers(ViewControllerRegistry registry) {
        registry.addViewController("/").setViewName("index");
        registry.addViewController("/index.html").setViewName("index");
        registry.addViewController("/login.html").setViewName("view/login");
    }
}
commons.html
<!doctype html>
<html lang="en" xmlns:th="http://www.thymeleaf.org">
<!--模板-->
<head th:fragment="head">
  <meta charset="utf-8">
  <meta name="viewport" content="width=device-width, initial-scale=1, shrink-to-fit=no">
  <meta name="description" content="">
  <meta name="author" content="">
  <link rel="icon" th:href="@{/image/favicon.ico}">

  <title>员工管理系统</title>

  <link rel="canonical" href="https://getbootstrap.com/docs/4.0/examples/dashboard/">

  <!-- Bootstrap core CSS -->
  <link th:href="@{/css/bootstrap.min.css}" rel="stylesheet">

  <!-- Custom styles for this template -->
  <link th:href="@{/css/dashboard.css}" rel="stylesheet">
</head>

<body>
<!-- 头部-->
<nav class="navbar navbar-dark sticky-top bg-dark flex-md-nowrap p-0" th:fragment="navbar">
  <a class="navbar-brand col-sm-3 col-md-2 mr-0" href="#">[[${session.loginUser}]]</a>
  <input class="form-control form-control-dark w-100" type="text" placeholder="Search" aria-label="Search">
  <ul class="navbar-nav px-3">
    <li class="nav-item text-nowrap">
      <a class="nav-link" th:href="@{/user/logout}">注销</a>
    </li>
  </ul>
</nav>

<div class="container-fluid">
  <div class="row">
    <!--侧边框-->
    <nav class="col-md-2 d-none d-md-block bg-light sidebar" th:fragment="sidebar">
      <div class="sidebar-sticky">
        <ul class="nav flex-column">
          <li class="nav-item">
            <a th:class="${active=='main.html'?'nav-link active':'nav-link'}" th:href="@{/main.html}">
              <span data-feather="home"></span>
              首页 <span class="sr-only">(current)</span>
            </a>
          </li>
          <li class="nav-item">
            <a class="nav-link" href="#">
              <span data-feather="file"></span>
              Orders
            </a>
          </li>
          <li class="nav-item">
            <a class="nav-link" href="#">
              <span data-feather="shopping-cart"></span>
              Products
            </a>
          </li>
          <li class="nav-item">
            <a th:class="${active=='list.html'?'nav-link active':'nav-link'}" th:href="@{/emps}">
              <span data-feather="users"></span>
              员工管理
            </a>
          </li>
          <li class="nav-item">
            <a class="nav-link" href="#">
              <span data-feather="bar-chart-2"></span>
              Reports
            </a>
          </li>
          <li class="nav-item">
            <a class="nav-link" href="#">
              <span data-feather="layers"></span>
              Integrations
            </a>
          </li>
        </ul>

        <h6 class="sidebar-heading d-flex justify-content-between align-items-center px-3 mt-4 mb-1 text-muted">
          <span>Saved reports</span>
          <a class="d-flex align-items-center text-muted" href="#">
            <span data-feather="plus-circle"></span>
          </a>
        </h6>
        <ul class="nav flex-column mb-2">
          <li class="nav-item">
            <a class="nav-link" href="#">
              <span data-feather="file-text"></span>
              Current month
            </a>
          </li>
          <li class="nav-item">
            <a class="nav-link" href="#">
              <span data-feather="file-text"></span>
              Last quarter
            </a>
          </li>
          <li class="nav-item">
            <a class="nav-link" href="#">
              <span data-feather="file-text"></span>
              Social engagement
            </a>
          </li>
          <li class="nav-item">
            <a class="nav-link" href="#">
              <span data-feather="file-text"></span>
              Year-end sale
            </a>
          </li>
        </ul>
      </div>
    </nav>
  </div>
</div>

<div th:fragment="js">
  <script th:href="@{/js/jquery-3.2.1.slim.min.js}"
          integrity="sha384-KJ3o2DKtIkvYIK3UENzmM7KCkRr/rE9/Qpg6aAZGJwFDMVNA/GpGFF93hXpG5KkN"
          crossorigin="anonymous"></script>
  <script>window.jQuery || document.write('<script src="../../assets/js/vendor/jquery-slim.min.js"><\/script>')</script>
  <script th:href="@{/js/popper.min.js}"></script>
  <script th:href="@{/js/bootstrap.min.js}"></script>

  <!-- Icons -->
  <script src="https://unpkg.com/feather-icons/dist/feather.min.js"></script>
  <script>
    feather.replace()
  </script>
</div>
</body>
</html>
1.html 和 index.html
<!doctype html>
<html lang="en" xmlns:th="http://www.thymeleaf.org">
<head th:replace="~{commons/commons::head}"></head>

<body>
<!--头部-->
<nav th:replace="~{commons/commons::navbar}"></nav>

<div class="container-fluid">
    <div class="row">
        <!-- 侧边框-->
        <nav th:replace="~{commons/commons::sidebar(active='main.html')}"></nav>

        <main role="main" class="col-md-9 ml-sm-auto col-lg-10 pt-3 px-4">
            <!-- 内容区 -->
            <h1>L1-1</h1>
        </main>
    </div>
</div>

<div th:replace="~{commons/commons::js}"></div>

</body>
</html>
login.html
<!doctype html>
<html lang="en" xmlns:th="http://www.thymeleaf.org">
<head>
<meta charset="utf-8">
<meta name="viewport" content="width=device-width, initial-scale=1, shrink-to-fit=no">
<meta name="description" content="">
<meta name="author" content="">
<link rel="icon" th:href="@{/image/favicon.ico}">
<title>员工管理系统</title>
<link rel="canonical" href="https://getbootstrap.com/docs/4.0/examples/sign-in/">
<!-- Bootstrap core CSS -->
<link th:href="@{/css/bootstrap.min.css}" rel="stylesheet">
<!-- Custom styles for this template -->
<link th:href="@{/css/signin.css}">
</head>
<body class="text-center">
<div class="text-center" style="margin:8% auto;width: 20%;">
<form class="form-signin" th:action="@{/user/login}">
<img class="mb-4" th:src="@{/image/笔记本电脑.svg}" alt="" width="72" height="72">
<h1 class="h3 mb-3 font-weight-normal" th:text="#{login.tip}">Please sign in</h1>
<p style="color: red" th:text="${msg}" th:if="${not #strings.isEmpty(msg)}"></p>
<input type="text" id="inputEmail" class="form-control" placeholder="Username" name="username"
th:placeholder="#{login.username}" required autofocus>
<input type="password" id="inputPassword" class="form-control" placeholder="Password" name="password"
th:placeholder="#{login.password}" required>
<div class="checkbox mb-3">
<label>
<input type="checkbox" value="remember-me" th:text="#{login.remember}">
</label>
</div>
<button class="btn btn-lg btn-primary btn-block" type="submit" th:text="#{login.btn}">Sign in</button>
<p class="mt-5 mb-3 text-muted">© 2017-2018</p>
<!-- 这里传入参数不需要使用 ?使用 (key=value)-->
<a class="btn btn-sm" th:href="@{/index.html(l='zh_CN')}">中文</a>
<a class="btn btn-sm" th:href="@{/index.html(l='en_US')}">English</a>
</form>
</div>
</body>
</html>
10.2 安全简介
在 Web 开发中,安全一直是非常重要的一个方面。安全虽然属于应用的非功能性需求,但是应该在应用开发的初期就考虑进来。如果在应用开发的后期才考虑安全的问题,就可能陷入一个两难的境地:一方面,应用存在严重的安全漏洞,无法满足用户的要求,并可能造成用户的隐私数据被攻击者窃取;另一方面,应用的基本架构已经确定,要修复安全漏洞,可能需要对系统的架构做出比较重大的调整,因而需要更多的开发时间,影响应用的发布进程。因此,从应用开发的第一天就应该把安全相关的因素考虑进来,并在整个应用的开发过程中。
安全框架 shiro、SpringSecurity(两者很像)
Spring Security是一个功能强大且高度可定制的身份验证和访问控制框架。它实际上是保护基于spring的应用程序的标准。
Spring Security是一个框架,侧重于为Java应用程序提供身份验证和授权。与所有Spring项目一样,Spring安全性的真正强大之处在于它可以轻松地扩展以满足定制需求
Spring Security 是针对Spring项目的安全框架,也是Spring Boot底层安全模块默认的技术选型,他可以实现强大的Web安全控制,对于安全控制,我们仅需要引入 spring-boot-starter-security 模块,进行少量的配置,即可实现强大的安全管理!
记住几个类:
- WebSecurityConfigurerAdapter:自定义Security策略
- AuthenticationManagerBuilder:自定义认证策略
- @EnableWebSecurity:开启WebSecurity模式
Spring Security的两个主要目标是 “认证” 和 “授权”(访问控制)。
“认证”(Authentication)
身份验证是关于验证您的凭据,如用户名/用户ID和密码,以验证您的身份。
身份验证通常通过用户名和密码完成,有时与身份验证因素结合使用。
“授权” (Authorization)
授权发生在系统成功验证您的身份后,最终会授予您访问资源(如信息,文件,数据库,资金,位置,几乎任何内容)的完全权限。
这个概念是通用的,而不是只在Spring Security 中存在。
10.3 认证和授权
目前,我们的测试环境,是谁都可以访问的,我们使用 Spring Security 增加上认证和授权的功能
1、引入 Spring Security 模块
<dependency>
   <groupId>org.springframework.boot</groupId>
   <artifactId>spring-boot-starter-security</artifactId>
</dependency>
2、编写 Spring Security 配置类
参考官网:https://spring.io/projects/spring-security
查看我们自己项目中的版本,找到对应的帮助文档:
https://docs.spring.io/spring-security/site/docs/5.3.0.RELEASE/reference/html5 #servlet-applications 8.16.4
3、编写基础配置类
package com.example.springsecurity.config;

import org.springframework.security.config.annotation.web.builders.HttpSecurity;
import org.springframework.security.config.annotation.web.configuration.EnableWebSecurity;
import org.springframework.security.config.annotation.web.configuration.WebSecurityConfigurerAdapter;

@EnableWebSecurity // 开启WebSecurity模式
public class SecurityConfig extends WebSecurityConfigurerAdapter {

    @Override
    protected void configure(HttpSecurity http) throws Exception {

    }
}
4、定制请求的授权规则
//授权
@EnableWebSecurity // 开启WebSecurity模式
public class SecurityConfig extends WebSecurityConfigurerAdapter {

    @Override
    protected void configure(HttpSecurity http) throws Exception {
        // 定制请求的授权规则
        // 首页所有人可以访问
        http.authorizeRequests().antMatchers("/").permitAll()
                .antMatchers("/level1/**").hasRole("vip1")
                .antMatchers("/level2/**").hasRole("vip2")
                .antMatchers("/level3/**").hasRole("vip3");
    }
}
5、测试一下:发现除了首页都进不去了!因为我们目前没有登录的角色,因为请求需要登录的角色拥有对应的权限才可以!
6、在configure()方法中加入以下配置,开启自动配置的登录功能!
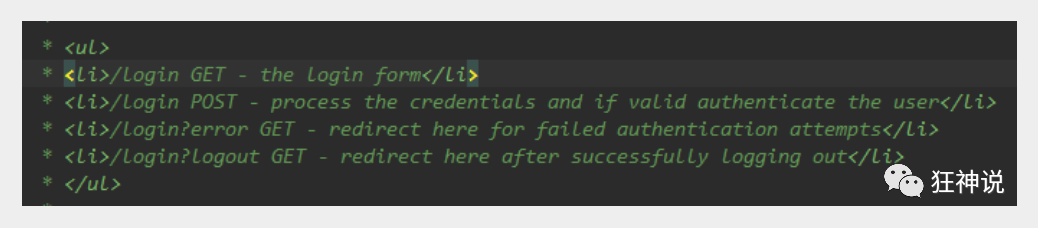
// 开启自动配置的登录功能
// /login 请求来到登录页
// /login?error 重定向到这里表示登录失败
http.formLogin();
7、测试一下:发现,没有权限的时候,会跳转到登录的页面!
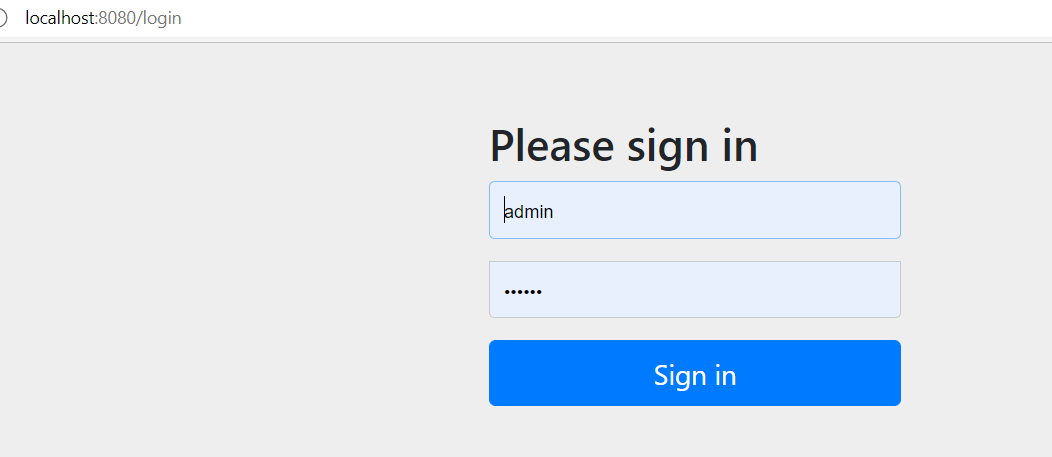
8、查看刚才登录页的注释信息;
我们可以定义认证规则,重写configure(AuthenticationManagerBuilder auth)方法
//定义认证规则
@Override
protected void configure(AuthenticationManagerBuilder auth) throws Exception {
//在内存中定义,也可以在jdbc中去拿....
    auth.inMemoryAuthentication()
        .withUser("admin").password("123456").roles("vip1","vip2","vip3")
        .and().withUser("张三").password("123").roles("vip2")
        .and().withUser("李四").password("123").roles("vip1");

}
9、测试,我们可以使用这些账号登录进行测试!发现会报错!
There is no PasswordEncoder mapped for the id “null”
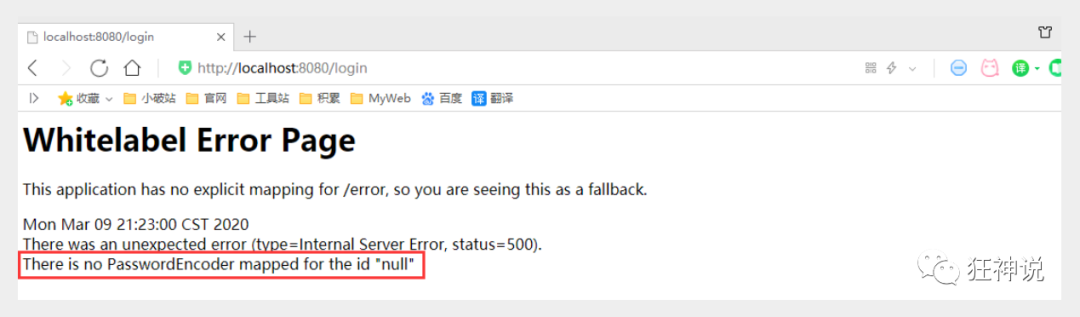
10、原因,我们要将前端传过来的密码进行某种方式加密,否则就无法登录,修改代码
//认证
@Override
protected void configure(AuthenticationManagerBuilder auth) throws Exception {
    //在内存中定义,也可以在jdbc中去拿....
    //Spring security 5.0中新增了多种加密方式,也改变了密码的格式。
    //要想我们的项目还能够正常登陆,需要修改一下configure中的代码。我们要将前端传过来的密码进行某种方式加密
    //spring security 官方推荐的是使用bcrypt加密方式。

    auth.inMemoryAuthentication().passwordEncoder(new BCryptPasswordEncoder())
        .withUser("admin").password(new BCryptPasswordEncoder().encode("123456")).roles("vip1","vip2","vip3")
        .and().withUser("张三").password(new BCryptPasswordEncoder().encode("123456")).roles("vip2")
        .and().withUser("李四").password(new BCryptPasswordEncoder().encode("123456")).roles("vip1");

}
11、测试,发现,登录成功,并且每个角色只能访问自己认证下的规则!搞定
10.4 权限控制和注销
1、开启自动配置的注销的功能
//定制请求的授权规则
@Override
protected void configure(HttpSecurity http) throws Exception {
   //....
   //开启自动配置的注销的功能
   // `/logout` 注销请求
   http.logout();
}
2、我们在前端,增加一个注销的按钮,index.html 导航栏中
<a class="nav-link" th:href="@{/logout}">注销</a>
3、我们可以去测试一下,登录成功后点击注销,发现注销完毕会跳转到登录页面!
4、但是,我们想让他注销成功后,依旧可以跳转到首页,该怎么处理呢?
// .logoutSuccessUrl("/"); 注销成功来到首页
http.logout().logoutSuccessUrl("/");
5、测试,注销完毕后,发现跳转到首页OK
6、我们现在又来一个需求:用户没有登录的时候,导航栏上只显示登录按钮,用户登录之后,导航栏可以显示登录的用户信息及注销按钮!还有就是,比如kuangshen这个用户,**它只有 vip2,vip3功能,那么登录则只显示这两个功能,而vip1的功能菜单不显示!**这个就是真实的网站情况了!该如何做呢?
我们需要结合thymeleaf中的一些功能
sec:authorize="isAuthenticated()":是否认证登录!来显示不同的页面
Maven依赖:
<!-- https://mvnrepository.com/artifact/org.thymeleaf.extras/thymeleaf-extras-springsecurity4 -->
<dependency>
   <groupId>org.thymeleaf.extras</groupId>
   <artifactId>thymeleaf-extras-springsecurity5</artifactId>
   <version>3.0.4.RELEASE</version>
</dependency>
7、修改我们的 前端页面
-
导入命名空间
-
xmlns:sec="http://www.thymeleaf.org/thymeleaf-extras-springsecurity5" -
修改导航栏,增加认证判断
-
<!--登录注销-->
<div class="right menu">

   <!--如果未登录-->
   <div sec:authorize="!isAuthenticated()">
       <a class="item" th:href="@{/login}">
           <i class="address card icon"></i> 登录
       </a>
   </div>

   <!--如果已登录-->
   <div sec:authorize="isAuthenticated()">
       <a class="item">
           <i class="address card icon"></i>
          用户名:<span sec:authentication="principal.username"></span>
          角色:<span sec:authentication="principal.authorities"></span>
       </a>
   </div>

   <div sec:authorize="isAuthenticated()">
       <a class="item" th:href="@{/logout}">
           <i class="address card icon"></i> 注销
       </a>
   </div>
</div>
8、重启测试,我们可以登录试试看,登录成功后确实,显示了我们想要的页面;
9、如果注销404了,就是因为它默认防止csrf跨站请求伪造,因为会产生安全问题,我们可以将请求改为post表单提交,或者在spring security中关闭csrf功能;我们试试:在 配置中增加 http.csrf().disable();
http.csrf().disable();//关闭csrf功能:跨站请求伪造,默认只能通过post方式提交logout请求
http.logout().logoutSuccessUrl("/");
10、我们继续将下面的角色功能块认证完成!
<!-- sec:authorize="hasRole('vip1')" -->
<div class="column" sec:authorize="hasRole('vip1')">
   <div class="ui raised segment">
       <div class="ui">
           <div class="content">
               <h5 class="content">Level 1</h5>
               <hr>
               <div><a th:href="@{/level1/1}"><i class="bullhorn icon"></i> Level-1-1</a></div>
               <div><a th:href="@{/level1/2}"><i class="bullhorn icon"></i> Level-1-2</a></div>
               <div><a th:href="@{/level1/3}"><i class="bullhorn icon"></i> Level-1-3</a></div>
           </div>
       </div>
   </div>
</div>

<div class="column" sec:authorize="hasRole('vip2')">
   <div class="ui raised segment">
       <div class="ui">
           <div class="content">
               <h5 class="content">Level 2</h5>
               <hr>
               <div><a th:href="@{/level2/1}"><i class="bullhorn icon"></i> Level-2-1</a></div>
               <div><a th:href="@{/level2/2}"><i class="bullhorn icon"></i> Level-2-2</a></div>
               <div><a th:href="@{/level2/3}"><i class="bullhorn icon"></i> Level-2-3</a></div>
           </div>
       </div>
   </div>
</div>

<div class="column" sec:authorize="hasRole('vip3')">
   <div class="ui raised segment">
       <div class="ui">
           <div class="content">
               <h5 class="content">Level 3</h5>
               <hr>
               <div><a th:href="@{/level3/1}"><i class="bullhorn icon"></i> Level-3-1</a></div>
               <div><a th:href="@{/level3/2}"><i class="bullhorn icon"></i> Level-3-2</a></div>
               <div><a th:href="@{/level3/3}"><i class="bullhorn icon"></i> Level-3-3</a></div>
           </div>
       </div>
   </div>
</div>
11、测试一下!
12、权限控制和注销搞定!
10.5 记住我
现在的情况,我们只要登录之后,关闭浏览器,再登录,就会让我们重新登录,但是很多网站的情况,就是有一个记住密码的功能,这个该如何实现呢?很简单
1、开启记住我功能
//定制请求的授权规则
@Override
protected void configure(HttpSecurity http) throws Exception {
//。。。。。。。。。。。
   //记住我
   http.rememberMe();
}
2、我们再次启动项目测试一下,发现登录页多了一个记住我功能,我们登录之后关闭 浏览器,然后重新打开浏览器访问,发现用户依旧存在!
思考:如何实现的呢?其实非常简单
我们可以查看浏览器的cookie

3、我们点击注销的时候,可以发现,spring security 帮我们自动删除了这个 cookie
 4、结论:登录成功后,将cookie发送给浏览器保存,以后登录带上这个cookie,只要通过检查就可以免登录了。如果点击注销,则会删除这个cookie,具体的原理我们在JavaWeb阶段都讲过了,这里就不在多说了!
10.6 定制登录页
现在这个登录页面都是spring security 默认的,怎么样可以使用我们自己写的Login界面呢?
1、在刚才的登录页配置后面指定 loginpage
http.formLogin().loginPage("/login.html");
2、然后前端也需要指向我们自己定义的 login请求
<li class="nav-item">
    <a th:href="@{/login.html}">
        <span data-feather="home"></span>
        登录 <span class="sr-only"></span>
    </a>
</li>
3、我们登录,需要将这些信息发送到哪里,我们也需要配置,login.html 配置提交请求及方式,方式必须为post:
在 loginPage()源码中的注释上有写明:
<!-- th:action="@{/login}" method="post" -->
<form class="form-signin" th:action="@{/login}" method="post">
<img class="mb-4" th:src="@{/image/笔记本电脑.svg}" alt="" width="72" height="72">
<h1 class="h3 mb-3 font-weight-normal" th:text="#{login.tip}">Please sign in</h1>
<p style="color: red" th:text="${msg}" th:if="${not #strings.isEmpty(msg)}"></p>
<input type="text" id="inputEmail" class="form-control" placeholder="Username" name="username"
th:placeholder="#{login.username}" required autofocus>
<input type="password" id="inputPassword" class="form-control" placeholder="Password" name="password"
th:placeholder="#{login.password}" required>
<div class="checkbox mb-3">
<label>
<input type="checkbox" value="remember-me" th:text="#{login.remember}">
</label>
</div>
<button class="btn btn-lg btn-primary btn-block" type="submit" th:text="#{login.btn}">Sign in</button>
<p class="mt-5 mb-3 text-muted">© 2017-2018</p>
<!-- 这里传入参数不需要使用 ?使用 (key=value)-->
<a class="btn btn-sm" th:href="@{/index.html(l='zh_CN')}">中文</a>
<a class="btn btn-sm" th:href="@{/index.html(l='en_US')}">English</a>
</form>
4、这个请求提交上来,我们还需要验证处理,怎么做呢?我们可以查看formLogin()方法的源码!我们配置接收登录的用户名和密码的参数!
http.formLogin()
  .usernameParameter("username")
  .passwordParameter("password")
  .loginPage("/login.html")
  .loginProcessingUrl("/login"); // 登陆表单提交请求
5、在登录页增加记住我的多选框
<input type="checkbox" name="remember"> 记住我
6、后端验证处理!
//定制记住我的参数!
http.rememberMe().rememberMeParameter("remember");
7、测试,OK
10.7 完整配置代码
package com.example.springsecurity.config;

import org.springframework.security.config.annotation.authentication.builders.AuthenticationManagerBuilder;
import org.springframework.security.config.annotation.web.builders.HttpSecurity;
import org.springframework.security.config.annotation.web.configuration.EnableWebSecurity;
import org.springframework.security.config.annotation.web.configuration.WebSecurityConfigurerAdapter;
import org.springframework.security.crypto.bcrypt.BCryptPasswordEncoder;

@EnableWebSecurity
public class SecurityConfig extends WebSecurityConfigurerAdapter {

   //定制请求的授权规则
   @Override
   protected void configure(HttpSecurity http) throws Exception {

       http.authorizeRequests()
           .antMatchers("/").permitAll()
      	.antMatchers("/level1/**").hasRole("vip1")
      	.antMatchers("/level2/**").hasRole("vip2")
      	.antMatchers("/level3/**").hasRole("vip3");


       //开启自动配置的登录功能:如果没有权限,就会跳转到登录页面!
           // /login 请求来到登录页
           // /login?error 重定向到这里表示登录失败
       http.formLogin()
          .usernameParameter("username")
          .passwordParameter("password")
          .loginPage("/login.html")
          .loginProcessingUrl("/login"); // 登陆表单提交请求

       //开启自动配置的注销的功能
           // /logout 注销请求
           // .logoutSuccessUrl("/"); 注销成功来到首页

       http.csrf().disable();//关闭csrf功能:跨站请求伪造,默认只能通过post方式提交logout请求
       http.logout().logoutSuccessUrl("/");

       //记住我
       http.rememberMe().rememberMeParameter("remember");
  }

   //认证
    @Override
    protected void configure(AuthenticationManagerBuilder auth) throws Exception {
        //在内存中定义,也可以在jdbc中去拿....
        //Spring security 5.0中新增了多种加密方式,也改变了密码的格式。
        //要想我们的项目还能够正常登陆,需要修改一下configure中的代码。我们要将前端传过来的密码进行某种方式加密
        //spring security 官方推荐的是使用bcrypt加密方式。

        auth.inMemoryAuthentication().passwordEncoder(new BCryptPasswordEncoder())
                .withUser("admin").password(new BCryptPasswordEncoder().encode("123456")).roles("vip1","vip2","vip3")
                .and().withUser("张三").password(new BCryptPasswordEncoder().encode("123456")).roles("vip2")
                .and().withUser("李四").password(new BCryptPasswordEncoder().encode("123456")).roles("vip1");

    }
}
11、安全框架 shiro
11.1 了解 shiro
安全框架 shiro、SpringSecurity(两者很像)
Apache Shiro | Simple. Java. Security.
GitHub – apache/shiro: Apache Shiro
Shiro官网下载jar包 – 金玉良猿 – 博客园 (cnblogs.com)
1、创建普通的Maven 项目
2、导包
<dependencies>
    <!-- https://mvnrepository.com/artifact/org.apache.shiro/shiro-core -->
    <dependency>
        <groupId>org.apache.shiro</groupId>
        <artifactId>shiro-core</artifactId>
        <version>1.4.1</version>
    </dependency>

    <!-- https://mvnrepository.com/artifact/org.slf4j/slf4j-log4j12 -->
    <dependency>
        <groupId>org.slf4j</groupId>
        <artifactId>slf4j-log4j12</artifactId>
        <version>1.7.21</version>
    </dependency>

    <!-- https://mvnrepository.com/artifact/org.slf4j/jcl-over-slf4j -->
    <dependency>
        <groupId>org.slf4j</groupId>
        <artifactId>jcl-over-slf4j</artifactId>
        <version>1.7.21</version>
    </dependency>

    <dependency>
        <groupId>log4j</groupId>
        <artifactId>log4j</artifactId>
        <version>1.2.17</version>
    </dependency>

</dependencies>
- 配置
resources/log4j.properties
log4j.rootLogger=INFO, stdout

log4j.appender.stdout=org.apache.log4j.ConsoleAppender
log4j.appender.stdout.layout=org.apache.log4j.PatternLayout
log4j.appender.stdout.layout.ConversionPattern=%d %p [%c] - %m %n

# General Apache libraries
log4j.logger.org.apache=WARN

# Spring
log4j.logger.org.springframework=WARN

# Default Shiro logging
log4j.logger.org.apache.shiro=INFO

# Disable verbose logging
log4j.logger.org.apache.shiro.util.ThreadContext=WARN
log4j.logger.org.apache.shiro.cache.ehcache.EhCache=WARN
resources/shiro.ini
#...
# -----------------------------------------------------------------------------
[users]
# user 'root' with password 'secret' and the 'admin' role
root = secret, admin
# user 'guest' with the password 'guest' and the 'guest' role
guest = guest, guest
# user 'presidentskroob' with password '12345' ("That's the same combination on
# my luggage!!!" ;)), and role 'president'
presidentskroob = 12345, president
# user 'darkhelmet' with password 'ludicrousspeed' and roles 'darklord' and 'schwartz'
darkhelmet = ludicrousspeed, darklord, schwartz
# user 'lonestarr' with password 'vespa' and roles 'goodguy' and 'schwartz'
lonestarr = vespa, goodguy, schwartz

# -----------------------------------------------------------------------------
# Roles with assigned permissions
#
# Each line conforms to the format defined in the
# org.apache.shiro.realm.text.TextConfigurationRealm#setRoleDefinitions JavaDoc
# -----------------------------------------------------------------------------
[roles]
# 'admin' role has all permissions, indicated by the wildcard '*'
admin = *
# The 'schwartz' role can do anything (*) with any lightsaber:
schwartz = lightsaber:*
# The 'goodguy' role is allowed to 'drive' (action) the winnebago (type) with
# license plate 'eagle5' (instance specific id)
goodguy = winnebago:drive:eagle5
4.Quickstart.java
import org.apache.shiro.SecurityUtils;
import org.apache.shiro.authc.*;
import org.apache.shiro.config.IniSecurityManagerFactory;
import org.apache.shiro.mgt.SecurityManager;
import org.apache.shiro.session.Session;
import org.apache.shiro.subject.Subject;
import org.apache.shiro.util.Factory;
import org.slf4j.Logger;
import org.slf4j.LoggerFactory;

public class Quickstart {

    private static final transient Logger log = LoggerFactory.getLogger(Quickstart.class);


    public static void main(String[] args) {
        Factory<SecurityManager> factory = new IniSecurityManagerFactory("classpath:shiro.ini");
        SecurityManager securityManager = factory.getInstance();
        SecurityUtils.setSecurityManager(securityManager);


        //Subject 对象
        Subject currentUser = SecurityUtils.getSubject();

        //Session
        Session session = currentUser.getSession();
        session.setAttribute("someKey", "aValue");
        String value = (String) session.getAttribute("someKey");
        if (value.equals("aValue")) {
            log.info("Retrieved the correct value! [" + value + "]");
        }

        // 判断当前用户是否被认证
        if (!currentUser.isAuthenticated()) {
            //令牌 Token
            UsernamePasswordToken token = new UsernamePasswordToken("lonestarr", "vespa");
            token.setRememberMe(true);//设置记住我

            try {
                currentUser.login(token);//执行登录操作
            } catch (UnknownAccountException uae) {
                log.info("There is no user with username of " + token.getPrincipal());
            } catch (IncorrectCredentialsException ice) {
                log.info("Password for account " + token.getPrincipal() + " was incorrect!");
            } catch (LockedAccountException lae) {
                log.info("The account for username " + token.getPrincipal() + " is locked.  " +
                        "Please contact your administrator to unlock it.");
            }
            // ... 这里捕获更多异常(也许是特定于您的应用程序的定制异常?
            catch (AuthenticationException ae) {
                //意想不到的条件?错误呢?
            }
        }

        //获得当前用户的认证
        log.info("User [" + currentUser.getPrincipal() + "] logged in successfully.");

        //test a role:
        if (currentUser.hasRole("schwartz")) {
            log.info("May the Schwartz be with you!");
        } else {
            log.info("Hello, mere mortal.");
        }

        //test a typed permission (not instance-level)
        //测试类型化权限(而不是实例级)
        if (currentUser.isPermitted("lightsaber:wield")) {
            log.info("You may use a lightsaber ring.  Use it wisely.");
        } else {
            log.info("Sorry, lightsaber rings are for schwartz masters only.");
        }

        //a (very powerful) Instance Level permission:
        if (currentUser.isPermitted("winnebago:drive:eagle5")) {
            log.info("You are permitted to 'drive' the winnebago with license plate (id) 'eagle5'.  " +
                    "Here are the keys - have fun!");
        } else {
            log.info("Sorry, you aren't allowed to drive the 'eagle5' winnebago!");
        }

        //all done - log out!
        currentUser.logout();

        System.exit(0);
    }
}
2022-01-19 10:16:20,639 INFO [org.apache.shiro.session.mgt.AbstractValidatingSessionManager] - Enabling session validation scheduler...
2022-01-19 10:16:21,209 INFO [Quickstart] - Retrieved the correct value! [aValue]
2022-01-19 10:16:21,211 INFO [Quickstart] - User [lonestarr] logged in successfully.
2022-01-19 10:16:21,211 INFO [Quickstart] - May the Schwartz be with you!
2022-01-19 10:16:21,211 INFO [Quickstart] - You may use a lightsaber ring.  Use it wisely.
2022-01-19 10:16:21,211 INFO [Quickstart] - You are permitted to 'drive' the winnebago with license plate (id) 'eagle5'.  Here are the keys - have fun!
11.2 SpringBoot整合Shiro环境
1、创建SpringBoot 项目
MyController
package com.example.shiro.controller;

//...
@Controller
public class MyController {

    @RequestMapping({"/","/index.html"})
    public String index(Model model){
        model.addAttribute("msg","Hello Shiro");
        return "index";
    }
}
index.html
<!DOCTYPE html>
<html lang="en" xmlns:th="http://www.thymeleaf.org">
<head>
    <meta charset="UTF-8">
    <title>Title</title>
</head>
<body>
<h1 th:text="${msg}"></h1>
</body>
</html>
2、导包
<dependency>
    <groupId>org.apache.shiro</groupId>
    <artifactId>shiro-spring</artifactId>
    <version>1.4.1</version>
</dependency>
3、配置
ShiroConfig
package com.example.shiro.config;

//...

@Configuration
public class ShiroConfig  {
    //    第3步
    //ShiroFilterFactoryBean
    @Bean
    public ShiroFilterFactoryBean getShiroFilterFactoryBean(@Qualifier("securityManager") DefaultWebSecurityManager securityManager){
        ShiroFilterFactoryBean bean = new ShiroFilterFactoryBean();
        bean.setSecurityManager(securityManager);

        return bean;
    }

    //    第2步
    //DefaultWebSecurityManager
    @Bean(name="securityManager")
    public DefaultWebSecurityManager getDefaultWebSecurityManager(@Qualifier("userRealm") UserRealm userRealm){
        DefaultWebSecurityManager securityManager = new DefaultWebSecurityManager();
        //关联userRealm
        securityManager.setRealm(userRealm);
        return securityManager;
    }

    //    第1步
    // 创建Realm 对象 ,需要自定义类
    @Bean(name="userRealm")
    public UserRealm userRealm(){
        return new UserRealm();
    }

}
UserRealm
package com.example.shiro.config;

import org.apache.shiro.authc.AuthenticationException;
import org.apache.shiro.authc.AuthenticationInfo;
import org.apache.shiro.authc.AuthenticationToken;
import org.apache.shiro.authz.AuthorizationInfo;
import org.apache.shiro.realm.AuthorizingRealm;
import org.apache.shiro.spring.web.ShiroFilterFactoryBean;
import org.apache.shiro.subject.PrincipalCollection;

public class UserRealm extends AuthorizingRealm{

    //授权
    @Override
    protected AuthorizationInfo doGetAuthorizationInfo(PrincipalCollection principalCollection) {
        System.out.println("执行 授权");
        return null;
    }

    //认证
    @Override
    protected AuthenticationInfo doGetAuthenticationInfo(AuthenticationToken authenticationToken) throws AuthenticationException {
        System.out.println("执行 认证");
        return null;
    }
}
11.3 Shiro实现登录拦截
login.html
<!doctype html>
<html lang="en" xmlns:th="http://www.thymeleaf.org" xmlns:sec="http://www.thymeleaf.org/thymeleaf-extras-springsecurity5">
<head>
<meta charset="utf-8">
<meta name="viewport" content="width=device-width, initial-scale=1, shrink-to-fit=no">
<meta name="description" content="">
<meta name="author" content="">
<link rel="icon" th:href="@{/image/favicon.ico}">
<title>员工管理系统</title>
<link rel="canonical" href="https://getbootstrap.com/docs/4.0/examples/sign-in/">
<!-- Bootstrap core CSS -->
<link th:href="@{/css/bootstrap.min.css}" rel="stylesheet">
<!-- Custom styles for this template -->
<link th:href="@{/css/signin.css}">
</head>
<body class="text-center">
<div class="text-center" style="margin:8% auto;width: 20%;">
<form class="form-signin" th:action="@{/login}" method="post">
<img class="mb-4" th:src="@{/image/笔记本电脑.svg}" alt="" width="72" height="72">
<h1 class="h3 mb-3 font-weight-normal" th:text="#{login.tip}">Please sign in</h1>
<p style="color: red" th:text="${msg}" th:if="${not #strings.isEmpty(msg)}"></p>
<input type="text" class="form-control" placeholder="username" name="username"
th:placeholder="#{login.username}" required autofocus>
<input type="password" class="form-control" placeholder="password" name="password"
th:placeholder="#{login.password}" required>
<div class="checkbox mb-3">
<label>
<input type="checkbox" value="remember-me" name="remember" th:text="#{login.remember}">
</label>
</div>
<button class="btn btn-lg btn-primary btn-block" type="submit" th:text="#{login.btn}">Sign in</button>
<p class="mt-5 mb-3 text-muted">© 2017-2018</p>
</form>
</div>
</body>
</html>
ShiroConfig
@Configuration
public class ShiroConfig  {
    //    第3步
    //ShiroFilterFactoryBean
    @Bean
    public ShiroFilterFactoryBean getShiroFilterFactoryBean(@Qualifier("securityManager") DefaultWebSecurityManager securityManager){
        ShiroFilterFactoryBean bean = new ShiroFilterFactoryBean();
        bean.setSecurityManager(securityManager);

//  添加shiro的内置过滤器
//      anon:无需认证就能访问
//      authc:必须认证才能访问
//      user:必须 `记住我` 才能用
//      perms: 拥有对某个资源的权限才能访问
//        role: 拥有某个角色
        Map<String,String> filterMap = new LinkedHashMap<>();
        filterMap.put("/user/add","authc");
        filterMap.put("/user/updata","authc");

        bean.setFilterChainDefinitionMap(filterMap);

        //设置登录页面,如果未认证则跳转到登录页面
        bean.setLoginUrl("/toLogin");

        return bean;
    }
    //......
11.4 Shiro实现用户认证
package com.example.shiro.controller;
//...
@Controller
public class MyController {
//...
@RequestMapping("/toLogin")
public String login(Model model){
return "/login";
}
// 注意 username , password 需与 输入 name 一致
@RequestMapping("/login")
public String login(String username, String password,Model model){
//获得当前用户
Subject subject = SecurityUtils.getSubject();
//封装用户登录数据
UsernamePasswordToken token = new UsernamePasswordToken(username,password);
try{
//执行登录方法
subject.login(token);
return "index";
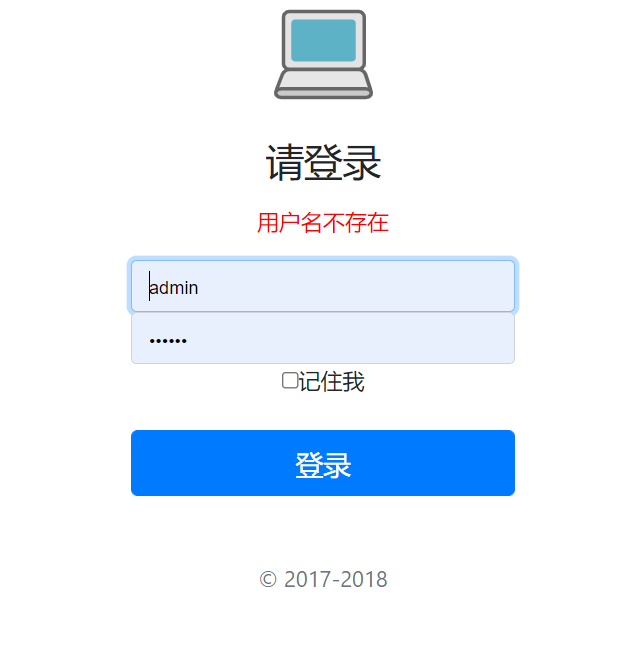
}catch (UnknownAccountException e){
//用户名不存在
model.addAttribute("msg","用户名不存在");
return "login";
}catch (IncorrectCredentialsException e){
//密码错误
model.addAttribute("msg","密码错误");
return "login";
}catch (AuthenticationException e){
//密码错误
model.addAttribute("msg","登录失败");
return "login";
}
}
- 配置 一个 用户
package com.example.shiro.config;

//...

public class UserRealm extends AuthorizingRealm{

    //授权
    @Override
    protected AuthorizationInfo doGetAuthorizationInfo(PrincipalCollection principalCollection) {
        System.out.println("执行 授权");
        return null;
    }

    //认证
    @Override
    protected AuthenticationInfo doGetAuthenticationInfo(AuthenticationToken token) throws AuthenticationException {
        System.out.println("执行 认证");
        String username = "admin";
        String password = "123456";

        UsernamePasswordToken userToken = (UsernamePasswordToken) token;
        if(!userToken.getUsername().equals(username)){
            return null;
        }

        return new SimpleAuthenticationInfo("",password,"");
    }
}
登录成功
11.5 Shiro整合Mybatis
11.5.1 配置Mybatis
1、导入 MyBatis 所需要的依赖
<dependency>
    <groupId>org.projectlombok</groupId>
    <artifactId>lombok</artifactId>
    <version>1.18.20</version>

<dependency>
    <groupId>com.alibaba</groupId>
    <artifactId>druid</artifactId>
    <version>1.1.21</version>
</dependency>

<dependency>
    <groupId>log4j</groupId>
    <artifactId>log4j</artifactId>
    <version>1.2.17</version>
</dependency>

<dependency>
    <groupId>mysql</groupId>
    <artifactId>mysql-connector-java</artifactId>
</dependency>
2、配置数据库连接信息(不变) 配置application.yaml(yml)文件
# 整合Mybatis
mybatis:
  type-aliases-package: com.example.shiro
  mapper-locations: classpath:mybatis/mapper/*.xml
spring:
  datasource:
    username: ssmbuild
    password: ssmbuild
    #?serverTimezone=UTC解决时区的报错
    url: jdbc:mysql://localhost:3306/ssmbuild?serverTimezone=UTC&useUnicode=true&characterEncoding=utf-8
    driver-class-name: com.mysql.cj.jdbc.Driver
    type: com.alibaba.druid.pool.DruidDataSource

    #Spring Boot 默认是不注入这些属性值的,需要自己绑定
    #druid 数据源专有配置
    initialSize: 5
    minIdle: 5
    maxActive: 20
    maxWait: 60000
    timeBetweenEvictionRunsMillis: 60000
    minEvictableIdleTimeMillis: 300000
    validationQuery: SELECT 1 FROM DUAL
    testWhileIdle: true
    testOnBorrow: false
    testOnReturn: false
    poolPreparedStatements: true

    #配置监控统计拦截的filters,stat:监控统计、log4j:日志记录、wall:防御sql注入
    #如果允许时报错  java.lang.ClassNotFoundException: org.apache.log4j.Priority
    #则导入 log4j 依赖即可,Maven 地址:https://mvnrepository.com/artifact/log4j/log4j
    filters: stat,wall,log4j
    maxPoolPreparedStatementPerConnectionSize: 20
    useGlobalDataSourceStat: true
    connectionProperties: druid.stat.mergeSql=true;druid.stat.slowSqlMillis=500
3、准备数据库数据,测试数据库是否连接成功!
CREATE TABLE `ssmbuild`.`User` ( `id` INT NOT NULL AUTO_INCREMENT , `name` VARCHAR(225) NOT NULL , `pwd` VARCHAR(225) NOT NULL , PRIMARY KEY (`id`)) ENGINE = MyISAM;
INSERT INTO `User` (`id`, `name`, `pwd`) VALUES (NULL, 'admin', '123456'), (NULL, 'root', '123456');
4、编写实体类
User.java
package com.example.shiro.pojo;

import lombok.AllArgsConstructor;
import lombok.Data;
import lombok.NoArgsConstructor;

@Data
@AllArgsConstructor
@NoArgsConstructor
public class User {
    private int id;
    private String name;
    private String pwd;
}
5、编写Mapper 接口
UserMapper.java
package com.example.shiro.mapper;

import com.example.shiro.pojo.User;
import org.apache.ibatis.annotations.Mapper;
import org.springframework.stereotype.Repository;

@Repository
@Mapper
public interface UserMapper {

    public User queryUserByName(String name);
}
6、编写Mapper配置文件
resources\mybatis\mapper\UserMapper.xml
<?xml version="1.0" encoding="UTF-8" ?>
<!DOCTYPE mapper
        PUBLIC "-//mybatis.org//DTD Mapper 3.0//EN"
        "http://mybatis.org/dtd/mybatis-3-mapper.dtd">

<mapper namespace="com.example.shiro.mapper.UserMapper">

    <select id="queryUserByName" resultType="User" parameterType="String">
        select * from user where name = #{name};
    </select>

</mapper>
7、 Service层
UserService
package com.example.shiro.service;

import com.example.shiro.mapper.UserMapper;
import com.example.shiro.pojo.User;
import org.springframework.beans.factory.annotation.Autowired;
import org.springframework.stereotype.Service;

@Service
public class UserService implements UserMapper {

    @Autowired
    UserMapper userMapper;

    @Override
    public User queryUserByName(String name) {
        return userMapper.queryUserByName(name);
    }
}
8、 测试
package com.example.shiro;

//..

@SpringBootTest
class ApplicationTests {

    @Autowired
    UserService userService;

    @Test
    void contextLoads() {
        System.out.println(userService.queryUserByName("admin"));
    }

}
User(id=1, name=admin, pwd=123456)
11.5.2 Shiro整合Mybatis
package com.example.shiro.config;

//...

public class UserRealm extends AuthorizingRealm{

    @Autowired
    UserService userService;

    //授权
    @Override
    protected AuthorizationInfo doGetAuthorizationInfo(PrincipalCollection principalCollection) {
        System.out.println("执行 授权");
        return null;
    }

    //认证
    @Override
    protected AuthenticationInfo doGetAuthenticationInfo(AuthenticationToken token) throws AuthenticationException {
        System.out.println("执行 认证");

        UsernamePasswordToken userToken = (UsernamePasswordToken) token;

        User user = userService.queryUserByName(userToken.getUsername());
        if(user == null){
            return null;
        }

        return new SimpleAuthenticationInfo("",user.getPwd(),"");
    }

}
11.5.3 Shiro实现请求授权
1、添加权限控制
ShiroConfig
//...
@Configuration
public class ShiroConfig  {
    //    第3步
    //ShiroFilterFactoryBean
    @Bean
    public ShiroFilterFactoryBean getShiroFilterFactoryBean(@Qualifier("securityManager") DefaultWebSecurityManager securityManager){
        ShiroFilterFactoryBean bean = new ShiroFilterFactoryBean();
        bean.setSecurityManager(securityManager);

//  添加shiro的内置过滤器
//      anon:无需认证就能访问
//      authc:必须认证才能访问
//      user:必须 `记住我` 才能用
//      perms: 拥有对某个资源的权限才能访问
//        role: 拥有某个角色
        Map<String,String> filterMap = new LinkedHashMap<>();
        //添加权限控制
        filterMap.put("/user/add","perms[user:add]");
        filterMap.put("/user/updata","perms[user:updata]");

        bean.setFilterChainDefinitionMap(filterMap);

        //设置登录页面,如果未认证则跳转到登录页面
        bean.setLoginUrl("/toLogin");

        //设置未授权的页面
        bean.setUnauthorizedUrl("/noauth");

        return bean;
    }
//...
MyController
@RequestMapping("/noauth")
@ResponseBody
public String Unauthorized(){
    return "未授权无法访问此页面";
}
2、添加权限实例
UserRealm
package com.example.shiro.config;

//...

public class UserRealm extends AuthorizingRealm{

    @Autowired
    UserService userService;

    //授权
    @Override
    protected AuthorizationInfo doGetAuthorizationInfo(PrincipalCollection principalCollection) {
        System.out.println("执行 授权");
        //添加权限
        SimpleAuthorizationInfo info = new SimpleAuthorizationInfo();
        info.addStringPermission("user:add");

        return null;
    }

    //认证
    //...

}
3、数据库添加权限字段
alter table user add perms VARCHAR(100) null;
- 权限字段赋值
UPDATE `user` SET `perms` = 'user:add' WHERE `user`.`id` = 1;
UPDATE `user` SET `perms` = 'user:updata' WHERE `user`.`id` = 2;
4、修改User实体类
private String perms;
UserRealm
package com.example.shiro.config;

//...

public class UserRealm extends AuthorizingRealm{

    @Autowired
    UserService userService;

    //授权
    @Override
    protected AuthorizationInfo doGetAuthorizationInfo(PrincipalCollection principalCollection) {
        System.out.println("执行 授权");
        SimpleAuthorizationInfo info = new SimpleAuthorizationInfo();
//        info.addStringPermission("user:add");

        //拿到登录的对象
        Subject subject = SecurityUtils.getSubject();
        //从principal取出user
        User currentUser = (User) subject.getPrincipal();

        //从数据库取出 授权字段 并赋值
        info.addStringPermission(currentUser.getPerms());

        return info;
    }

    //认证
    @Override
    protected AuthenticationInfo doGetAuthenticationInfo(AuthenticationToken token) throws AuthenticationException {
        System.out.println("执行 认证");

        UsernamePasswordToken userToken = (UsernamePasswordToken) token;

        User user = userService.queryUserByName(userToken.getUsername());
        if(user == null){
            return null;
        }

        //将user存入 principal
        return new SimpleAuthenticationInfo(user,user.getPwd(),"");
    }

}
11.6 Shiro整合Thymeleaf
控制前端显示
1、导整合包
<dependency>
    <groupId>com.github.theborakompanioni</groupId>
    <artifactId>thymeleaf-extras-shiro</artifactId>
    <version>2.0.0</version>
</dependency>
2、配置
ShiroConfig
// ShiroDialect 整合Thymeleaf
@Bean
public ShiroDialect getShiroDialect(){
	return new ShiroDialect();
}
3、前端导入命名空间
<html xmlns:shiro="http://www.thymeleaf.org/thymeleaf-extras-shiro">
4、前端
12、鸡汤分析开源项目
项目地址:
GitHub – WinterChenS/my-site: springboot2.0开发的个人网站,集成了:个人首页,个人博客,个人作品
(70条消息) Base64Encoder和Base64Decoder无法使用解决办法_但行好事,莫问前程-CSDN博客
13、Swagger
学习目标:
- 了解Swagger的概念及作用
- 掌握在项目中集成Swagger自动生成API文档
14、任务
在我们的工作中,常常会用到异步处理任务,比如我们在网站上发送邮件,后台会去发送邮件,此时前台会造成响应不动,直到邮件发送完毕,响应才会成功,所以我们一般会采用多线程的方式去处理这些任务。还有一些定时任务,比如需要在每天凌晨的时候,分析一次前一天的日志信息。还有就是邮件的发送,微信的前身也是邮件服务呢?这些东西都是怎么实现的呢?其实SpringBoot都给我们提供了对应的支持,我们上手使用十分的简单,只需要开启一些注解支持,配置一些配置文件即可!那我们来看看吧~
14.1 异步任务
1、创建一个service包
2、创建一个类AsyncService
异步处理还是非常常用的,比如我们在网站上发送邮件,后台会去发送邮件,此时前台会造成响应不动,直到邮件发送完毕,响应才会成功,所以我们一般会采用多线程的方式去处理这些任务。
编写方法,假装正在处理数据,使用线程设置一些延时,模拟同步等待的情况;
AsyncService
package com.example.task.service;

import org.springframework.stereotype.Service;

@Service
public class AsyncService {

    public void hello(){
        try {
            Thread.sleep(3000);
        } catch (InterruptedException e) {
            e.printStackTrace();
        }
        System.out.println("业务进行中....");
    }
}
3、编写controller包
4、编写AsyncController类
我们去写一个Controller测试一下
package com.example.task.controller;

import com.example.task.service.AsyncService;
import org.springframework.beans.factory.annotation.Autowired;
import org.springframework.web.bind.annotation.GetMapping;
import org.springframework.web.bind.annotation.RestController;

@RestController
public class AsyncController {

    @Autowired
    AsyncService asyncService;

    @GetMapping("/hello")
    public String hello(){
        asyncService.hello();
        return "success";
    }

}
5、访问http://localhost:8080/hello进行测试,3秒后出现success,这是同步等待的情况。
问题:我们如果想让用户直接得到消息,就在后台使用多线程的方式进行处理即可,但是每次都需要自己手动去编写多线程的实现的话,太麻烦了,我们只需要用一个简单的办法,在我们的方法上加一个简单的注解即可,如下:
6、给hello方法添加@Async注解;
//告诉Spring这是一个异步方法
@Async
public void hello(){
   try {
       Thread.sleep(3000);
  } catch (InterruptedException e) {
       e.printStackTrace();
  }
   System.out.println("业务进行中....");
}
SpringBoot就会自己开一个线程池,进行调用!但是要让这个注解生效,我们还需要在主程序上添加一个注解@EnableAsync ,开启异步注解功能;
@EnableAsync //开启异步注解功能
@SpringBootApplication
public class SpringbootTaskApplication {

   public static void main(String[] args) {
       SpringApplication.run(SpringbootTaskApplication.class, args);
  }

}
7、重启测试,网页瞬间响应,后台代码依旧执行!
14.2 邮件任务
邮件发送,在我们的日常开发中,也非常的多,Springboot也帮我们做了支持
- 邮件发送需要引入spring-boot-start-mail
- SpringBoot 自动配置MailSenderAutoConfiguration
- 定义MailProperties内容,配置在application.yml中
- 自动装配JavaMailSender
- 测试邮件发送
测试:
1、引入pom依赖
<dependency>
   <groupId>org.springframework.boot</groupId>
   <artifactId>spring-boot-starter-mail</artifactId>
</dependency>
看它引入的依赖,可以看到 jakarta.mail
<dependency>
   <groupId>com.sun.mail</groupId>
   <artifactId>jakarta.mail</artifactId>
   <version>1.6.4</version>
   <scope>compile</scope>
</dependency>
2、查看自动配置类:MailSenderAutoConfiguration

这个类中存在bean,JavaMailSenderImpl

然后我们去看下配置文件
@ConfigurationProperties(
   prefix = "spring.mail"
)
public class MailProperties {
   private static final Charset DEFAULT_CHARSET;
   private String host;
   private Integer port;
   private String username;
   private String password;
   private String protocol = "smtp";
   private Charset defaultEncoding;
   private Map<String, String> properties;
   private String jndiName;
}
3、配置文件:
spring.mail.username=你的邮箱
spring.mail.password=你的qq授权码
spring.mail.host=smtp.qq.com
# qq需要配置ssl
spring.mail.properties.mail.smtp.ssl.enable=true
获取授权码:在QQ邮箱中的设置->账户->开启pop3和smtp服务
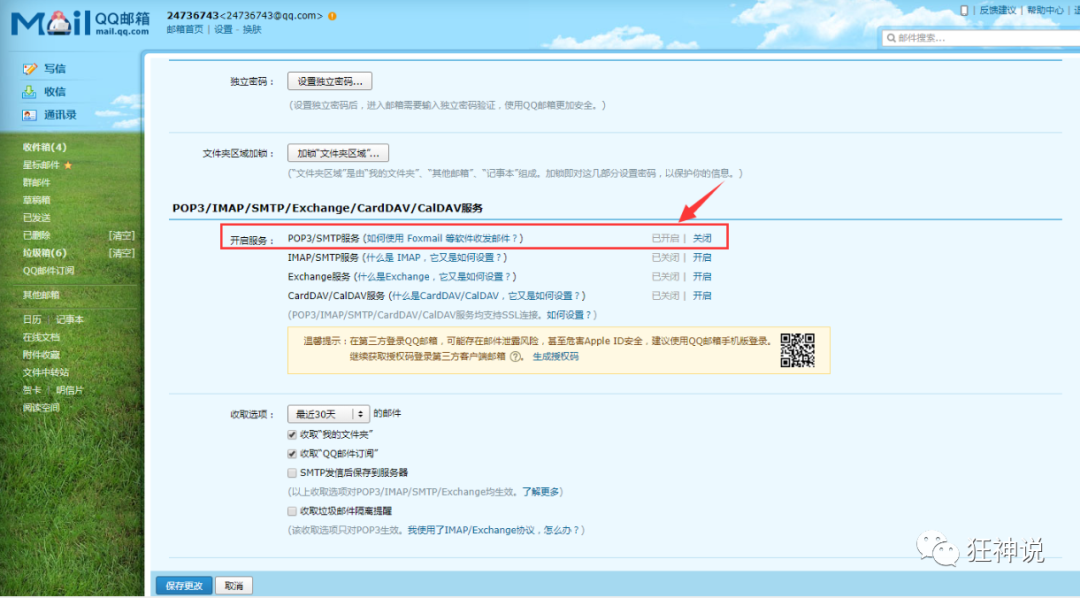

ftna walr fllf dggf
4、Spring单元测试
@Autowired
JavaMailSenderImpl mailSender;

@Test
public void contextLoads() {
   //邮件设置1:一个简单的邮件
   SimpleMailMessage message = new SimpleMailMessage();
   message.setSubject("通知-明天来狂神这听课");
   message.setText("今晚7:30开会");

   message.setTo("24736743@qq.com");
   message.setFrom("24736743@qq.com");
   mailSender.send(message);
}

@Test
public void contextLoads2() throws MessagingException {
   //邮件设置2:一个复杂的邮件
   MimeMessage mimeMessage = mailSender.createMimeMessage();
   MimeMessageHelper helper = new MimeMessageHelper(mimeMessage, true);

   helper.setSubject("通知-明天来狂神这听课");
   helper.setText("<b style='color:red'>今天 7:30来开会</b>",true);

   //发送附件
   helper.addAttachment("1.jpg",new File(""));
   helper.addAttachment("2.jpg",new File(""));

   helper.setTo("24736743@qq.com");
   helper.setFrom("24736743@qq.com");

   mailSender.send(mimeMessage);
}
查看邮箱,邮件接收成功!
我们只需要使用Thymeleaf进行前后端结合即可开发自己网站邮件收发功能了!
狂神讲解的配套视频地址 https://www.bilibili.com/video/BV1PE411i7CV
14.3 定时执行任务
项目开发中经常需要执行一些定时任务,比如需要在每天凌晨的时候,分析一次前一天的日志信息,Spring为我们提供了异步执行任务调度的方式,提供了两个接口。
- TaskExecutor接口
- TaskScheduler接口
两个注解:
- @EnableScheduling
- @Scheduled
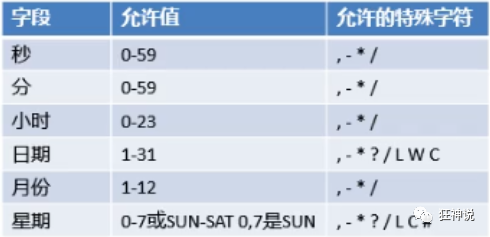
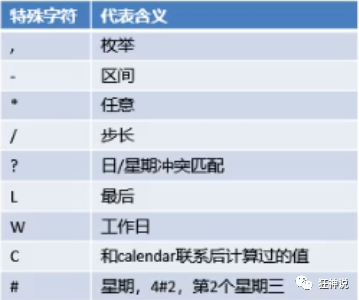
cron表达式:
测试步骤:
1、创建一个ScheduledService
我们里面存在一个hello方法,他需要定时执行,怎么处理呢?
@Service
public class ScheduledService {

   //秒   分   时     日   月   周几
   //0 * * * * MON-FRI
   //注意cron表达式的用法;
   //0/10 * * * * ? 表示每10秒 执行任务
    @Scheduled(cron = "0/10 * * * * ?")
   public void hello(){
       System.out.println("当前时间:"+new Date());
  }
}
2、这里写完定时任务之后,我们需要在主程序上增加@EnableScheduling 开启定时任务功能
@EnableAsync //开启异步注解功能
@EnableScheduling //开启基于注解的定时任务
@SpringBootApplication
public class SpringbootTaskApplication {

   public static void main(String[] args) {
       SpringApplication.run(SpringbootTaskApplication.class, args);
  }

}
- 运行
当前时间:Thu Jan 20 19:02:30 CST 2022
当前时间:Thu Jan 20 19:02:40 CST 2022
当前时间:Thu Jan 20 19:02:50 CST 2022
当前时间:Thu Jan 20 19:03:00 CST 2022
当前时间:Thu Jan 20 19:03:10 CST 2022
当前时间:Thu Jan 20 19:03:20 CST 2022
当前时间:Thu Jan 20 19:03:30 CST 2022
3、我们来详细了解下cron表达式;
http://www.bejson.com/othertools/cron/
4、常用的表达式
(1)0/2 * * * * ?   表示每2秒 执行任务
(1)0 0/2 * * * ?   表示每2分钟 执行任务
(1)0 0 2 1 * ?   表示在每月的1日的凌晨2点调整任务
(2)0 15 10 ? * MON-FRI   表示周一到周五每天上午10:15执行作业
(3)0 15 10 ? 6L 2002-2006   表示2002-2006年的每个月的最后一个星期五上午10:15执行作
(4)0 0 10,14,16 * * ?   每天上午10点,下午2点,4点
(5)0 0/30 9-17 * * ?   朝九晚五工作时间内每半小时
(6)0 0 12 ? * WED   表示每个星期三中午12点
(7)0 0 12 * * ?   每天中午12点触发
(8)0 15 10 ? * *   每天上午10:15触发
(9)0 15 10 * * ?     每天上午10:15触发
(10)0 15 10 * * ?   每天上午10:15触发
(11)0 15 10 * * ? 2005   2005年的每天上午10:15触发
(12)0 * 14 * * ?     在每天下午2点到下午2:59期间的每1分钟触发
(13)0 0/5 14 * * ?   在每天下午2点到下午2:55期间的每5分钟触发
(14)0 0/5 14,18 * * ?     在每天下午2点到2:55期间和下午6点到6:55期间的每5分钟触发
(15)0 0-5 14 * * ?   在每天下午2点到下午2:05期间的每1分钟触发
(16)0 10,44 14 ? 3 WED   每年三月的星期三的下午2:10和2:44触发
(17)0 15 10 ? * MON-FRI   周一至周五的上午10:15触发
(18)0 15 10 15 * ?   每月15日上午10:15触发
(19)0 15 10 L * ?   每月最后一日的上午10:15触发
(20)0 15 10 ? * 6L   每月的最后一个星期五上午10:15触发
(21)0 15 10 ? * 6L 2002-2005   2002年至2005年的每月的最后一个星期五上午10:15触发
(22)0 15 10 ? * 6#3   每月的第三个星期五上午10:15触发
15、SpringBoot集成Redis
REmote DIctionary Server(Redis) 是一个由 Salvatore Sanfilippo 写的 key-value 存储系统,是跨平台的非关系型数据库。(Mysq是关系型数据库)
1、创建项目
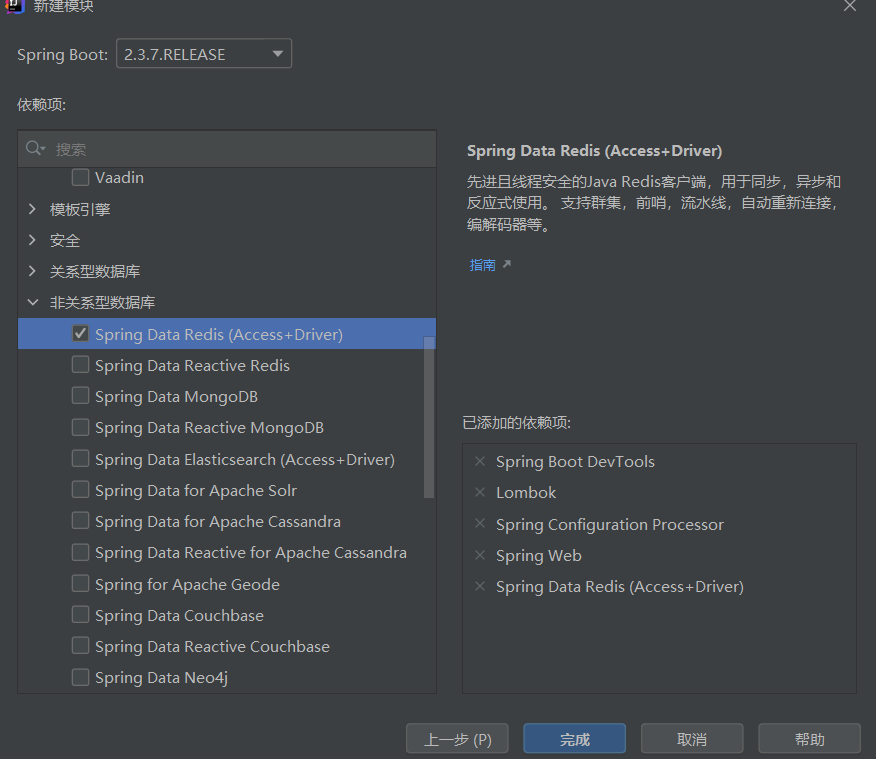
<dependency>
    <groupId>org.springframework.boot</groupId>
    <artifactId>spring-boot-starter-data-redis</artifactId>
</dependency>
<dependency>
    <groupId>org.springframework.boot</groupId>
    <artifactId>spring-boot-starter-web</artifactId>
</dependency>

<dependency>
    <groupId>org.springframework.boot</groupId>
    <artifactId>spring-boot-devtools</artifactId>
    <scope>runtime</scope>
    <optional>true</optional>
</dependency>
<dependency>
    <groupId>org.springframework.boot</groupId>
    <artifactId>spring-boot-configuration-processor</artifactId>
    <optional>true</optional>
</dependency>
<dependency>
    <groupId>org.projectlombok</groupId>
    <artifactId>lombok</artifactId>
    <optional>true</optional>
</dependency>
<dependency>
    <groupId>org.springframework.boot</groupId>
    <artifactId>spring-boot-starter-test</artifactId>
    <scope>test</scope>
    <exclusions>
        <exclusion>
            <groupId>org.junit.vintage</groupId>
            <artifactId>junit-vintage-engine</artifactId>
        </exclusion>
    </exclusions>
</dependency>
16、Dubbo和Zookeeper集成
狂神说SpringBoot17:Dubbo和Zookeeper集成 (qq.com)
16.1 什么是分布式系统?
在《分布式系统原理与范型》一书中有如下定义:“分布式系统是若干独立计算机的集合,这些计算机对于用户来说就像单个相关系统”;
分布式系统是由一组通过网络进行通信、为了完成共同的任务而协调工作的计算机节点组成的系统。分布式系统的出现是为了用廉价的、普通的机器完成单个计算机无法完成的计算、存储任务。其目的是利用更多的机器,处理更多的数据。
分布式系统(distributed system)是建立在网络之上的软件系统。
首先需要明确的是,只有当单个节点的处理能力无法满足日益增长的计算、存储任务的时候,且硬件的提升(加内存、加磁盘、使用更好的CPU)高昂到得不偿失的时候,应用程序也不能进一步优化的时候,我们才需要考虑分布式系统。因为,分布式系统要解决的问题本身就是和单机系统一样的,而由于分布式系统多节点、通过网络通信的拓扑结构,会引入很多单机系统没有的问题,为了解决这些问题又会引入更多的机制、协议,带来更多的问题。。。
集群是多个服务器节点共同负责一个功能,分布式微服务是不同服务器节点负责不同的功能模块
集群就是将一个整体复制n多份
比如同样一个流程a->b-c,分布式就是a,b,c每个步骤分开不同的服务器去完成,而集群就是用多个服务器,每个服务器都会执行a->b->c
16.2 什么是RPC
RPC【Remote Procedure Call】是指远程过程调用,是一种进程间通信方式,他是一种技术的思想,而不是规范。它允许程序调用另一个地址空间(通常是共享网络的另一台机器上)的过程或函数,而不用程序员显式编码这个远程调用的细节。即程序员无论是调用本地的还是远程的函数,本质上编写的调用代码基本相同。
也就是说两台服务器A,B,一个应用部署在A服务器上,想要调用B服务器上应用提供的函数/方法,由于不在一个内存空间,不能直接调用,需要通过网络来表达调用的语义和传达调用的数据。为什么要用RPC呢?就是无法在一个进程内,甚至一个计算机内通过本地调用的方式完成的需求,比如不同的系统间的通讯,甚至不同的组织间的通讯,由于计算能力需要横向扩展,需要在多台机器组成的集群上部署应用。RPC就是要像调用本地的函数一样去调远程函数;
推荐阅读文章:https://www.jianshu.com/p/2accc2840a1b
RPC基本原理
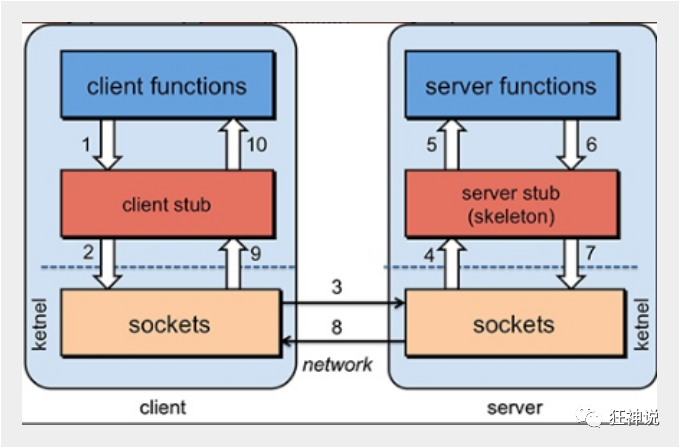
步骤解析:
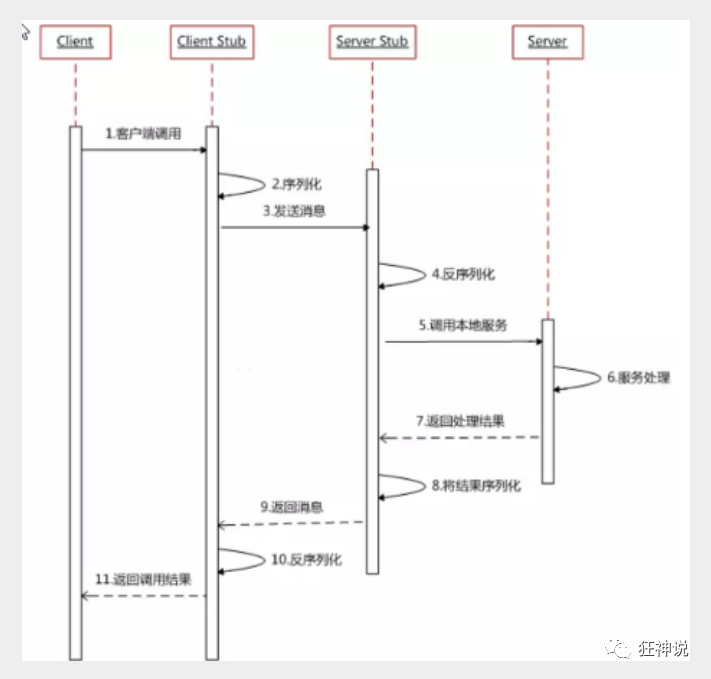
RPC两个核心模块:通讯,序列化。
16.3 Dubbo
Apache Dubbo |ˈdʌbəʊ| 是一款高性能、轻量级的开源Java RPC框架,它提供了三大核心能力:面向接口的远程方法调用,智能容错和负载均衡,以及服务自动注册和发现。
1.了解Dubbo的特性
2.查看官方文档 Apache Dubbo
(Netty)
16.4 安装zookeeper
1、下载zookeeper :地址, 我们下载3.4.14 , 最新版!解压zookeeper
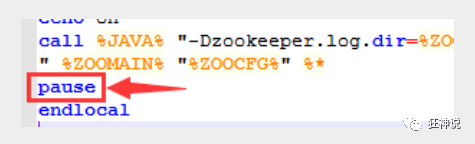
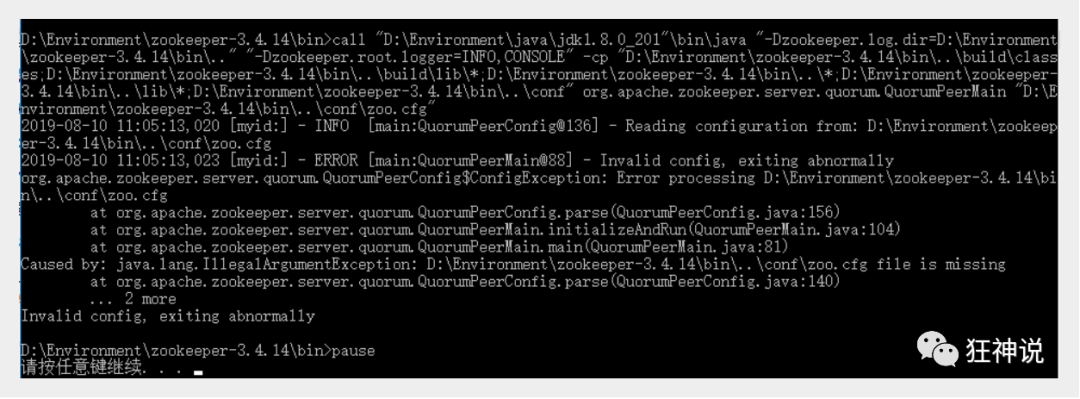
2、运行/bin/zkServer.cmd ,初次运行会报错,没有zoo.cfg配置文件;
可能遇到问题:闪退 !
解决方案:编辑zkServer.cmd文件末尾添加pause 。这样运行出错就不会退出,会提示错误信息,方便找到原因。
3、修改zoo.cfg配置文件
将conf文件夹下面的zoo_sample.cfg复制一份改名为zoo.cfg即可。
注意几个重要位置:
dataDir=./ 临时数据存储的目录(可写相对路径)
clientPort=2181 zookeeper的端口号
修改完成后再次启动zookeeper

4、使用zkCli.cmd测试
ls /:列出zookeeper根下保存的所有节点
[zk: 127.0.0.1:2181(CONNECTED) 4] ls /
[zookeeper]
create –e /kuangshen 123:创建一个kuangshen节点,值为123

get /kuangshen:获取/kuangshen节点的值
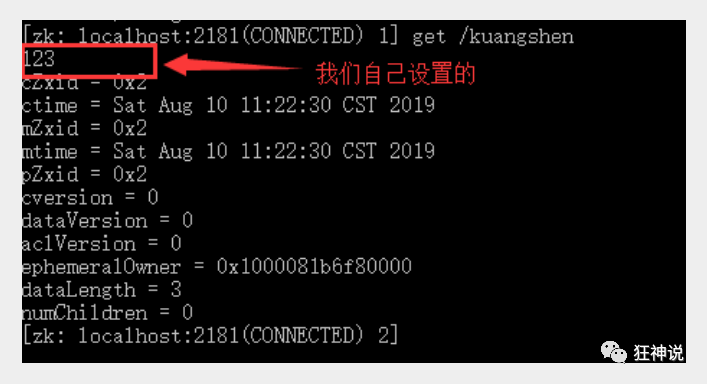
我们再来查看一下节点

16.5 安装dubbo-admin
dubbo本身并不是一个服务软件。它其实就是一个jar包,能够帮你的java程序连接到zookeeper,并利用zookeeper消费、提供服务。
但是为了让用户更好的管理监控众多的dubbo服务,官方提供了一个可视化的监控程序dubbo-admin,不过这个监控即使不装也不影响使用。
我们这里来安装一下:
1、下载dubbo-admin
地址 :https://github.com/apache/dubbo-admin/tree/master
2、解压进入目录
修改 dubbo-admin\src\main\resources \application.properties 指定zookeeper地址
server.port=7001
spring.velocity.cache=false
spring.velocity.charset=UTF-8
spring.velocity.layout-url=/templates/default.vm
spring.messages.fallback-to-system-locale=false
spring.messages.basename=i18n/message
spring.root.password=root
spring.guest.password=guest

dubbo.registry.address=zookeeper://127.0.0.1:2181
3、在项目目录下打包dubbo-admin
mvn clean package -Dmaven.test.skip=true
第一次打包的过程有点慢,需要耐心等待!直到成功!
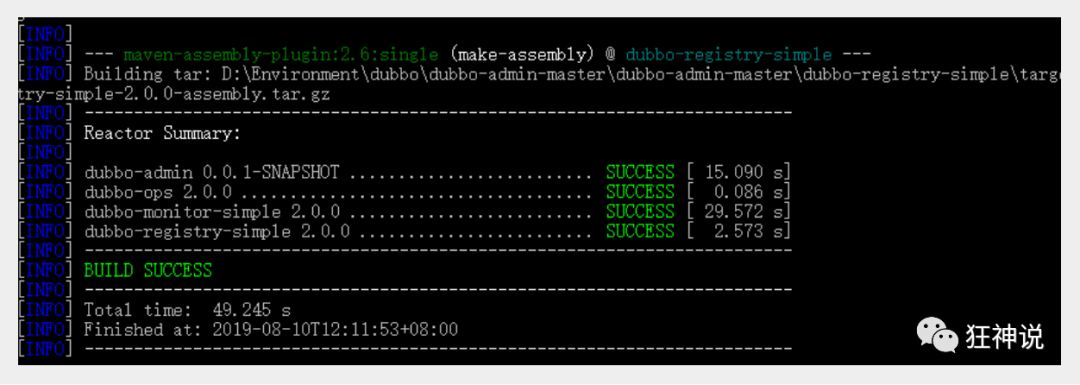
4、执行 dubbo-admin\target 下的dubbo-admin-0.0.1-SNAPSHOT.jar
java -jar dubbo-admin-0.0.1-SNAPSHOT.jar
【注意:zookeeper的服务一定要打开!】
执行完毕,我们去访问一下 http://localhost:7001/ , 这时候我们需要输入登录账户和密码,我们都是默认的root-root;
登录成功后,查看界面
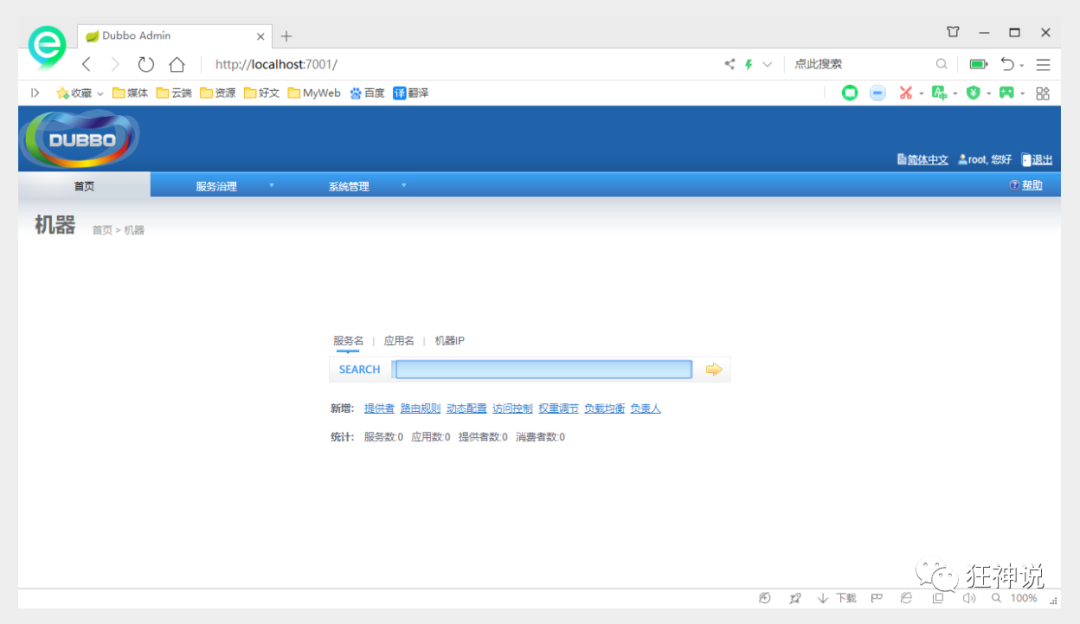
安装完成!
17、SpringBoot + Dubbo + zookeeper
17.1 框架搭建
1. 启动zookeeper !
2. IDEA创建一个空项目;
3.创建一个模块,实现服务提供者:provider-server , 选择web依赖即可
4.项目创建完毕,我们写一个服务,比如卖票的服务;
编写接口
package com.kuang.provider.service;

public interface TicketService {
   public String getTicket();
}
编写实现类
package com.kuang.provider.service;

public class TicketServiceImpl implements TicketService {
   @Override
   public String getTicket() {
       return "《狂神说Java》";
  }
}
5.创建一个模块,实现服务消费者:consumer-server , 选择web依赖即可
6.项目创建完毕,我们写一个服务,比如用户的服务;
编写service
package com.kuang.consumer.service;

public class UserService {
   //我们需要去拿去注册中心的服务
}
需求:现在我们的用户想使用买票的服务,这要怎么弄呢 ?
17.2 服务提供者(provider.service)
1、将服务提供者注册到注册中心,我们需要整合Dubbo和zookeeper,所以需要导包
我们从dubbo官网进入github,看下方的帮助文档,找到dubbo-springboot,找到依赖包
<!-- Dubbo Spring Boot Starter -->
<dependency>
   <groupId>org.apache.dubbo</groupId>
   <artifactId>dubbo-spring-boot-starter</artifactId>
   <version>2.7.3</version>
</dependency>
zookeeper的包我们去maven仓库下载,zkclient;
<!-- https://mvnrepository.com/artifact/com.github.sgroschupf/zkclient -->
<dependency>
   <groupId>com.github.sgroschupf</groupId>
   <artifactId>zkclient</artifactId>
   <version>0.1</version>
</dependency>
【新版的坑】zookeeper及其依赖包,解决日志冲突,还需要剔除日志依赖;
<!-- 引入zookeeper -->
<dependency>
   <groupId>org.apache.curator</groupId>
   <artifactId>curator-framework</artifactId>
   <version>2.12.0</version>
</dependency>
<dependency>
   <groupId>org.apache.curator</groupId>
   <artifactId>curator-recipes</artifactId>
   <version>2.12.0</version>
</dependency>
<dependency>
   <groupId>org.apache.zookeeper</groupId>
   <artifactId>zookeeper</artifactId>
   <version>3.4.14</version>
   <!--排除这个slf4j-log4j12-->
   <exclusions>
       <exclusion>
           <groupId>org.slf4j</groupId>
           <artifactId>slf4j-log4j12</artifactId>
       </exclusion>
   </exclusions>
</dependency>
2、在springboot配置文件中配置dubbo相关属性!
#当前应用名字
dubbo.application.name=provider-server
#注册中心地址
dubbo.registry.address=zookeeper://127.0.0.1:2181
#扫描指定包下服务
dubbo.scan.base-packages=com.kuang.provider.service
3、在service的实现类中配置服务注解,发布服务!注意导包问题
import org.apache.dubbo.config.annotation.Service;
import org.springframework.stereotype.Component;

@Service //将服务发布出去
@Component //放在容器中
public class TicketServiceImpl implements TicketService {
   @Override
   public String getTicket() {
       return "《狂神说Java》";
  }
}
逻辑理解 :应用启动起来,dubbo就会扫描指定的包下带有@component注解的服务,将它发布在指定的注册中心中!
17.3 服务消费者(consumer-server)
1、导入依赖,和之前的依赖一样;
<!--dubbo-->
<!-- Dubbo Spring Boot Starter -->
<dependency>
   <groupId>org.apache.dubbo</groupId>
   <artifactId>dubbo-spring-boot-starter</artifactId>
   <version>2.7.3</version>
</dependency>
<!--zookeeper-->
<!-- https://mvnrepository.com/artifact/com.github.sgroschupf/zkclient -->
<dependency>
   <groupId>com.github.sgroschupf</groupId>
   <artifactId>zkclient</artifactId>
   <version>0.1</version>
</dependency>
<!-- 引入zookeeper -->
<dependency>
   <groupId>org.apache.curator</groupId>
   <artifactId>curator-framework</artifactId>
   <version>2.12.0</version>
</dependency>
<dependency>
   <groupId>org.apache.curator</groupId>
   <artifactId>curator-recipes</artifactId>
   <version>2.12.0</version>
</dependency>
<dependency>
   <groupId>org.apache.zookeeper</groupId>
   <artifactId>zookeeper</artifactId>
   <version>3.4.14</version>
   <!--排除这个slf4j-log4j12-->
   <exclusions>
       <exclusion>
           <groupId>org.slf4j</groupId>
           <artifactId>slf4j-log4j12</artifactId>
       </exclusion>
   </exclusions>
</dependency>
2、配置参数
#当前应用名字
dubbo.application.name=consumer-server
#注册中心地址
dubbo.registry.address=zookeeper://127.0.0.1:2181
3. 本来正常步骤是需要将服务提供者的接口打包,然后用pom文件导入,我们这里使用简单的方式,直接将服务的接口拿过来,路径必须保证正确,即和服务提供者相同;
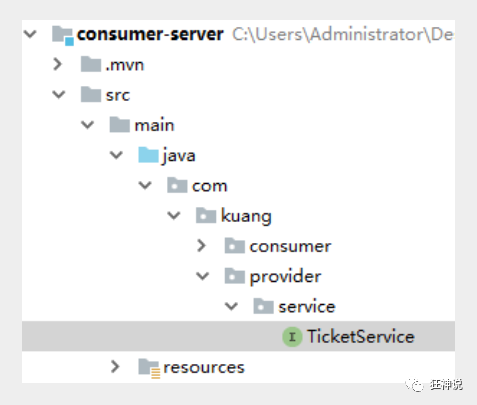
4. 完善消费者的服务类
package com.kuang.consumer.service;

import com.kuang.provider.service.TicketService;
import org.apache.dubbo.config.annotation.Reference;
import org.springframework.stereotype.Service;

@Service //注入到容器中
public class UserService {

   @Reference //远程引用指定的服务,他会按照全类名进行匹配,看谁给注册中心注册了这个全类名
   TicketService ticketService;

   public void bugTicket(){
       String ticket = ticketService.getTicket();
       System.out.println("在注册中心买到"+ticket);
  }

}
5. 测试类编写;
@RunWith(SpringRunner.class)
@SpringBootTest
public class ConsumerServerApplicationTests {

   @Autowired
   UserService userService;

   @Test
   public void contextLoads() {

       userService.bugTicket();

  }

}
17.4 启动测试
1. 开启zookeeper
2. 打开dubbo-admin实现监控【可以不用做】
3. 开启服务者
4. 消费者消费测试,结果:
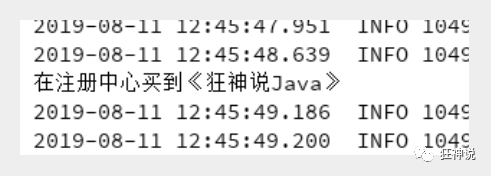
监控中心 :
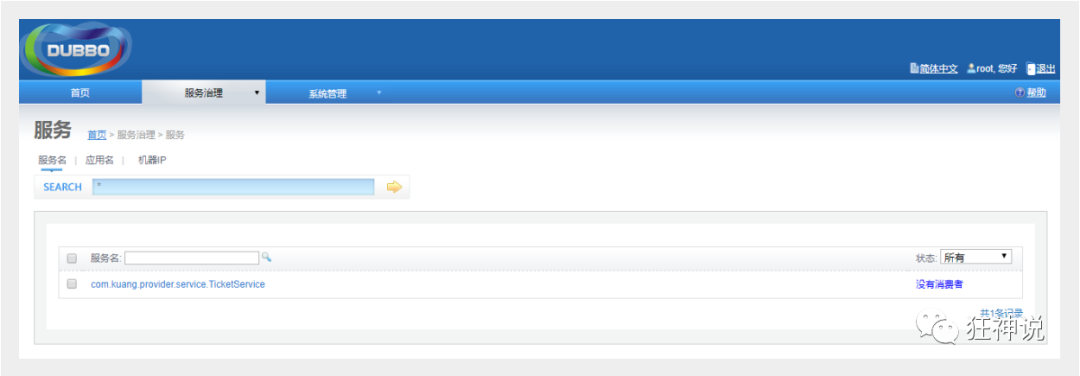
ok , 这就是SpingBoot + dubbo + zookeeper实现分布式开发的应用,其实就是一个服务拆分的思想;
版权声明:本文内容由互联网用户自发贡献,该文观点仅代表作者本人。本站仅提供信息存储空间服务,不拥有所有权,不承担相关法律责任。如发现本站有涉嫌侵权/违法违规的内容, 请发送邮件至 举报,一经查实,本站将立刻删除。
文章由极客之音整理,本文链接:https://www.bmabk.com/index.php/post/92661.html

