
文章目录
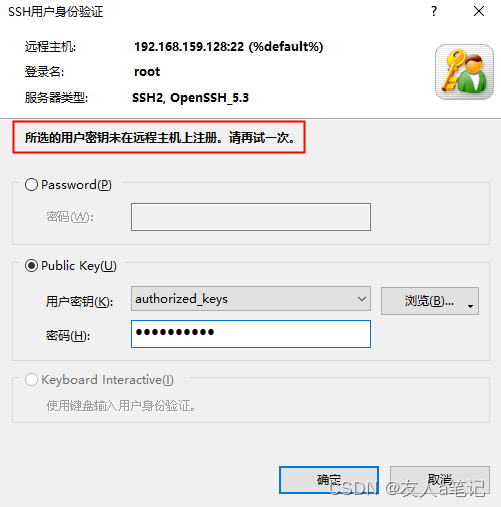
错误提示
方法一、使用Xshell生成密钥
1、关闭 selinux
[root@localhost ~]# sed -i 's/SELINUX=enforcing/SELINUX=disabled/g' /etc/selinux/config
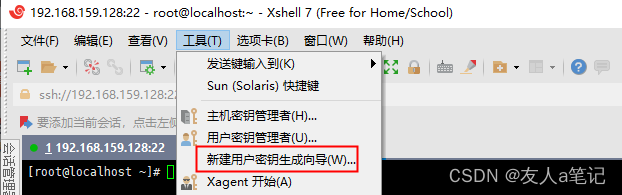
2、创建密钥
点击Xshell的”工具”–“新建用户密钥生产向导”
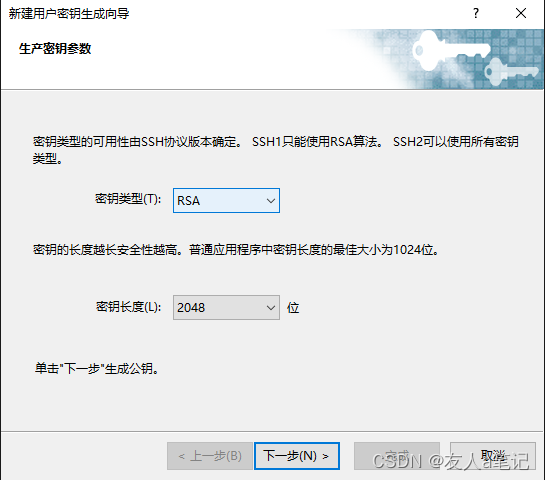
3、选择密钥类型、密钥长度
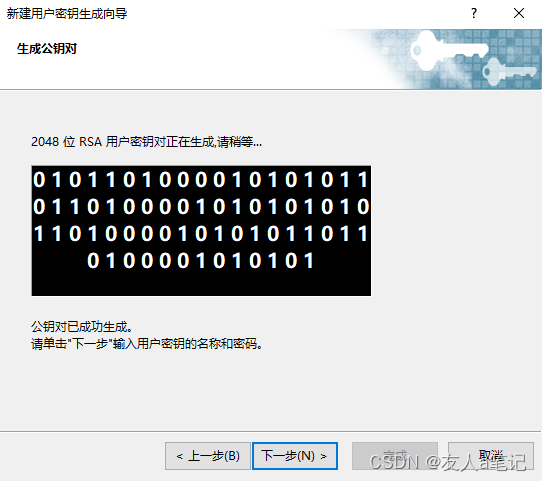
4、生产公钥对
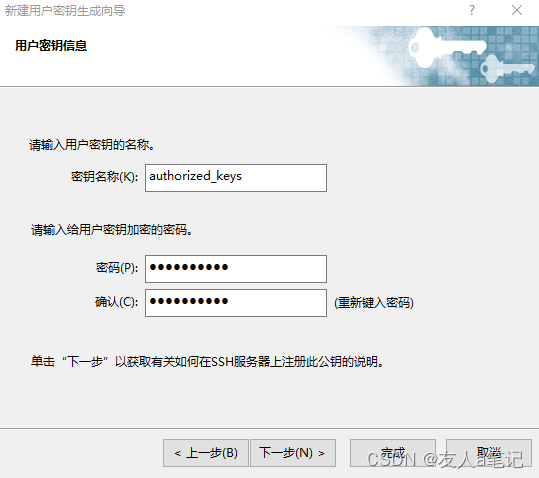
5、修改密钥名称
修改名称为authorized_keys,为了和sshd配置文件名字一致
6、保存为文件
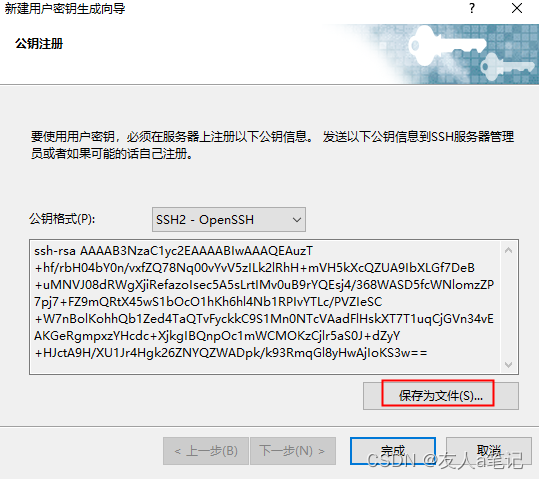
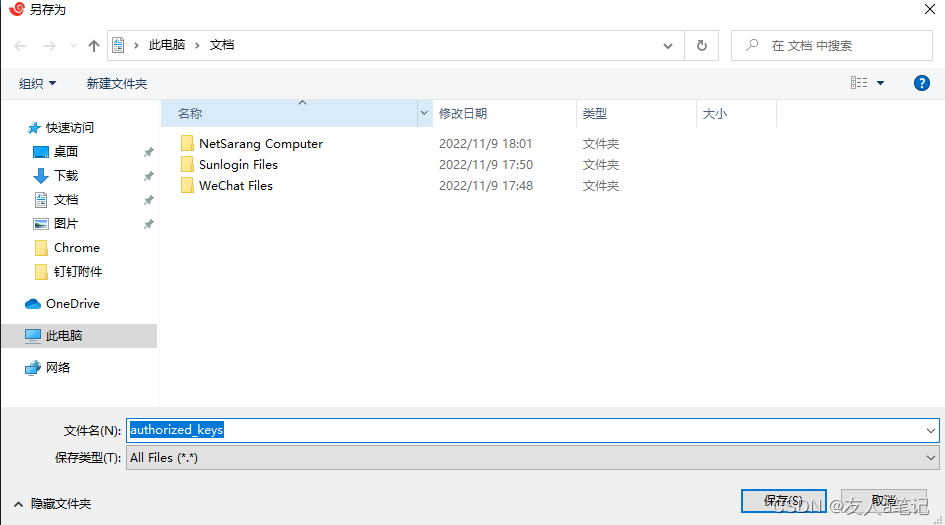
7、保存公钥到指定位置
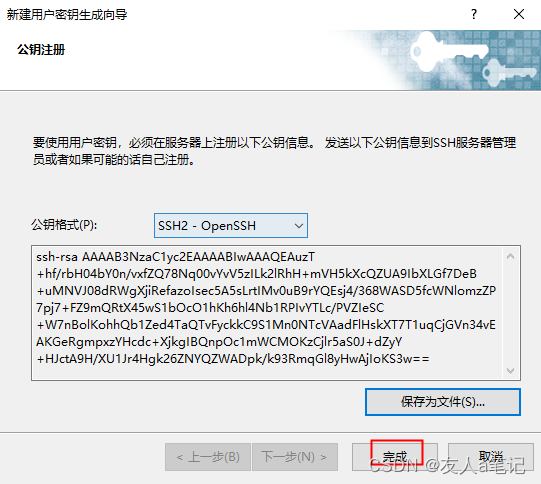
8、点击完成
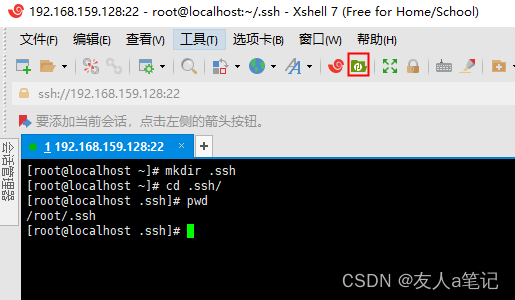
9、创建密钥目录
如果已经存在,直接cd .ssh
[root@localhost ~]# mkdir .ssh
[root@localhost ~]# cd .ssh/
[root@localhost .ssh]#
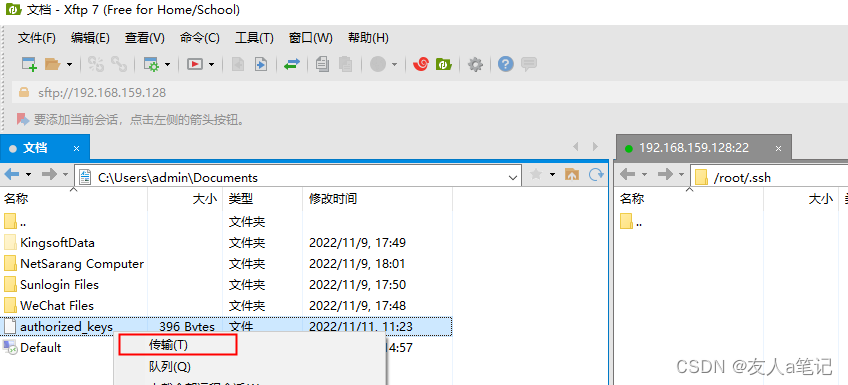
10、上传公钥到.ssh
11、修改sshd配置文件
[root@localhost ~]# vi /etc/ssh/sshd_config
#取消注释
PubkeyAuthentication yes
AuthorizedKeysFile      .ssh/authorized_keys
12、重启sshd服务
[root@localhost ~]# service sshd restart
Stopping sshd:                                             [  OK  ]
Starting sshd:                                             [  OK  ]
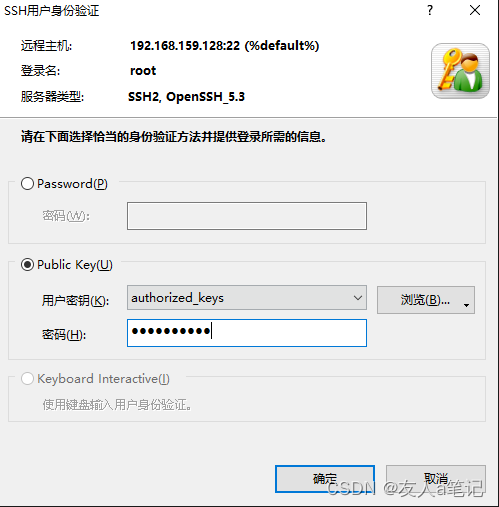
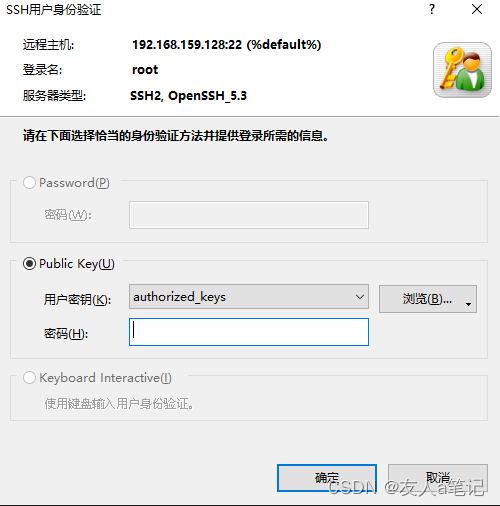
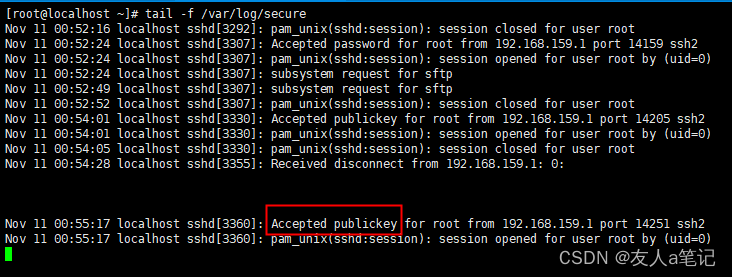
13、使用密钥远程登陆
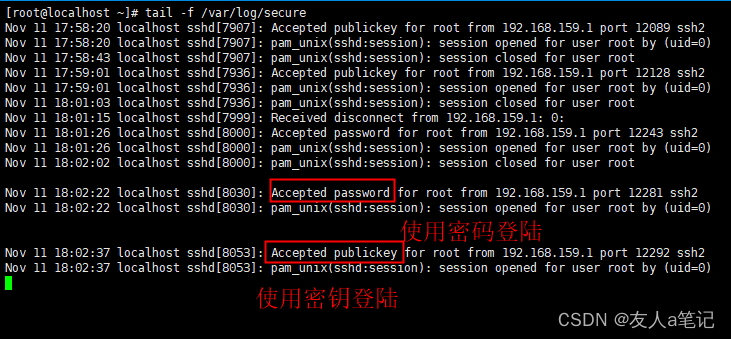
查看日志可以区分是密码还是密钥登陆
14、关闭密码登陆
验证使用密钥登陆之后,建议关闭密码登陆,提高安全性
[root@localhost ~]# vi /etc/ssh/sshd_config
#把yes改为no,然后重启sshd服务
PasswordAuthentication no

#重启sshd服务
[root@localhost ~]# service sshd restart
已经无法使用密码登陆
方法二、使用ssh-keygen命令
1、关闭 selinux
[root@localhost ~]# sed -i 's/SELINUX=enforcing/SELINUX=disabled/g' /etc/selinux/config
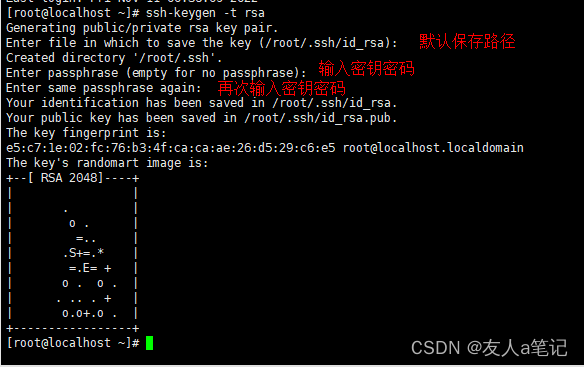
2、输入命令
[root@localhost ~]# ssh-keygen -t rsa
3、切换目录
[root@localhost ~]# cd .ssh/
4、查看文件
自动生成两个文件,id_rsa为私钥,id_rsa.pub为公钥
[root@localhost .ssh]# ll
total 8
-rw-------. 1 root root 1743 Nov 11 00:41 id_rsa
-rw-r--r--. 1 root root  408 Nov 11 00:41 id_rsa.pub
5、写入公钥
重写为authorized_keys文件,为了和sshd配置文件名字一致
[root@localhost .ssh]# cat id_rsa.pub >> authorized_keys
6、修改sshd配置文件
[root@localhost ~]# vi /etc/ssh/sshd_config
#取消注释
PubkeyAuthentication yes
AuthorizedKeysFile      .ssh/authorized_keys
7、重启sshd服务
[root@localhost ~]# service sshd restart
Stopping sshd:                                             [  OK  ]
Starting sshd:                                             [  OK  ]
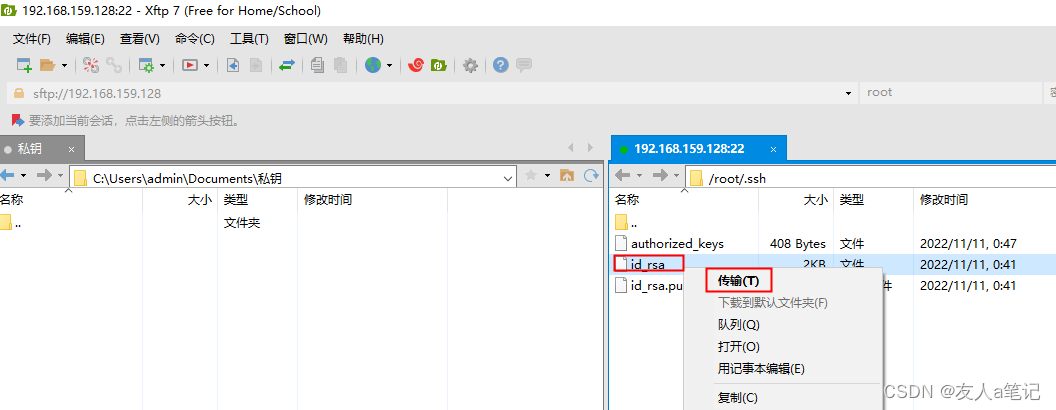
8、拷贝私钥到需要登陆的软件
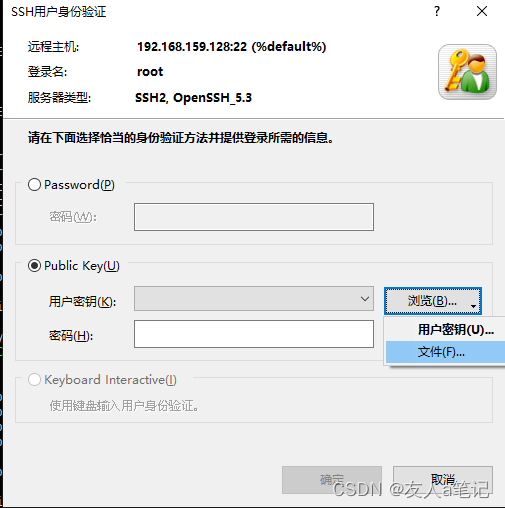
9、导入私钥,然后登陆
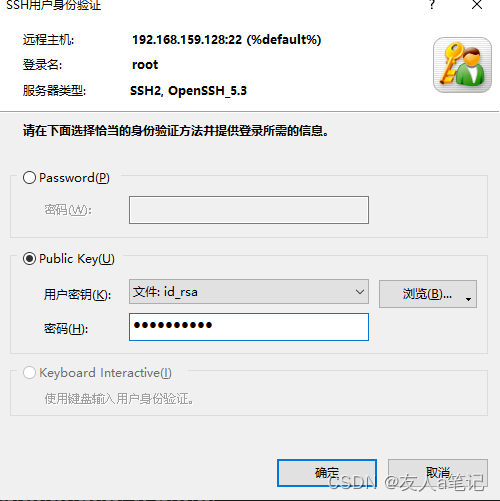
10、验证登陆结果
版权声明:本文内容由互联网用户自发贡献,该文观点仅代表作者本人。本站仅提供信息存储空间服务,不拥有所有权,不承担相关法律责任。如发现本站有涉嫌侵权/违法违规的内容, 请发送邮件至 举报,一经查实,本站将立刻删除。
文章由极客之音整理,本文链接:https://www.bmabk.com/index.php/post/95105.html

