
概述
之前我们说了下ServletContainerInitializer机制以及如何利用ServletContext向web容器中注册Servlet、Listener以及Filter三大组件。下面我们来详细分析下Servlet3.0是如何利用ServletContainerInitializer机制来整合SpringMVC的。
Servlet 3.0与Spring MVC的整合分析
首先,我们来创建一个新的maven工程,例如springmvc-annotation-liayun,注意其打包方式是war。该maven工程创建好了之后,发现它里面报了一个小小的错误,如下图所示。

在pom.xml文件报了web.xml is missing and is set to true这样一个错误。
我们可以在pom.xml文件中添加如下一个编译war的maven插件即可。
<project xmlns="http://maven.apache.org/POM/4.0.0" xmlns:xsi="http://www.w3.org/2001/XMLSchema-instance"
	xsi:schemaLocation="http://maven.apache.org/POM/4.0.0 http://maven.apache.org/xsd/maven-4.0.0.xsd">
	<modelVersion>4.0.0</modelVersion>
	<groupId>com.meimeixia</groupId>
	<artifactId>springmvc-annotation-liayun</artifactId>
	<version>0.0.1-SNAPSHOT</version>
	<packaging>war</packaging>

	<build>
		<plugins>
			<plugin>
				<groupId>org.apache.maven.plugins</groupId>
				<artifactId>maven-war-plugin</artifactId>
				<version>2.4</version>
				<configuration>
					<failOnMissingWebXml>false</failOnMissingWebXml>
				</configuration>
			</plugin>
		</plugins>
	</build>
</project>
注意标签里面的false这个配置,它是来告诉maven工程即使没有web.xml文件。
导入相关依赖
先导入对spring-webmvc的依赖,注意其版本是4.3.11.RELEASE。
<dependencies>
    <dependency>
        <groupId>org.springframework</groupId>
        <artifactId>spring-webmvc</artifactId>
        <version>4.3.11.RELEASE</version>
    </dependency>
</dependencies>
这样,我们就把Spring MVC的webmvc包,以及它所依赖的其他jar包,都一并导入进来了。
再来导入对servlet api的依赖,注意其版本是3.1.0,因为我们现在是在用Servlet 3.0以上的特性。
<dependencies>
    <dependency>
        <groupId>org.springframework</groupId>
        <artifactId>spring-webmvc</artifactId>
        <version>4.3.11.RELEASE</version>
    </dependency>
    <dependency>
        <groupId>javax.servlet</groupId>
        <artifactId>javax.servlet-api</artifactId>
        <version>3.1.0</version>
        <scope>provided</scope>
    </dependency>
</dependencies>
注意下provided配置,说明该Jar已经提供了,只是编译是使用,是不需要打入war包中的。
由于Tomcat服务器里面也有servlet api,即目标环境已经提高该Jar包了,所以把servlet api的scope设置成provided。这样我们项目在打成war包时,就不会带上jar包了,否则就会引起jar包冲突。
Servlet3.0整合SpringMVC的底层原理
Spring的官网地址是:https://spring.io/
看到网页顶部导航栏中的Projects菜单没有,将鼠标光标放在它上面,你就能看到如下所示的下拉列表了,然后点击其中的Overview选项。
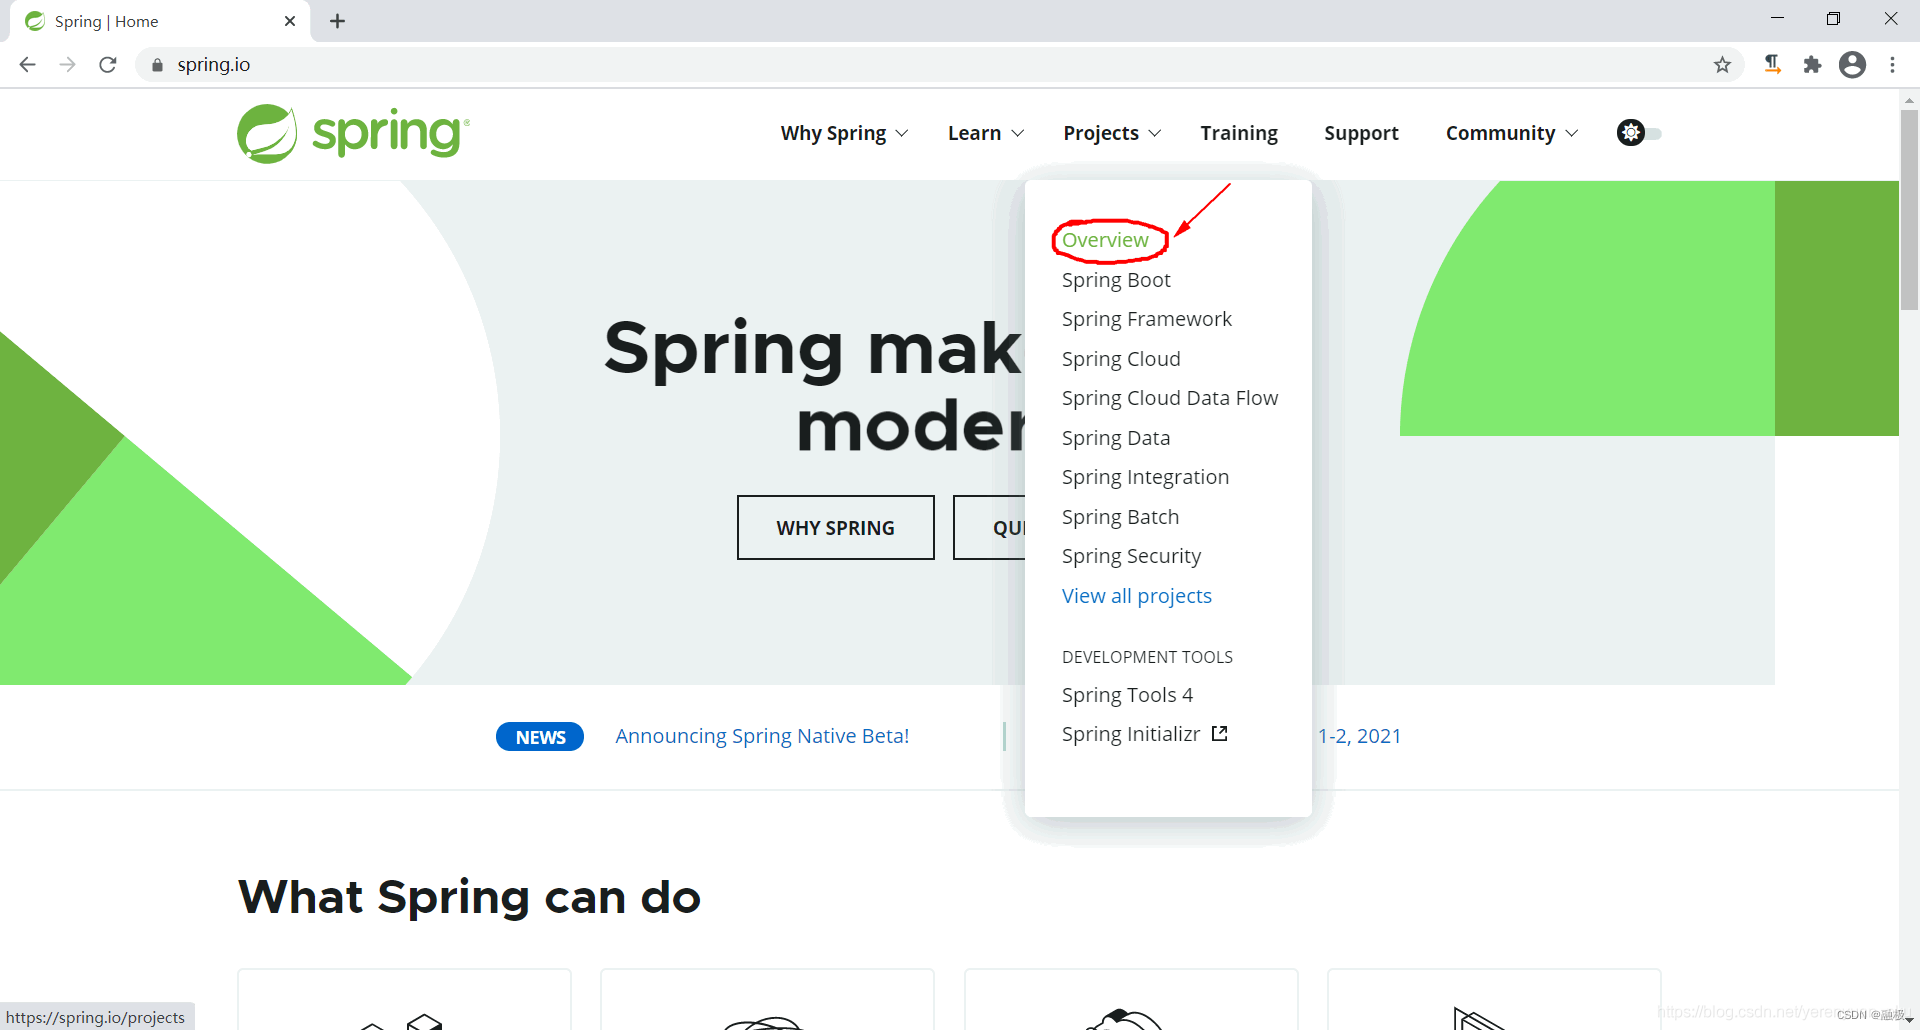
这时,你应该能看到如下图所示的页面了。
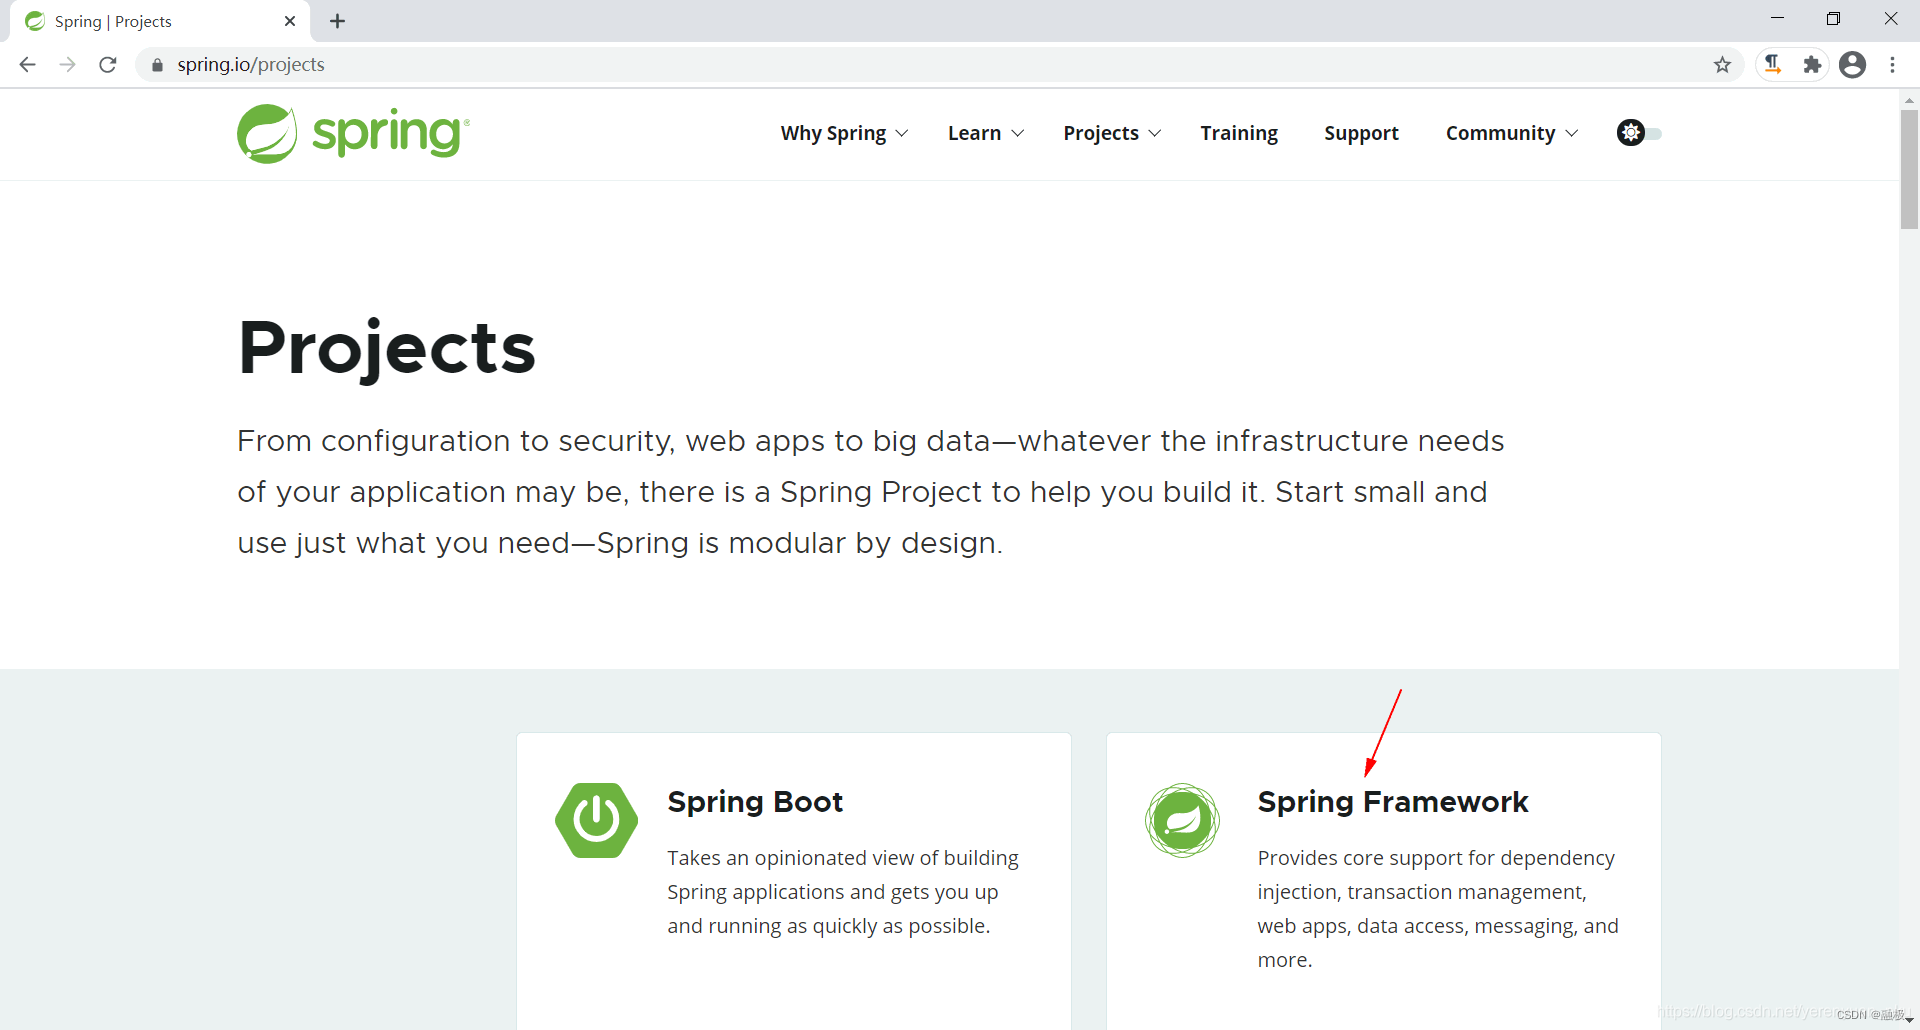
接着,点击箭头所指的Spring Framework,来到Spring框架的介绍页面,如下图所示。

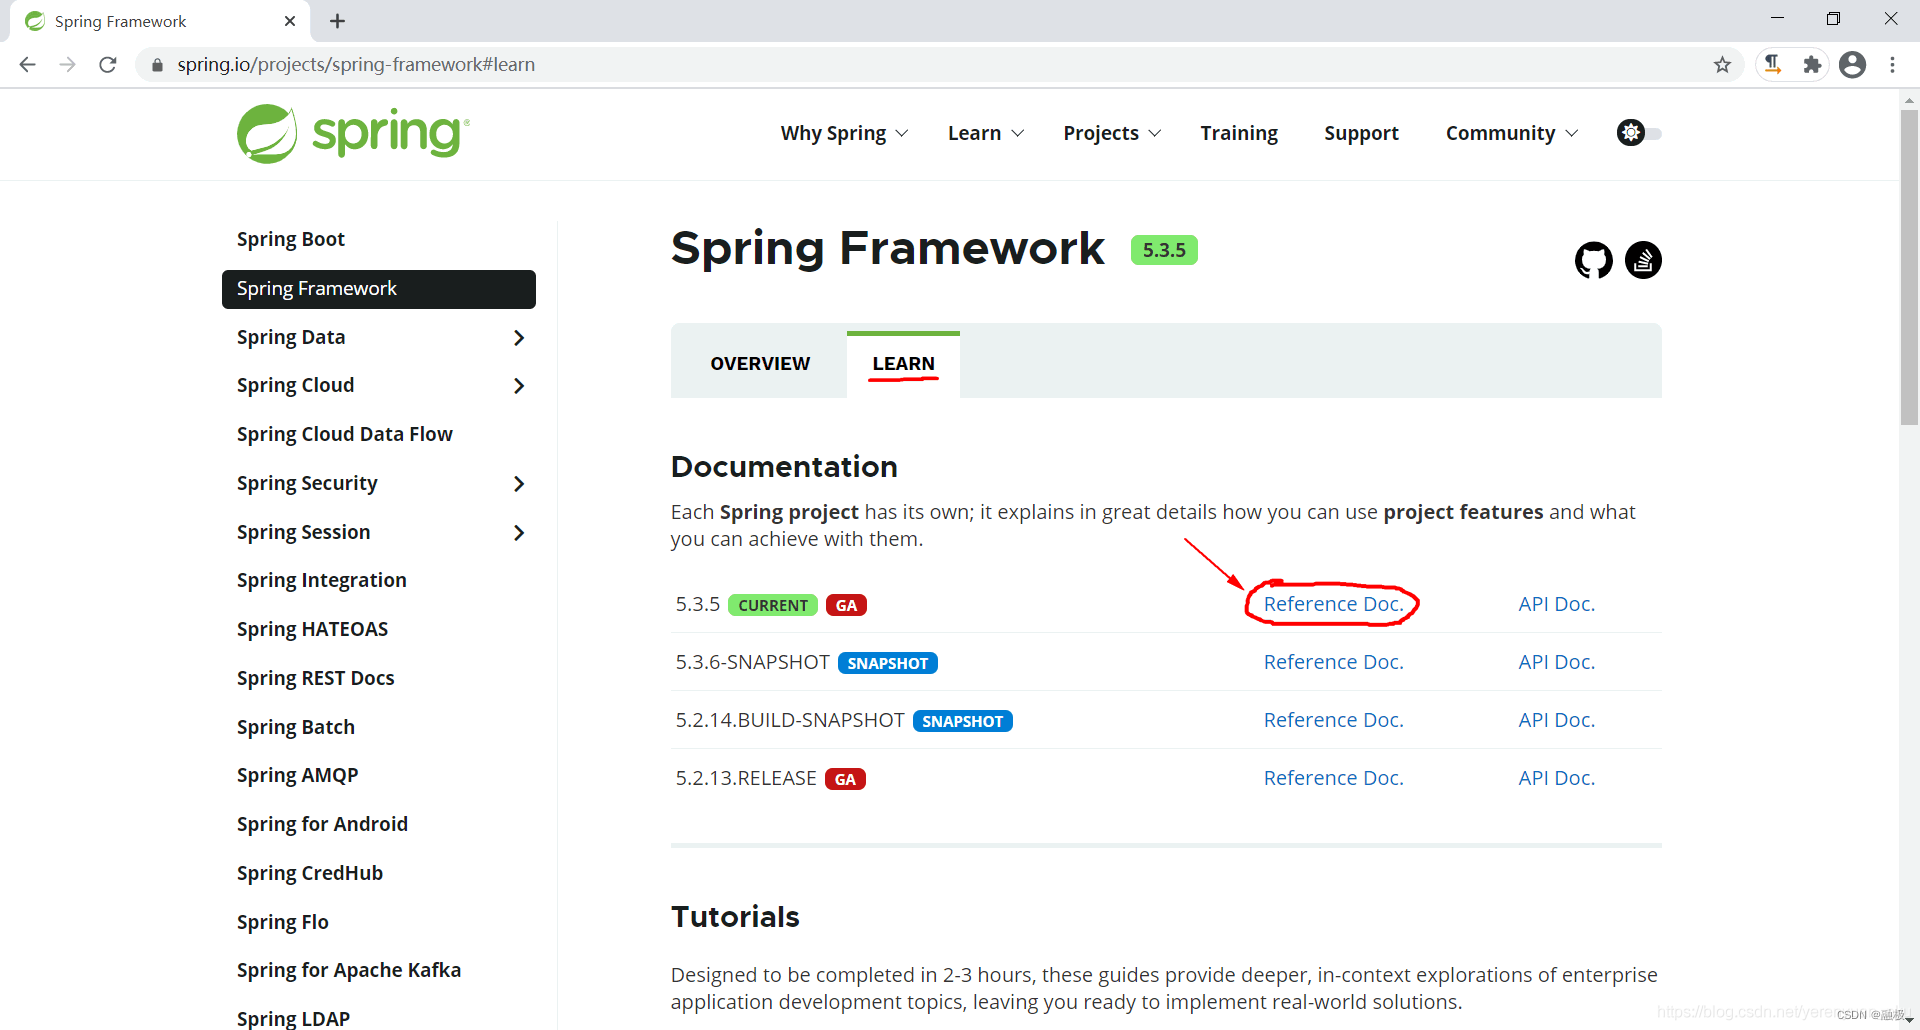
紧接着,点击箭头所指的LEARN切换到如下所示的选项卡中,点击Reference Doc.
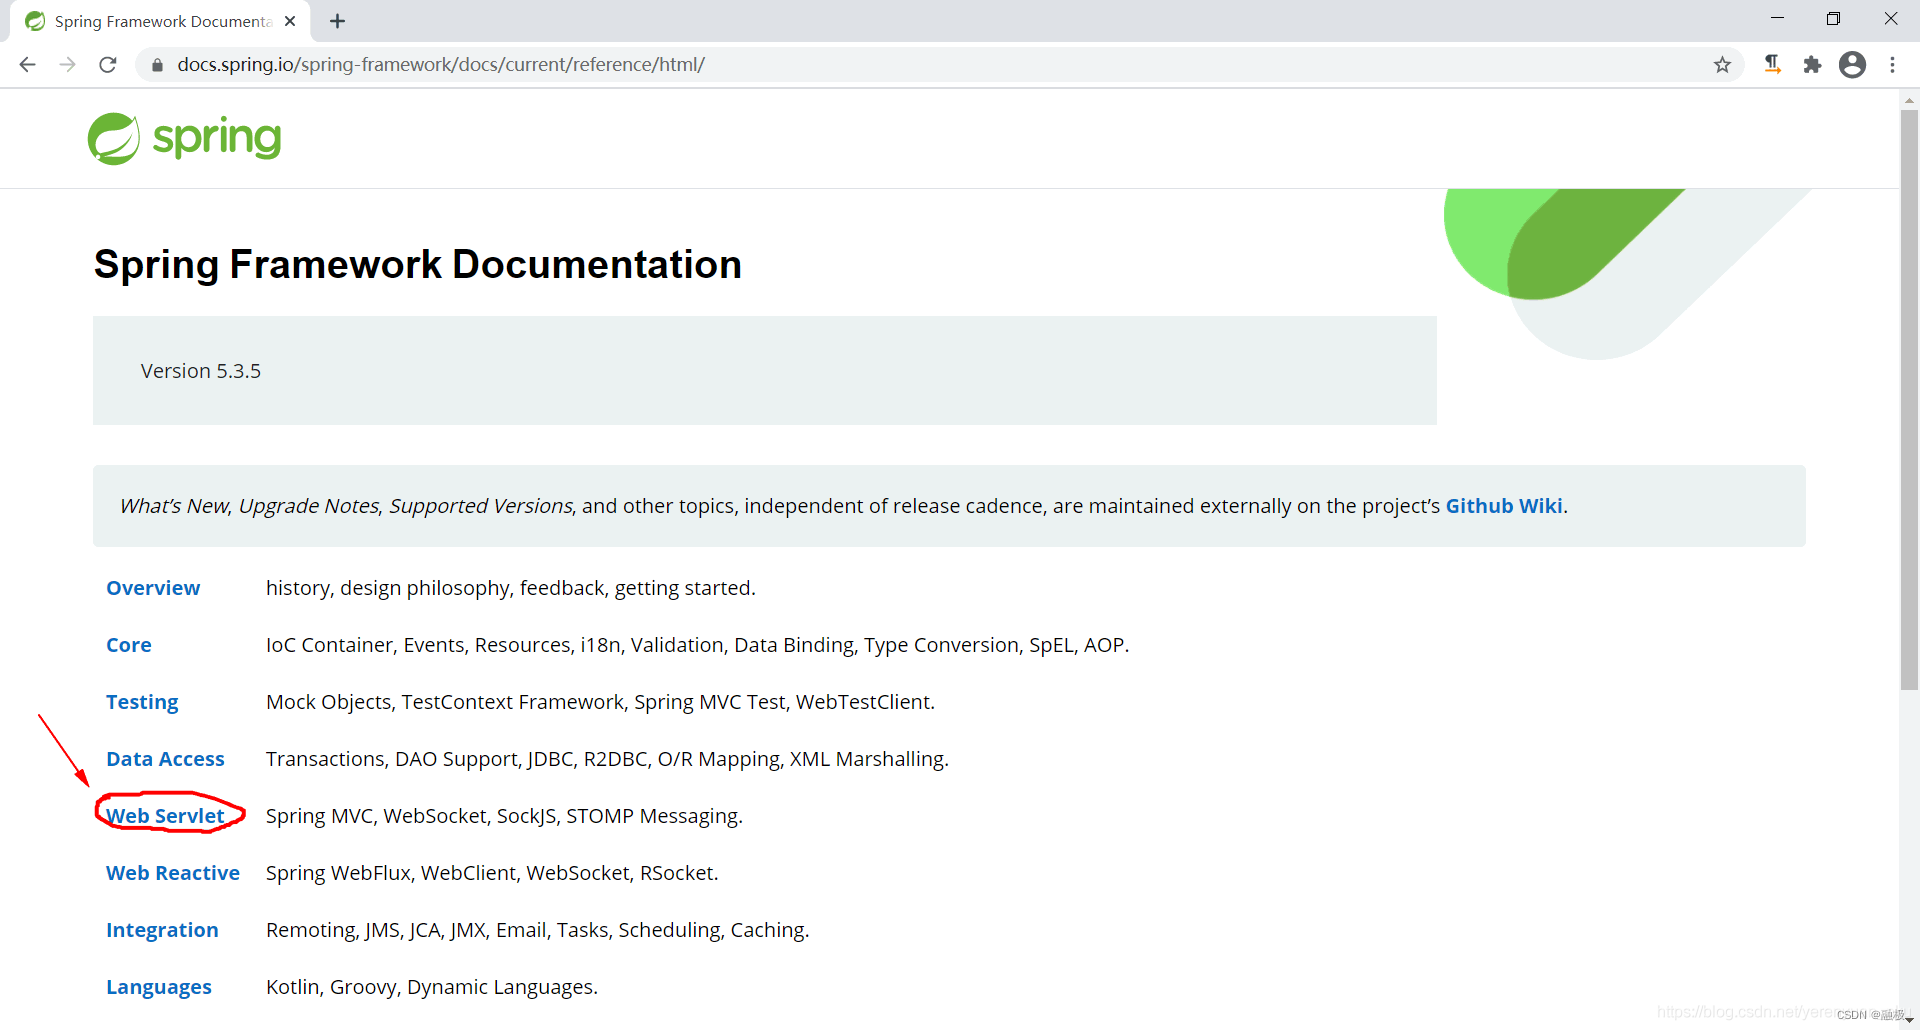
Spring官方文档分类是非常详细的,如下图所示,不过这儿我们只关注Web Servlet这一分类,因为它主要是来讲述Spring MVC、WebSocket等等的。
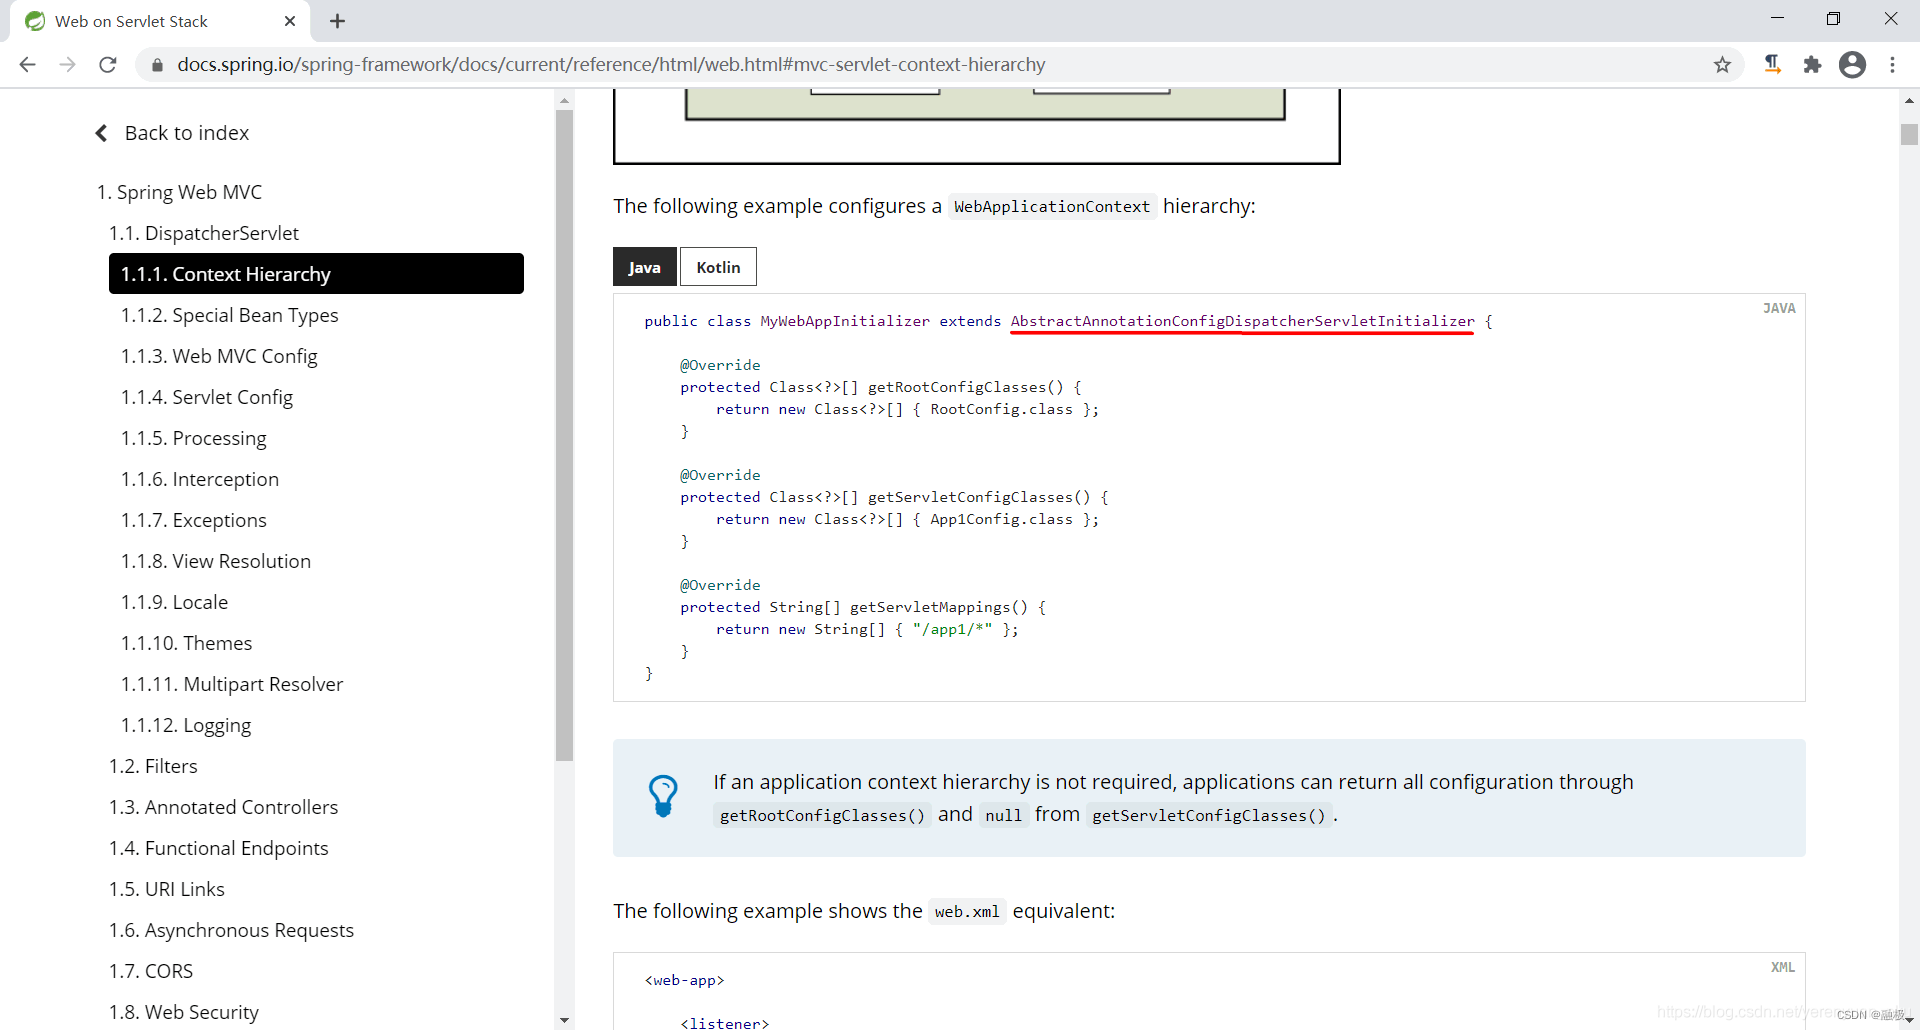
在Spring Web MVC这一部分下有这样1.1. DispatcherServlet一个小节,这一小节主要是来讲述配置DispatcherServlet的,我们不妨看一看该小节中的内容,如下图所示。
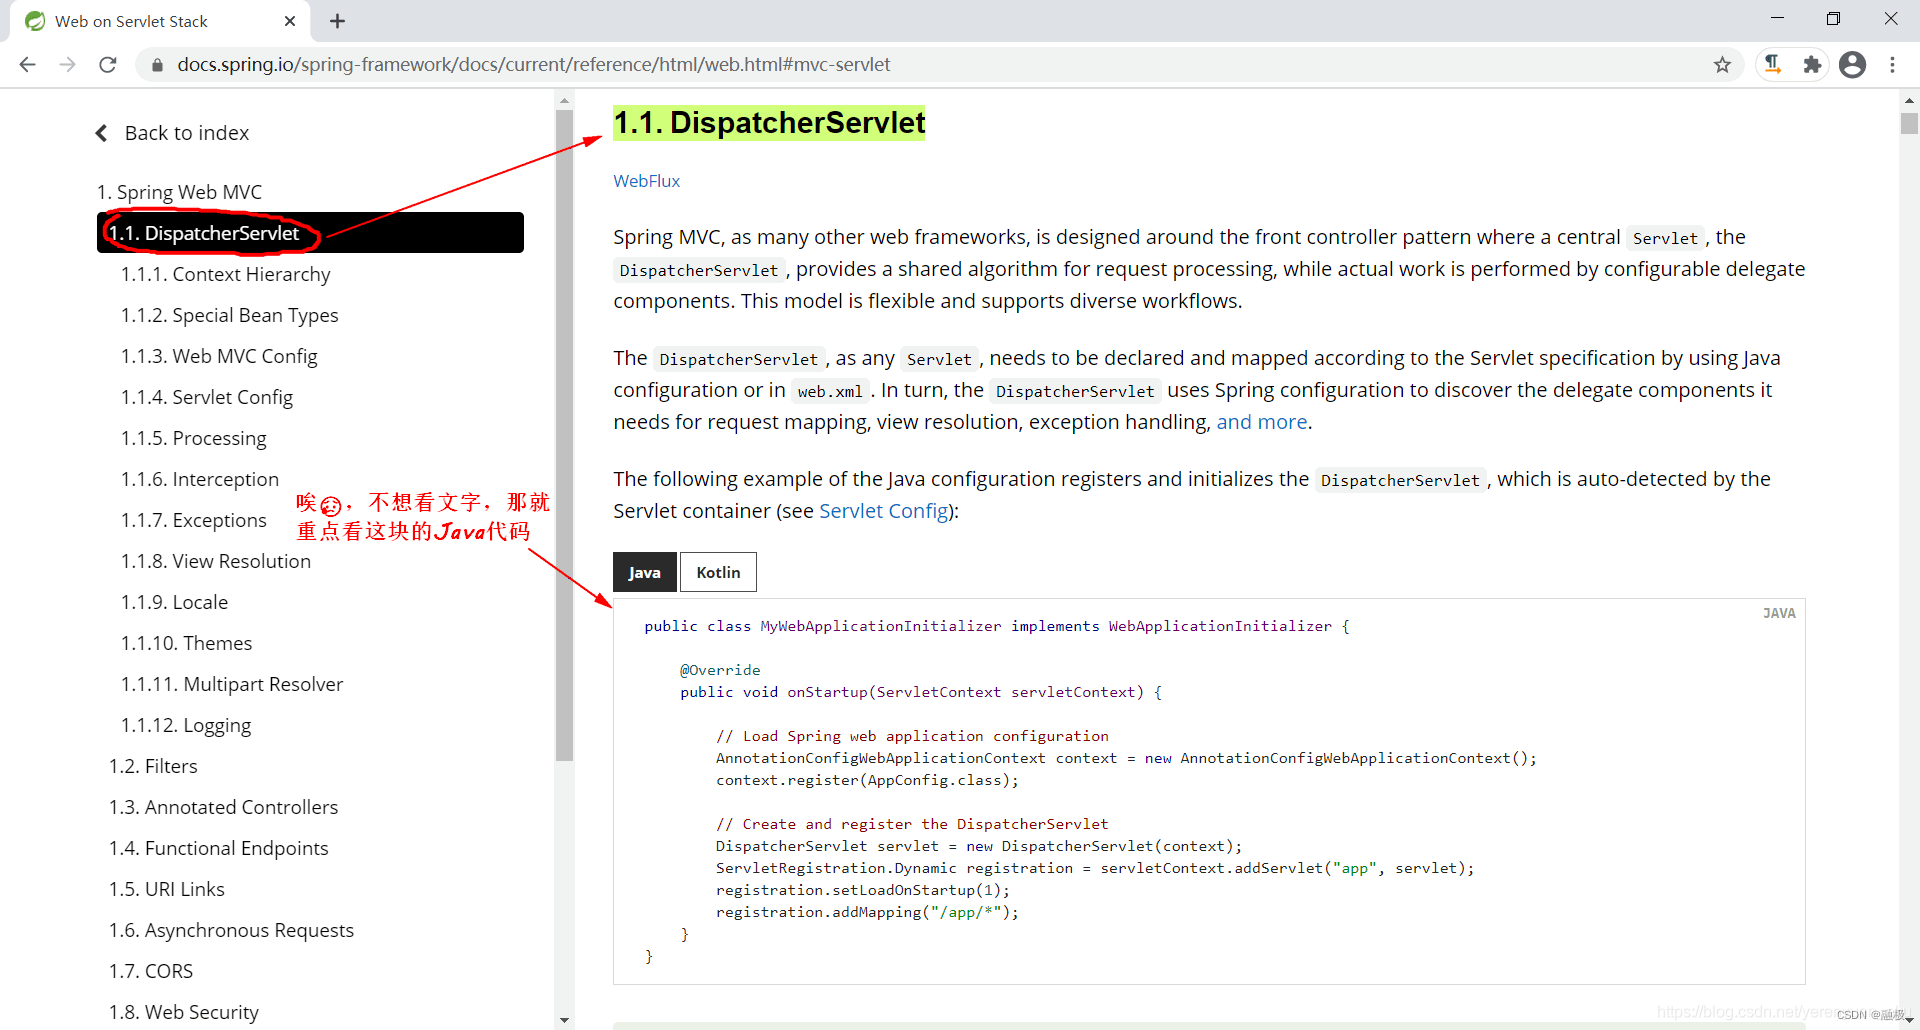
上图中代码摘抄如下:
// 我们可以编写一个类来实现WebApplicationInitializer接口哟,当然了,你也可以编写一个类来实现ServletContainerInitializer接口
public class MyWebApplicationInitializer implements WebApplicationInitializer {

	@Override
	public void onStartup(ServletContext servletContext) {

		// 然后,我们来创建一个AnnotationConfigWebApplicationContext对象,它应该代表的是web的IOC容器
		AnnotationConfigWebApplicationContext context = new AnnotationConfigWebApplicationContext();
		// 加载我们的配置类
		context.register(AppConfig.class);

		// 在容器启动的时候,我们自己来创建一个DispatcherServlet对象,并将其注册在ServletContext中
		DispatcherServlet servlet = new DispatcherServlet(context);
		// 向servlet容器(Tomcat容器)中添加DispatcherServlet实例
		ServletRegistration.Dynamic registration = servletContext.addServlet("app", servlet);
		registration.setLoadOnStartup(1);
		// 这儿是来配置DispatcherServlet的映射信息的
		registration.addMapping("/app/*");
	}
}
我们通常不使用上面的方式整合SpringMVC,但是通过它我们可以了解Servlet通过生命周期的Hook方法调用Spring,Spring容器的创建过程。
这种方式类似于我们以前整合Spring MVC时在web.xml文件中写的如下配置。
<!-- 使用监听器启动Spring的配置(即spring/applicationContext-*.xml),加载Spring的配置来启动Spring容器,这个容器我们叫它父容器,也可以称之为根容器 -->
<listener>
	<listener-class>org.springframework.web.context.ContextLoaderListener</listener-class>
</listener>
<!-- 初始化Spring容器 -->
<context-param>
	<param-name>contextConfigLocation</param-name>
	<param-value>classpath:spring/applicationContext-*.xml</param-value>
</context-param>
<!-- 子容器,Spring MVC子容器-->
<!-- 前端控制器 -->
<servlet>
	<servlet-name>taotao-search-web</servlet-name>
	<servlet-class>org.springframework.web.servlet.DispatcherServlet</servlet-class>
	<!-- contextConfigLocation不是必须的,如果不配置contextConfigLocation, Spring MVC的配置文件默认在:WEB-INF/servlet的name+"-servlet.xml" -->
	<init-param>
		<param-name>contextConfigLocation</param-name>
		<!-- 指定Spring MVC配置文件的路径 -->
		<param-value>classpath:spring/springmvc.xml</param-value>
	</init-param>
	<load-on-startup>1</load-on-startup>
</servlet>
<!-- 配好映射 -->
<servlet-mapping>
	<servlet-name>taotao-search-web</servlet-name>
	<!-- 伪静态化 -->
	<url-pattern>*.html</url-pattern>
</servlet-mapping>
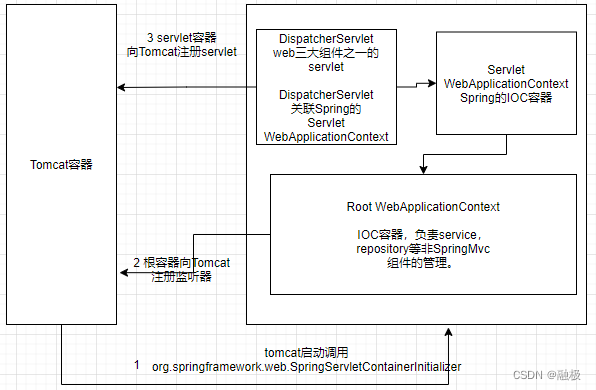
可以看到我们以前配置的是这种父子容器,而且Spring也推荐使用父子容器的概念。
Servlet3.0整合SpringMVC的方式
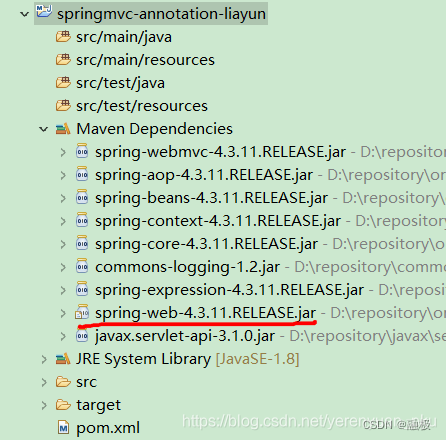
既然我们不会用上述这种方式,那么得用哪种方式呢?不妨展开我们maven工程下的Maven Dependencies目录,发现我们导入了spring-web-4.3.11.RELEASE.jar这样一个jar包,如下图所示。
展开该jar包,发现它里面有一个META-INF/services/目录,而且在该目录下有一个名字叫javax.servlet.ServletContainerInitializer的文件,其内容如下所示。
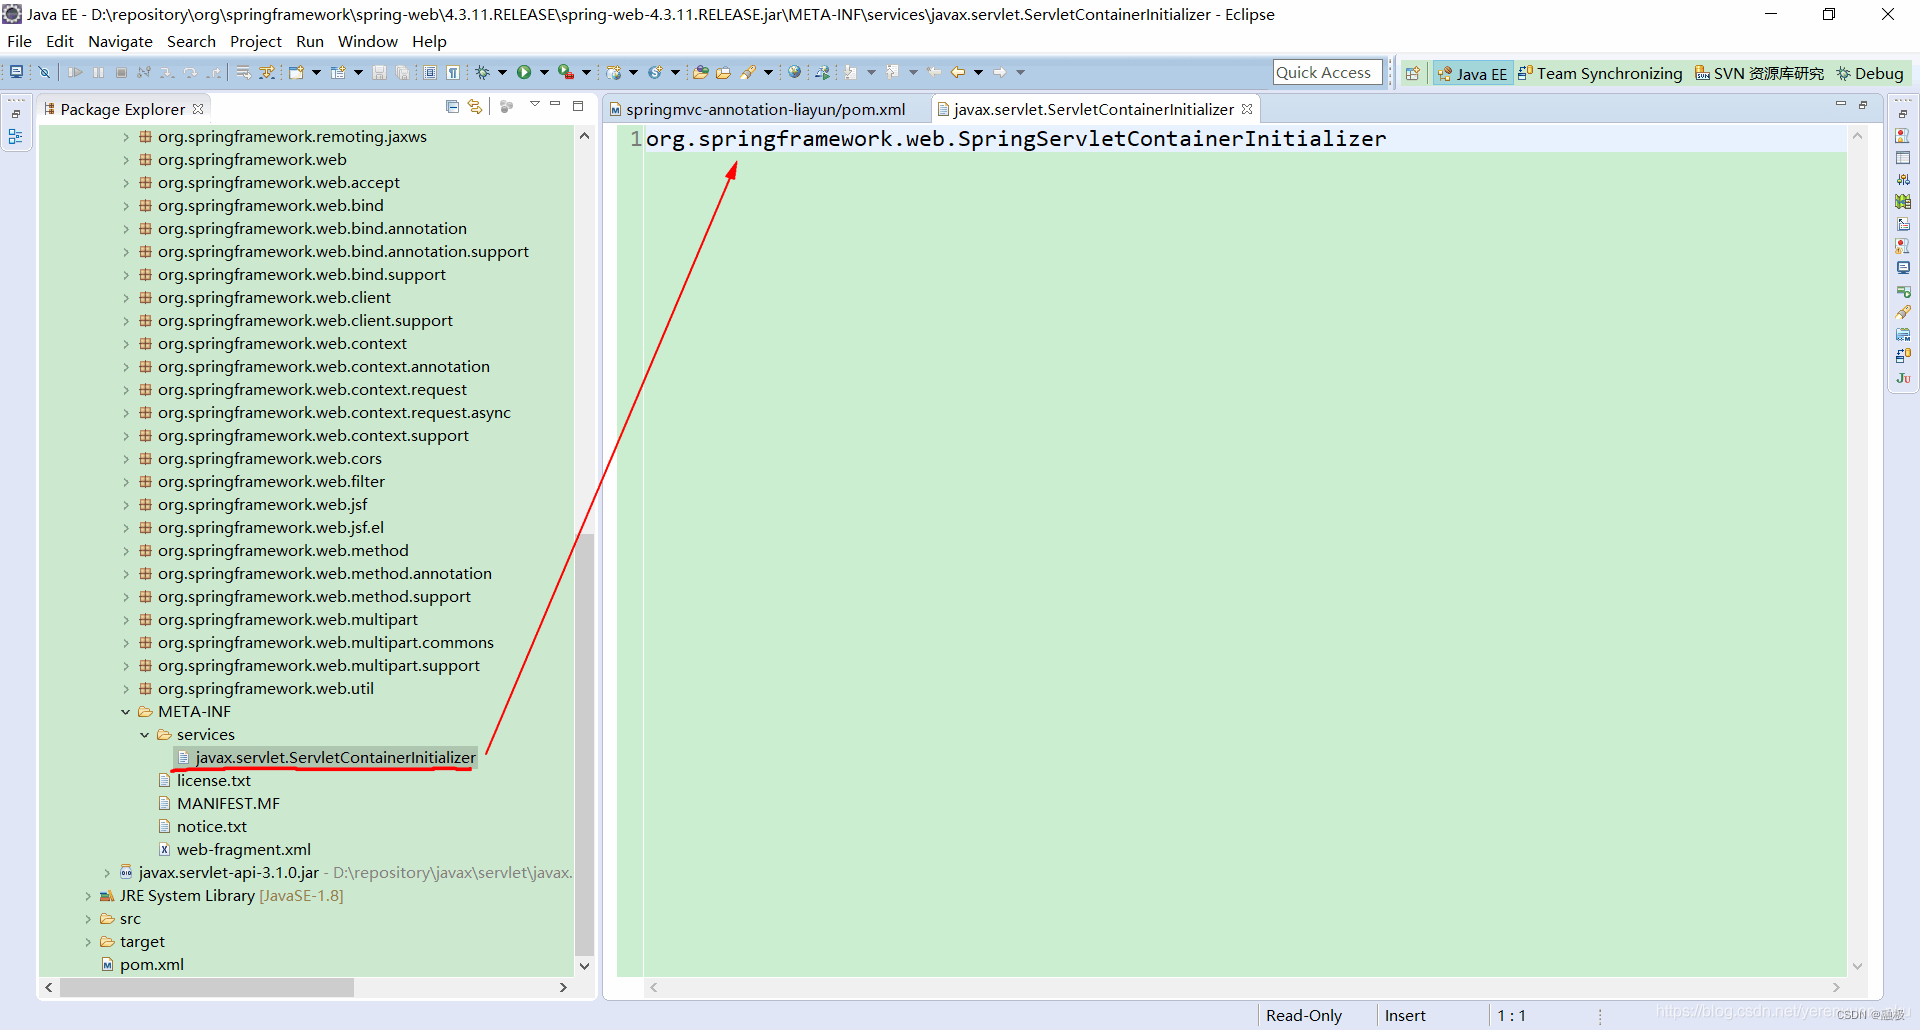
我们以前说过,Servlet容器在启动应用的时候,会扫描当前应用每一个jar包里面的META-INF/services/javax.servlet.ServletContainerInitializer文件中指定的实现类,然后加载该实现类并运行它里面的方法。
那我们就来看一下spring-web-4.3.11.RELEASE.jar中META-INF/services/目录里面的javax.servlet.ServletContainerInitializer文件中到底指定的哪一个类,从上图我们可以知道其指定的是org.springframework.web.SpringServletContainerInitializer这个类。
它实现的就是ServletContainerInitializer接口。
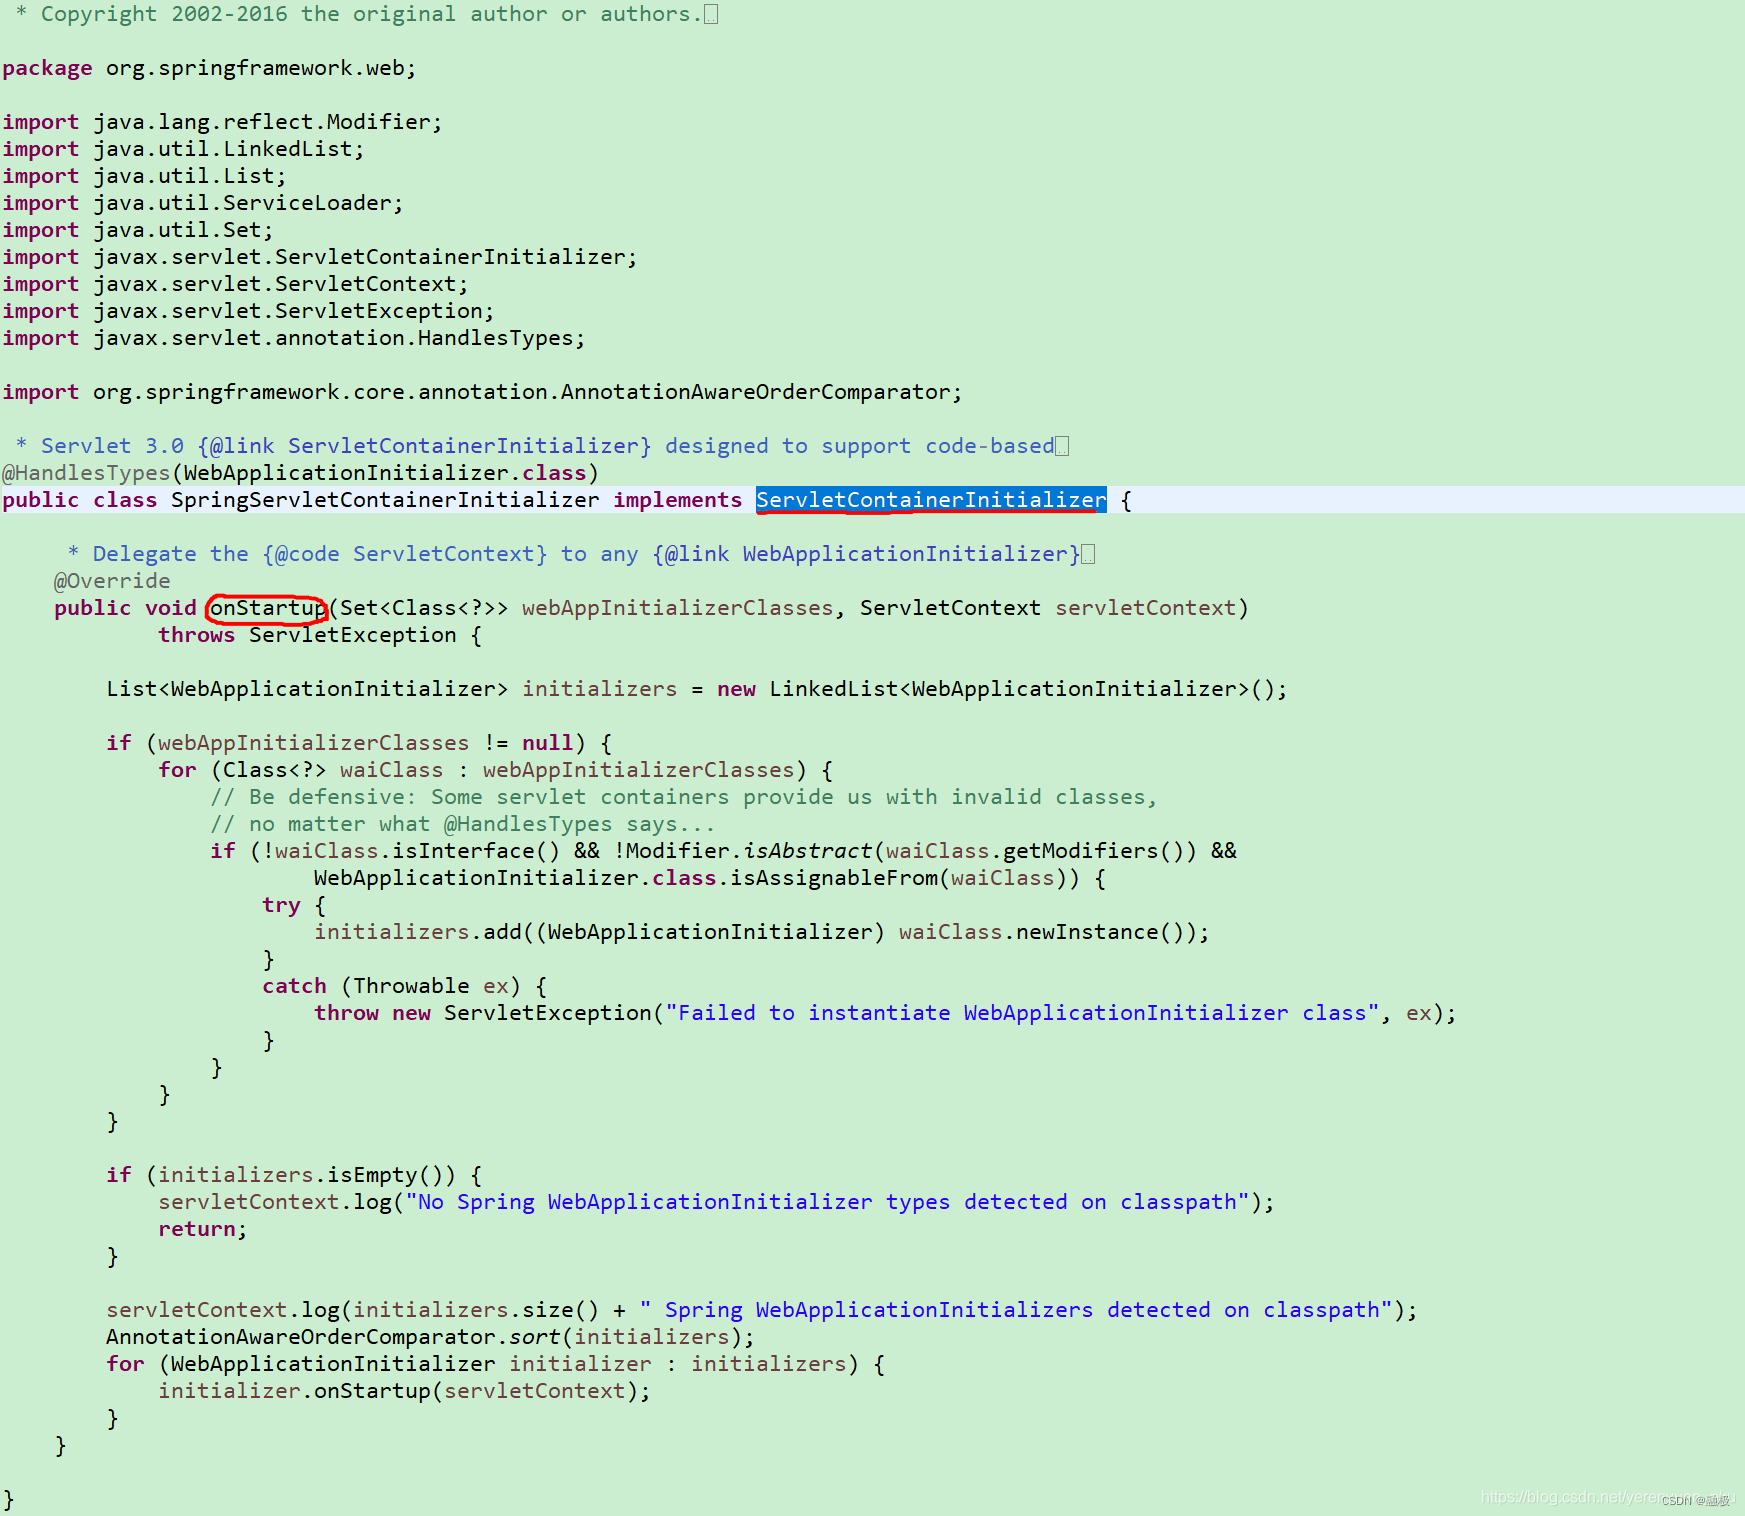
Servlet容器在启动我们Spring应用之后,会传入一个我们感兴趣的类型的集合,然后在onStartup方法中拿到之后就会来挨个遍历,如果遍历出来的我们感兴趣的类型不是接口,也不是抽象类,但是WebApplicationInitializer接口旗下的,那么就会创建该类型的一个实例,并将其存储到名为initializers的LinkedList集合中。
也可以这样说,我们Spring的应用一启动就会加载感兴趣的WebApplicationInitializer接口旗下的所有组件,并且为这些WebApplicationInitializer组件创建对象,当然前提是这些组件即不是接口,也不是抽象类。
接下来,我们就来到咱们感兴趣的WebApplicationInitializer接口中,并查看该接口的继承树。
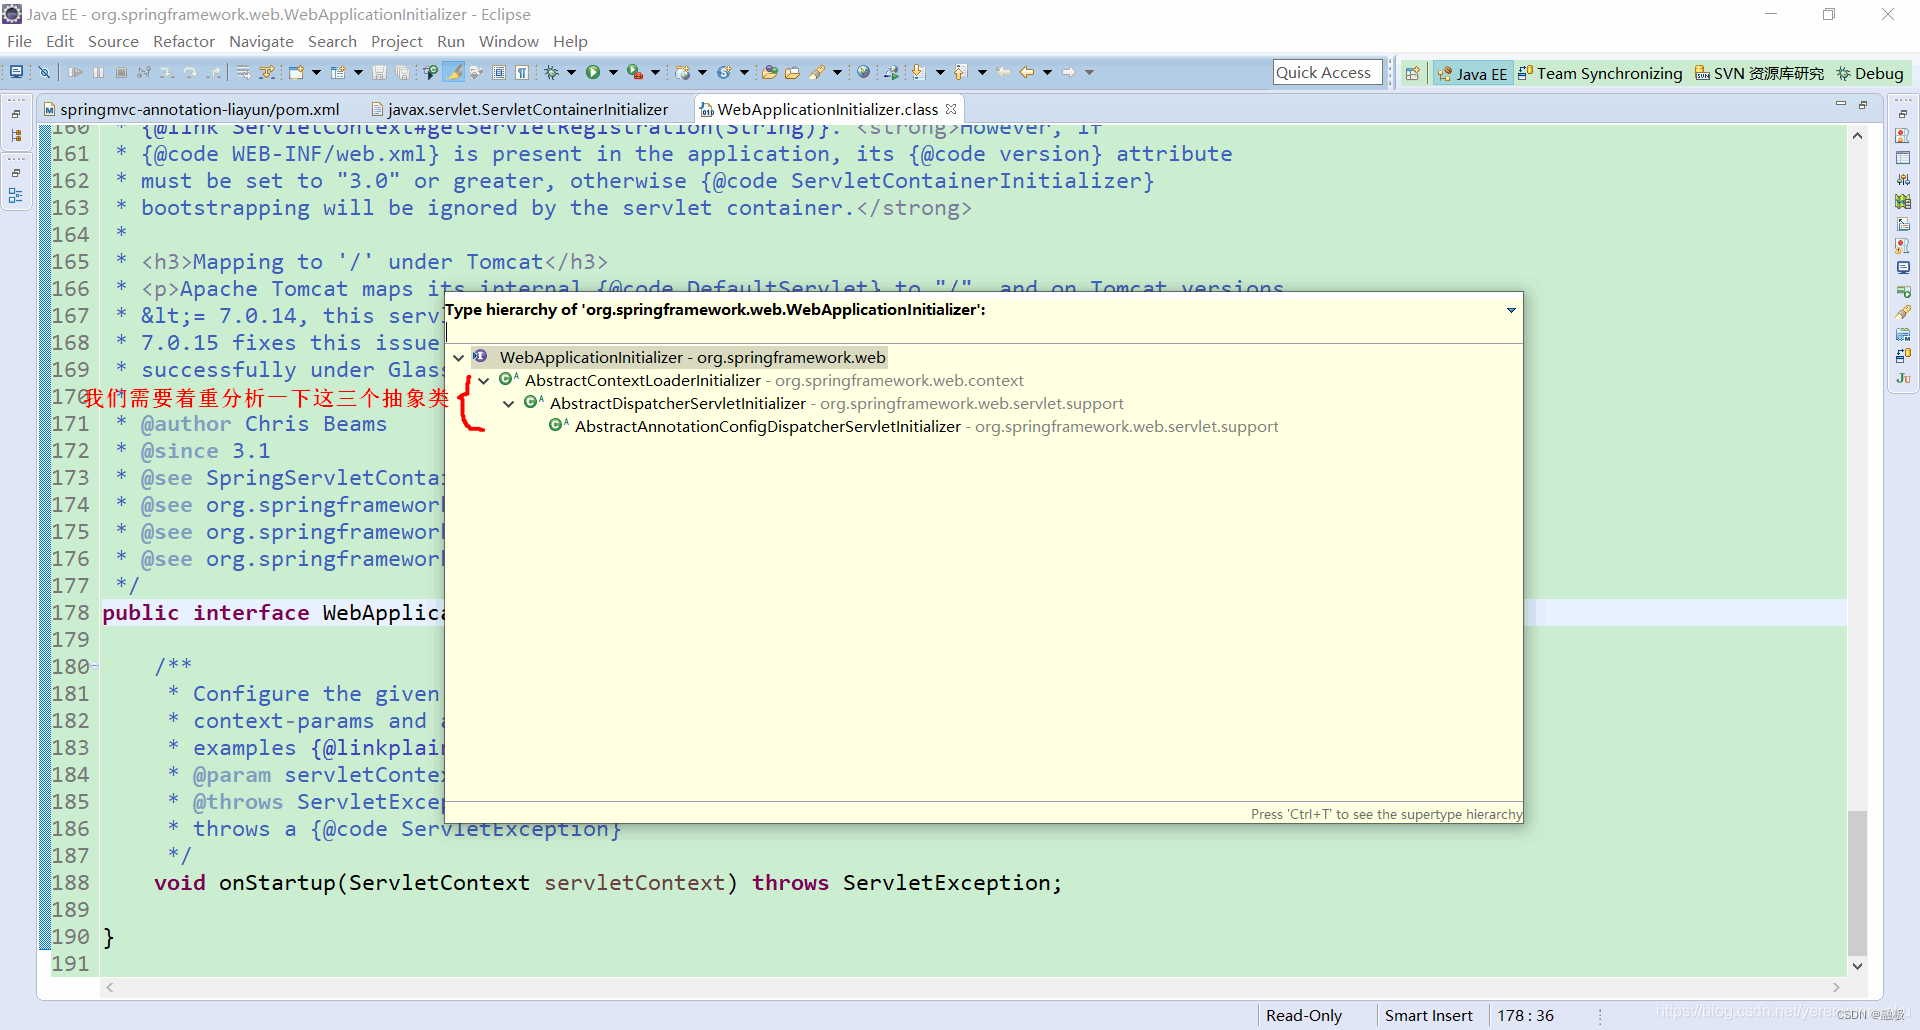
第一层抽象类:AbstactContextLoaderInitializer
进入AbstractContextLoaderInitializer的源码,主要看onStartUp方法。

方法调用了registerContextLoaderListener方法,就是注册ContextLoaderListener。
registerContextLoaderListener掉有了createRootApplicationContext方法,该方法是来创建根容器的,而且方法是一个抽象方法,需要子类自己去实现。根据根容器创建上下文加载监听器(ContextLoaderListener),接着把ContextLoaderListener注册到ServletContext容器中。
第二层抽象类,AbstractDispatcherServletInitializer
我们也不妨点进该抽象类里面去看一看,并且主要来看其onStartUp方法,发现会注册DispatcherServlet,如下所示。
@Override
public void onStartup(ServletContext servletContext) throws ServletException {
	// 调用父类(即AbstractContextLoaderInitializer)的onStartup方法,先把根容器创建出来
	super.onStartup(servletContext);
	// 往ServletContext中注册DispatcherServlet
	registerDispatcherServlet(servletContext);
}

protected void registerDispatcherServlet(ServletContext servletContext) {
	String servletName = getServletName();
	Assert.hasLength(servletName, "getServletName() must not return empty or null");

	// 调用createServletApplicationContext方法来创建一个web的IOC容器,而且该方法还是一个抽象方法,需要子类去实现
	WebApplicationContext servletAppContext = createServletApplicationContext();
	Assert.notNull(servletAppContext,
			"createServletApplicationContext() did not return an application " +
			"context for servlet [" + servletName + "]");

	// 调用createDispatcherServlet方法来创建一个DispatcherServlet
	FrameworkServlet dispatcherServlet = createDispatcherServlet(servletAppContext);
	dispatcherServlet.setContextInitializers(getServletApplicationContextInitializers());

	// 将创建好的DispatcherServlet注册到ServletAppContext中
	ServletRegistration.Dynamic registration = servletContext.addServlet(servletName, dispatcherServlet);
	Assert.notNull(registration,
			"Failed to register servlet with name '" + servletName + "'." +
			"Check if there is another servlet registered under the same name.");

	registration.setLoadOnStartup(1);
	// 配置DispatcherServlet的映射映射信息,其中getServletMappings方法是一个抽象方法,需要由子类自己来重写
	registration.addMapping(getServletMappings());
	registration.setAsyncSupported(isAsyncSupported());

	Filter[] filters = getServletFilters();
	if (!ObjectUtils.isEmpty(filters)) {
		for (Filter filter : filters) {
			registerServletFilter(servletContext, filter);
		}
	}
	customizeRegistration(registration);
}
我们发现会先调用createServletApplicationContext方法来创建一个WebApplicationContext(即web的IOC容器),再调用createDispatcherServlet方法来创建一个DispatcherServlet。
protected FrameworkServlet createDispatcherServlet(WebApplicationContext servletAppContext) {
	// 创建一个DispatcherServlet
	return new DispatcherServlet(servletAppContext);
}
此外,我们还发现在registerDispatcherServlet方法中还会将创建好的DispatcherServlet注册到ServletAppContext中,很显然,这时会返回一个ServletRegistration.Dynamic对象,自然地就要来配置该DispatcherServlet的映射信息了,在配置该DispatcherServlet的映射信息时,还调用了一个getServletMapppings方法,不过该方法是一个抽象方法,需要由子类自己来重写。
第三层抽象类,AbstractAnnotationConfigDispatcherServletInitializer
我们也不妨点进该抽象类里面去看一看,可以看到它重写了AbstractContextLoaderInitializer抽象父类里面的createRootApplicationContext方法,如下所示,而且我们知道该方法是来创建根容器的。
@Override
protected WebApplicationContext createRootApplicationContext() {
	// 传入一个配置类(用户自定义)
	Class<?>[] configClasses = getRootConfigClasses();
	if (!ObjectUtils.isEmpty(configClasses)) {
		// 创建一个根容器
		AnnotationConfigWebApplicationContext rootAppContext = new AnnotationConfigWebApplicationContext();
		// 注册获取到的配置类,相当于注册配置类里面的组件
		rootAppContext.register(configClasses);
		return rootAppContext;
	}
	else {
		return null;
	}
}
首先获取到一个配置类,调用的可是getRootConfigClasses方法,调用该方法能传入一个配置类(其实就是我们自己写的),而且该方法还是一个抽象方法,需要由子类自己来重写。继续,要知道我们以前写的可是xml配置文件,获取到了之后,会new一个AnnotationConfigWebApplicationContext,这就相当于创建了一个根容器,然后将获取到的配置类注册进去,相当于是注册配置类里面的组件,最终返回创建的根容器。
此外,该抽象类里面还有一个createServletApplicationContext方法,如下所示,它是来创建web的IOC容器的,其实这个方法就是重写的AbstractDispatcherServletInitializer抽象类里面的createServletApplicationContext方法。
@Override
protected WebApplicationContext createServletApplicationContext() {
	// 创建一个web容器
	AnnotationConfigWebApplicationContext servletAppContext = new AnnotationConfigWebApplicationContext();
	// 获取一个配置类
	Class<?>[] configClasses = getServletConfigClasses();
	if (!ObjectUtils.isEmpty(configClasses)) {
		// 注册获取到的配置类,相当于注册配置类里面的组件
		servletAppContext.register(configClasses);
	}
	return servletAppContext;
}
可以看到,在以上方法中首先会创建一个web的IOC容器(即AnnotationConfigWebApplicationContext对象),然后再获取一个配置类,调用的是getServletConfigClasses方法,我们不妨点进该方法里面去看一下,如下所示,发现它是一个抽象方法,需要由子类自己来重写。
protected abstract Class<?>[] getServletConfigClasses();
获取到配置类之后,最终会将其注册进去。
至此,我们就算分析完了AbstractAnnotationConfigDispatcherServletInitializer抽象类了。
总结
如果我们想以注解方式(也就是配置类的方式)来整合SpringMVC,只需要自己来继承AbstractAnnotationConfigDispatcherServletInitializer这个抽象类就行了。
继承它之后,它里面会给我们预留一些抽象方法,例如getServletConfigClasses、getRootConfigClasses以及getServletMappings等抽象方法,我们只须重写这些抽象方法即可,这样就能指定DispatcherServlet的配置信息了,随即,DispatcherServlet就会被自动地注册到ServletContext对象中。
最后我们来看下Spring官方文档。
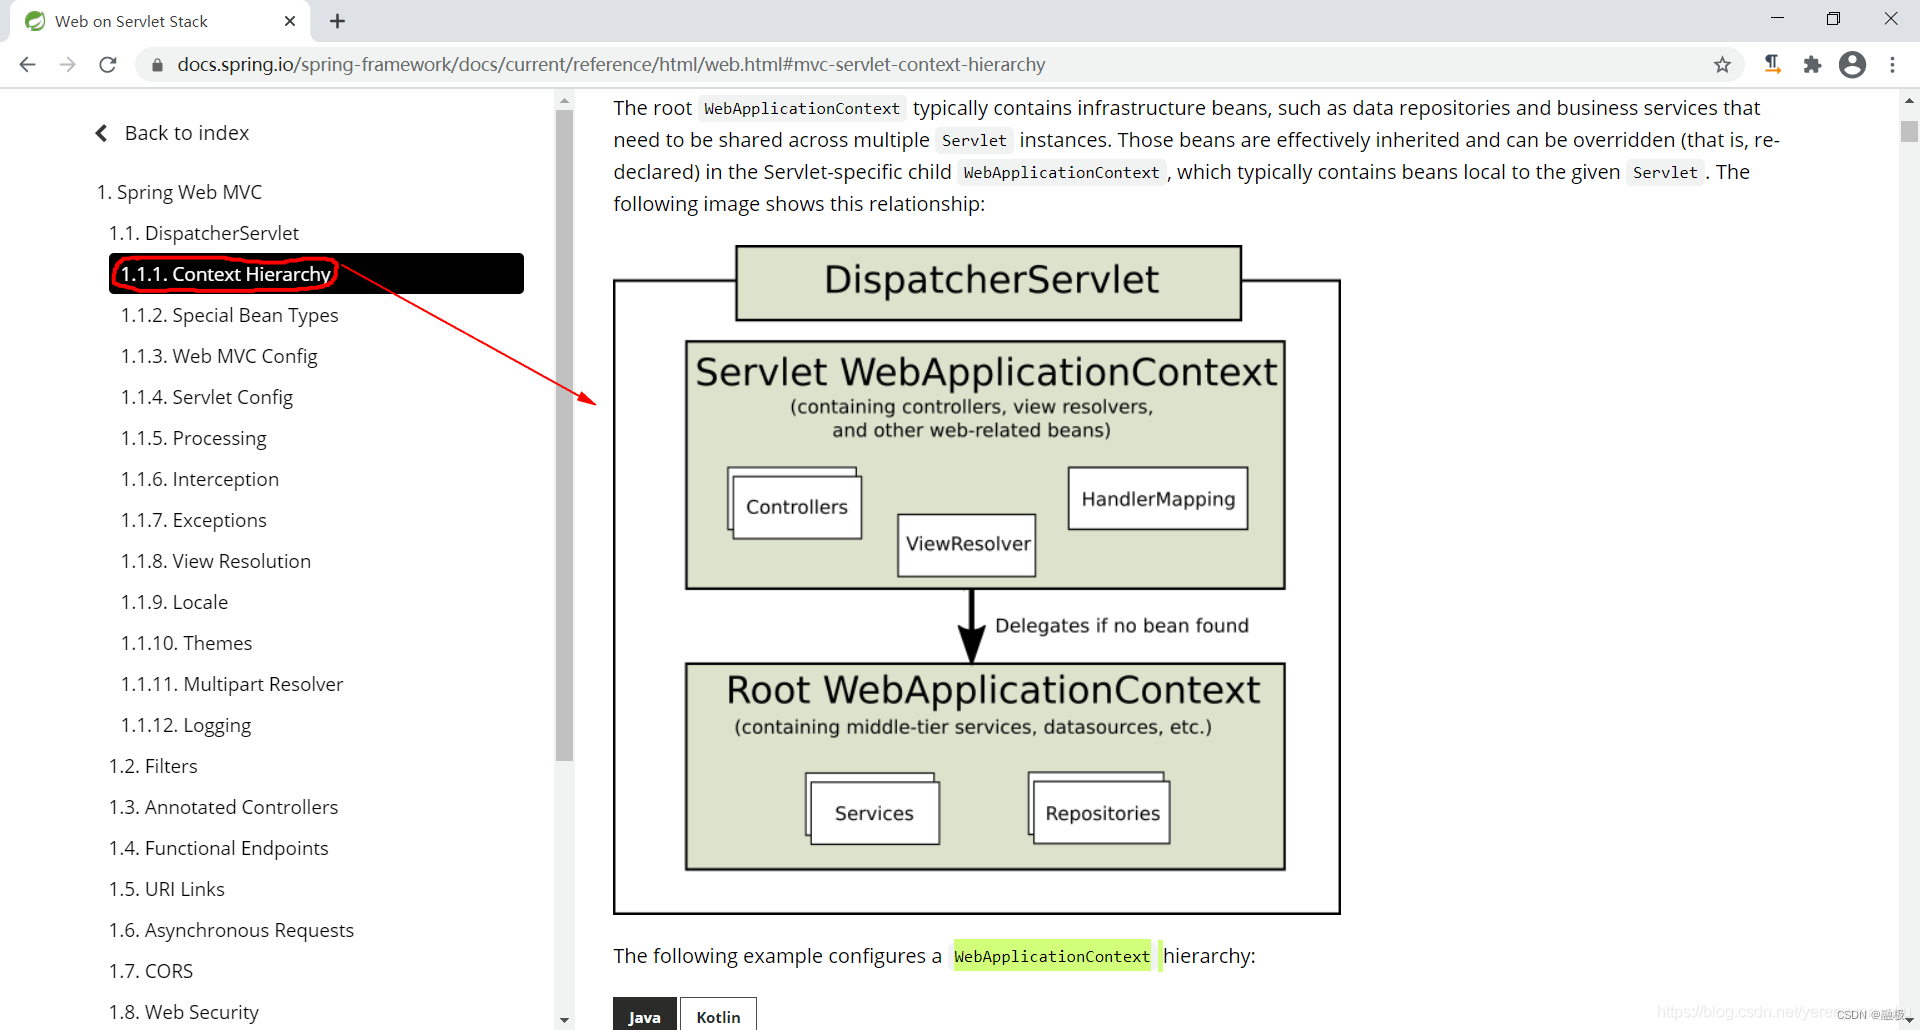
可以看到Spring官方也推荐使用父子容器的概念,分为根容器和web容器:
- web容器:也即子容器,只来扫描controller控制层组件(一般不包含核心业务逻辑,只有数据校验和视图渲染等工作)与视图解析器等等。
- 根容器:扫描业务逻辑核心组件,包括不同的数据源等待。
继续往下看1.1.1. Context Hierarchy这一小节中的内容,发现跟我们分析的一样,要想以注解方式(也可以说是以配置类的方式)来整合Spring MVC,那么只需要我们自己来继承AbstractAnnotationConfigDispatcherServletInitializer这个抽象类就行了,这样,web容器启动的时候就能处理我们实现的这个类的内容了。

参考
版权声明:本文内容由互联网用户自发贡献,该文观点仅代表作者本人。本站仅提供信息存储空间服务,不拥有所有权,不承担相关法律责任。如发现本站有涉嫌侵权/违法违规的内容, 请发送邮件至 举报,一经查实,本站将立刻删除。
文章由极客之音整理,本文链接:https://www.bmabk.com/index.php/post/99966.html

