
一、yaml
YAML(YAML Ain’t Markup Language),一种数据序列化格式。
优点:
- 容易阅读
- 容易与脚本语言交互
- 以数据为核心,重数据轻格式
YAML文件扩展名:
- .yml(主流)
- .yaml
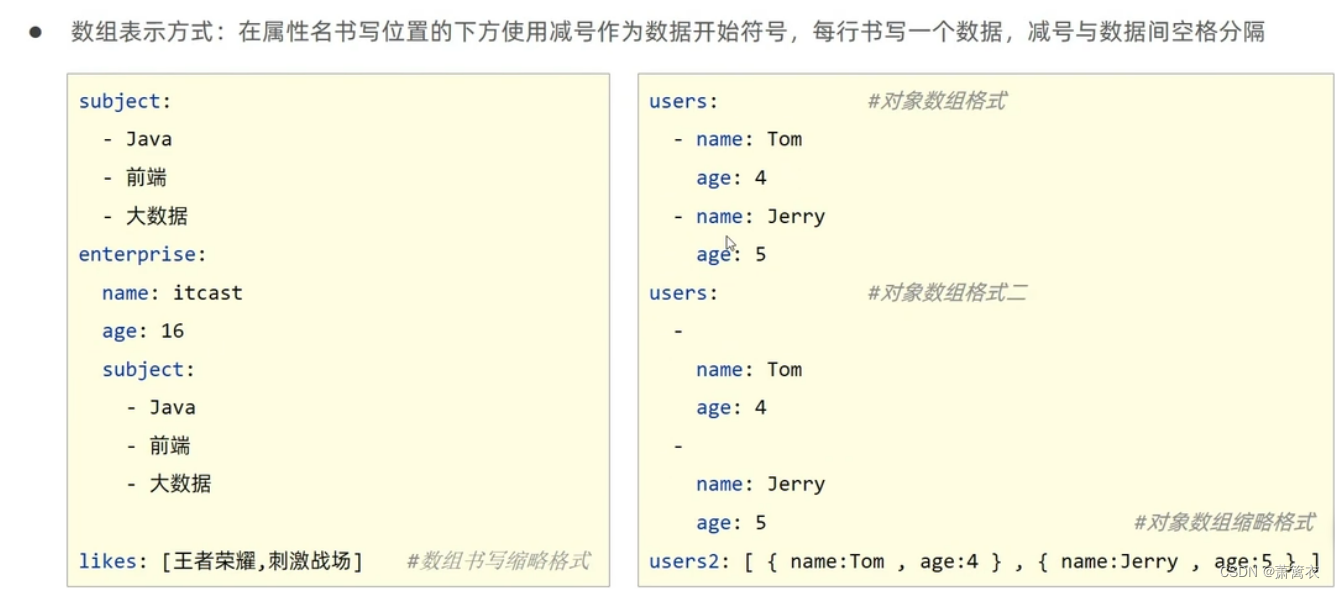
二、yaml语法规则
- 大小写敏感
- 属性层级关系使用多行描述,每行结尾使用冒号结束
- 使用缩进表示层级关系,同层级左侧对齐,只允许使用空格(不允许使用Tab键)
- 属性值前面添加空格(属性名与属性值之间使用冒号+空格作为分隔)
- #表示注解
核心规则:数据前面要加空格与冒号隔开
country: china
province: beijing
city: beijing
area: haidian

port: 8080

party: true

birthday: 1949-10-01

user:
  name: jf
  age: 16

likes: [game,music,sleep]

users:
  - name: zhangsan
    age: 18
  - name: lisi
age: 20| Boolean: TRUE | #TRUE,true,True,FALSE,false,False均可 |
| float: 3.14 | #6.8523015e+5 支持科学及算法 |
| int: 123 | #0b1010_0111_0100_1010_1110 支持二进制、八进制、十六进制 |
| null: ~ | #使用~表示null |
| string: hello world | #字符串可以直接书写 |
| string2: “hello world” | #可以使用双引号包裹特殊字符 |
| date: 2022-07-29 | #日期必须使用yyyy-MM-dd格式 |
| datetime: 2022-07-29T15:02:31+08:00 | #时间和日期之间使用T连接,最后使用+代表时区 |
三、yaml数据读取
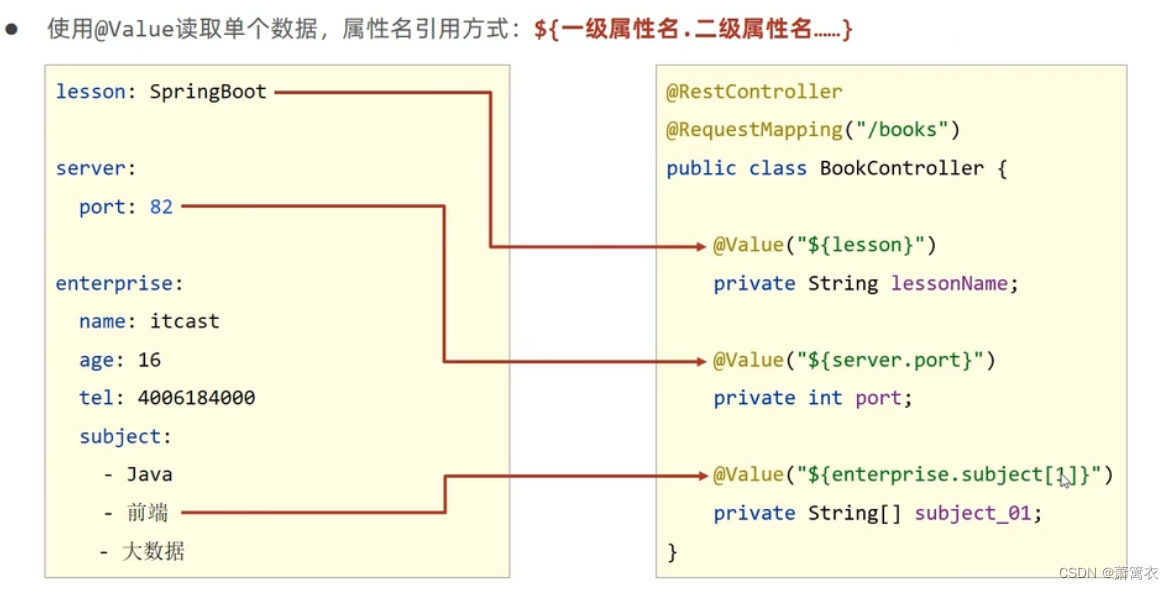
使用@Value配合SpEL读取单个数据,属性名引用方式:${一级属性名.二级属性名…},遇到数组用中括号,如果数据存在多层级,依次书写层级名称即可,代码和效果图如下:
注意:user 默认有属性值 就是你系统 用户信息
@RestController
@RequestMapping("/books")
public class BookController {

    //读取yaml数据中的单一数据
    @Value("${country}")
    private String country1;

    @Value("${user.name}")
    private String name1;

}
四、yaml文件中的变量引用
1. 使用${属性名}引用数据
#使用${属性名}引用数据
tempDir: "${baseDir}\temp"
2. 属性中如果出现转义字符,需要使用双引号包裹
#使用引号包裹的字符串,其中的转义字符可以生效
tempDir2: "${baseDir}\temp\t1\t2\t3"
注意:在yaml中是支持转义字符的,例如上图的例子只要加上引号效果就会不一样

五、读取yaml全部属性数据
封装全部数据到 Environment 对象
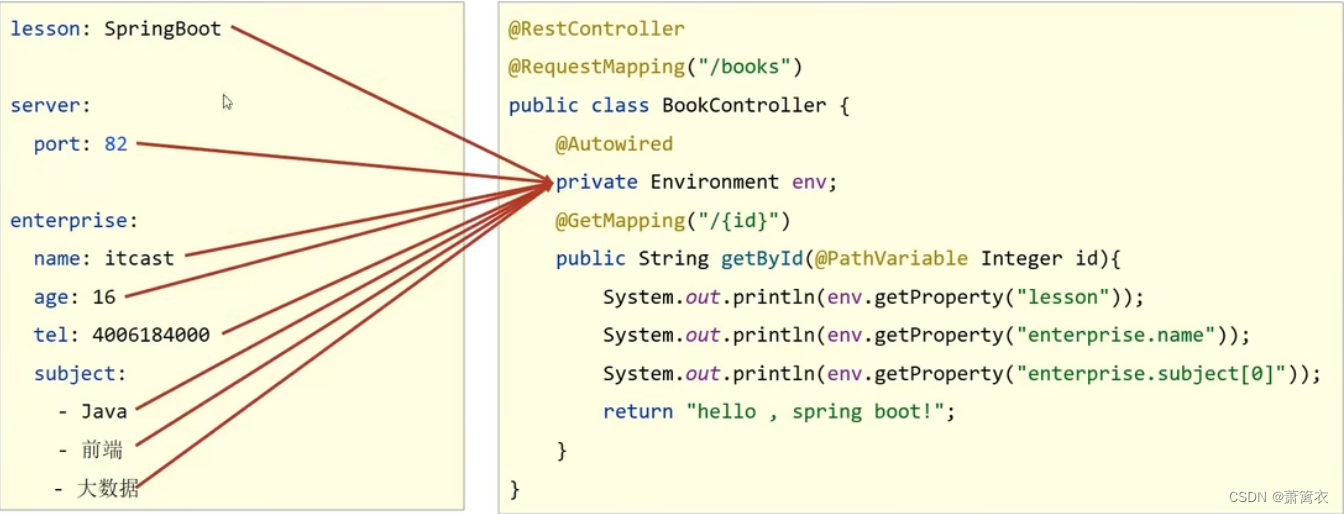
使用 @Autowired 自动装配数据到 Environment 对象中
Controller代码:
package com.jf.controller;
import org.springframework.beans.factory.annotation.Autowired;
import org.springframework.beans.factory.annotation.Value;
import org.springframework.core.env.Environment;
import org.springframework.stereotype.Controller;
import org.springframework.web.bind.annotation.*;
import java.awt.print.Book;
//Rest模式
@RestController
@RequestMapping("/books")
public class BookController {
//读取yaml数据中的单一数据
@Value("${country}")
private String country1;
@Value("${user.name}")
private String name1;
@Value("${tempDir}")
private String tempDir;
//使用自动装配将所有的数据封装到一个对象Environment中
@Autowired
private Environment env;
@GetMapping
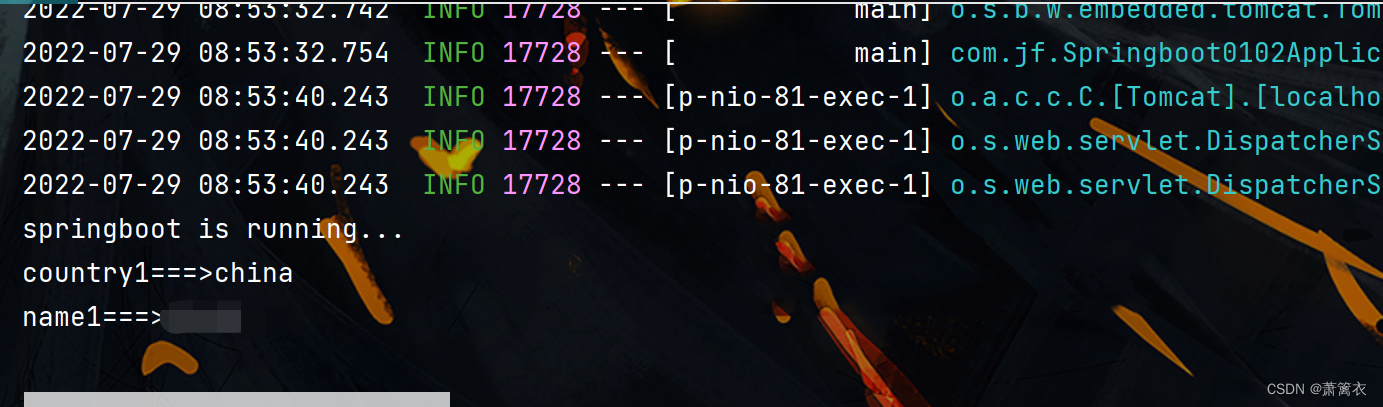
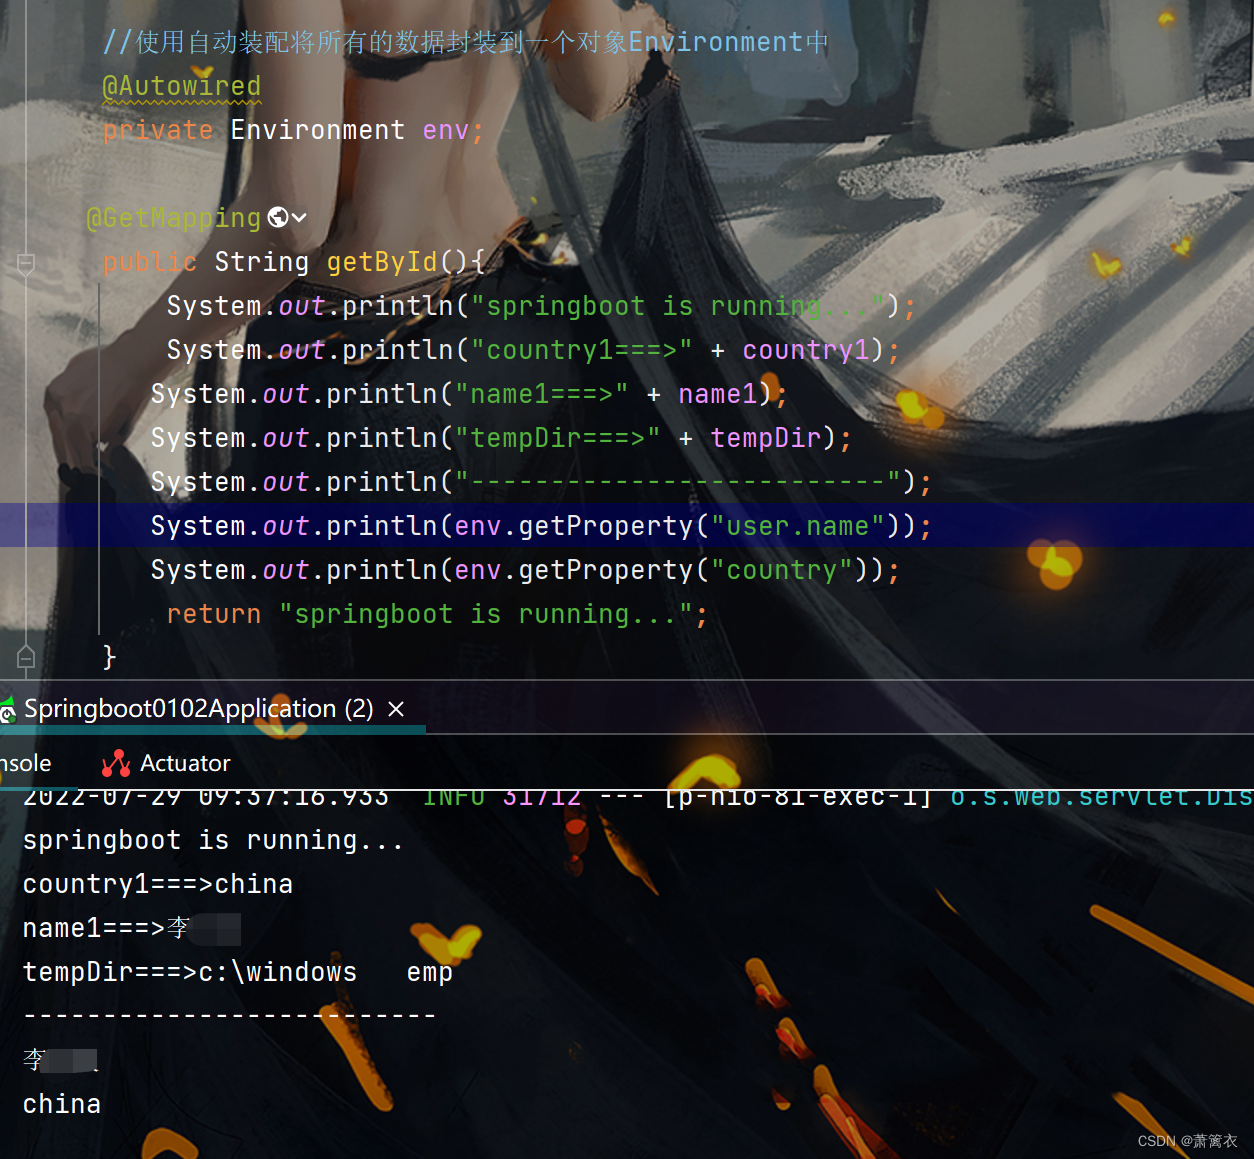
public String getById(){
System.out.println("springboot is running...");
System.out.println("country1===>" + country1);
System.out.println("name1===>" + name1);
System.out.println("tempDir===>" + tempDir);
System.out.println("--------------------------");
System.out.println(env.getProperty("user.name"));
System.out.println(env.getProperty("country"));
return "springboot is running...";
}
}
yml代码:
country: china
province: beijing
city: beijing
area: haidian

port: 8080

party: true

birthday: 1949-10-01

user:
  name: jf
  age: 16

likes: [game,music,sleep]

users:
  - name: zhangsan
    age: 18
  - name: lisi
    age: 20

server:
  port: 81

baseDir: c:\windows

#使用${属性名}引用数据
tempDir: "${baseDir}\temp"
#使用引号包裹的字符串,其中的转义字符可以生效
tempDir2: "${baseDir}\temp\t1\t2\t3"
六、读取yaml引用类型属性数据
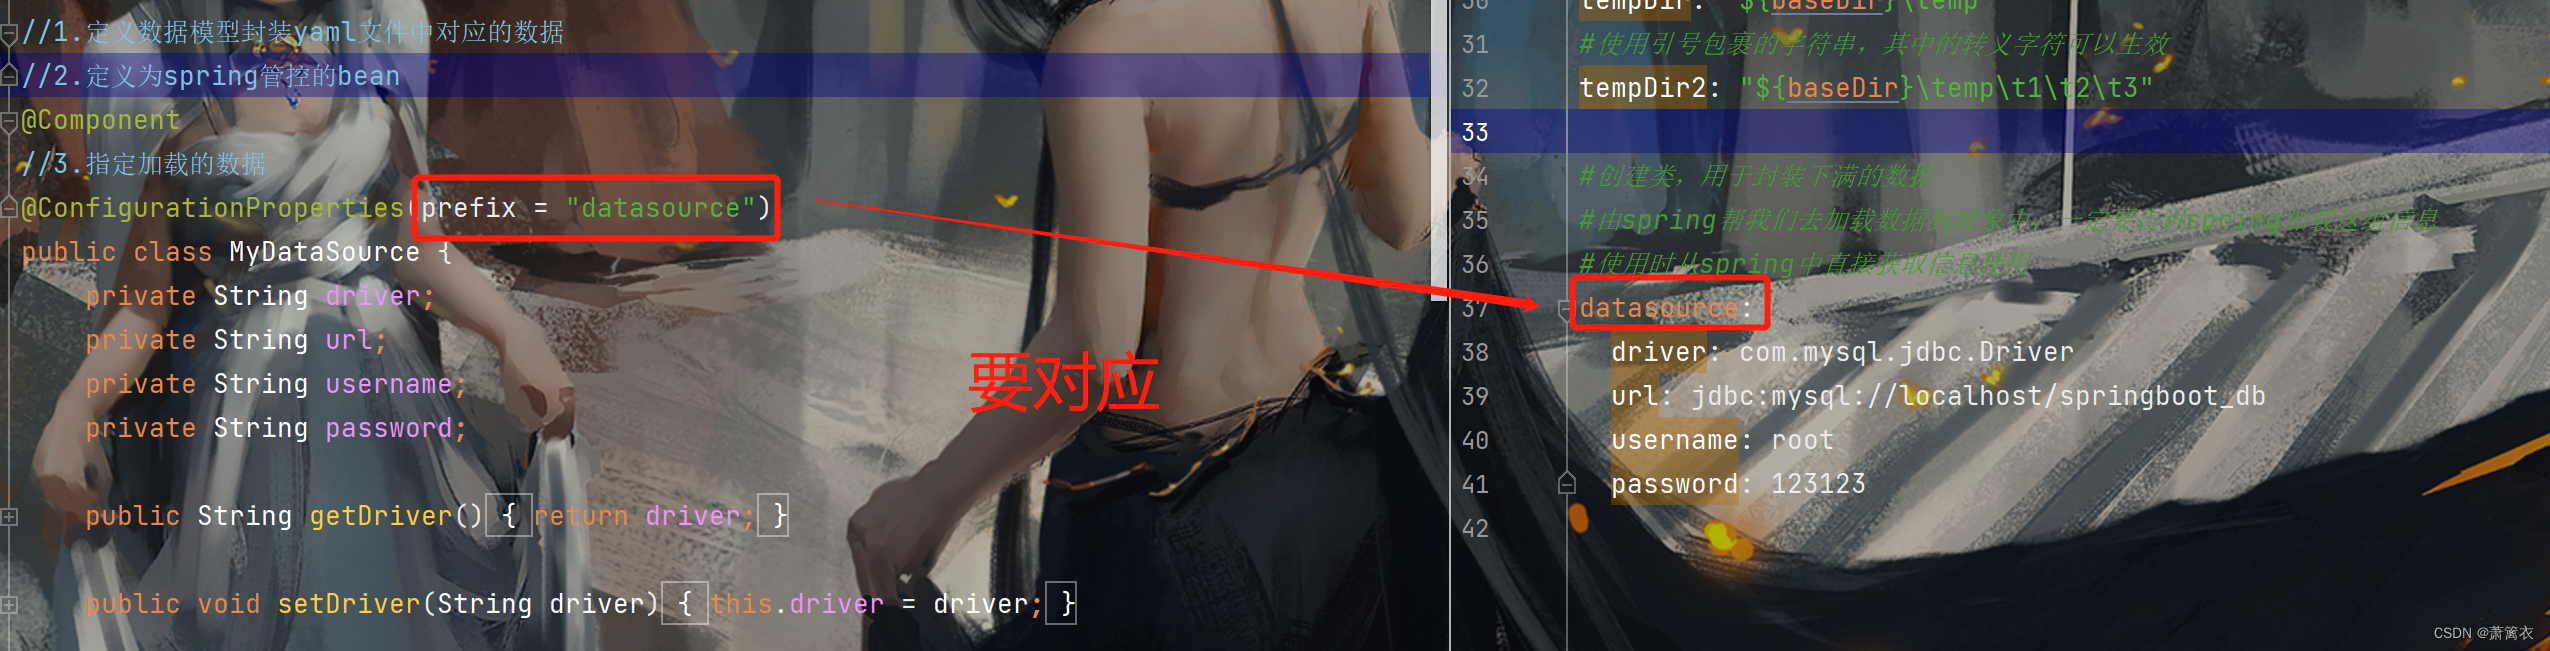
1. 自定义对象封装指定数据
datasource:
  driver: com.mysql.jdbc.Driver
  url: jdbc:mysql://localhost/springboot_db
  username: root
  password: 123123
提供一个用来封装的模型类
package com.jf;

import org.springframework.boot.context.properties.ConfigurationProperties;
import org.springframework.context.annotation.Configuration;
import org.springframework.stereotype.Component;

//1.定义数据模型封装yaml文件中对应的数据
//2.定义为spring管控的bean
@Component
//3.指定加载的数据
@ConfigurationProperties(prefix = "datasource")
public class MyDataSource {
    private String driver;
    private String url;
    private String username;
    private String password;

    public String getDriver() {
        return driver;
    }

    public void setDriver(String driver) {
        this.driver = driver;
    }

    public String getUrl() {
        return url;
    }

    public void setUrl(String url) {
        this.url = url;
    }

    public String getUsername() {
        return username;
    }

    public void setUsername(String username) {
        this.username = username;
    }

    public String getPassword() {
        return password;
    }

    public void setPassword(String password) {
        this.password = password;
    }

    @Override
    public String toString() {
        return "MyDataSource{" +
                "driver='" + driver + '\'' +
                ", url='" + url + '\'' +
                ", username='" + username + '\'' +
                ", password='" + password + '\'' +
                '}';
    }
}
@component (把普通pojo实例化到spring容器中,相当于配置文件中的 <bean id=”” class=””/>)
2. 启动
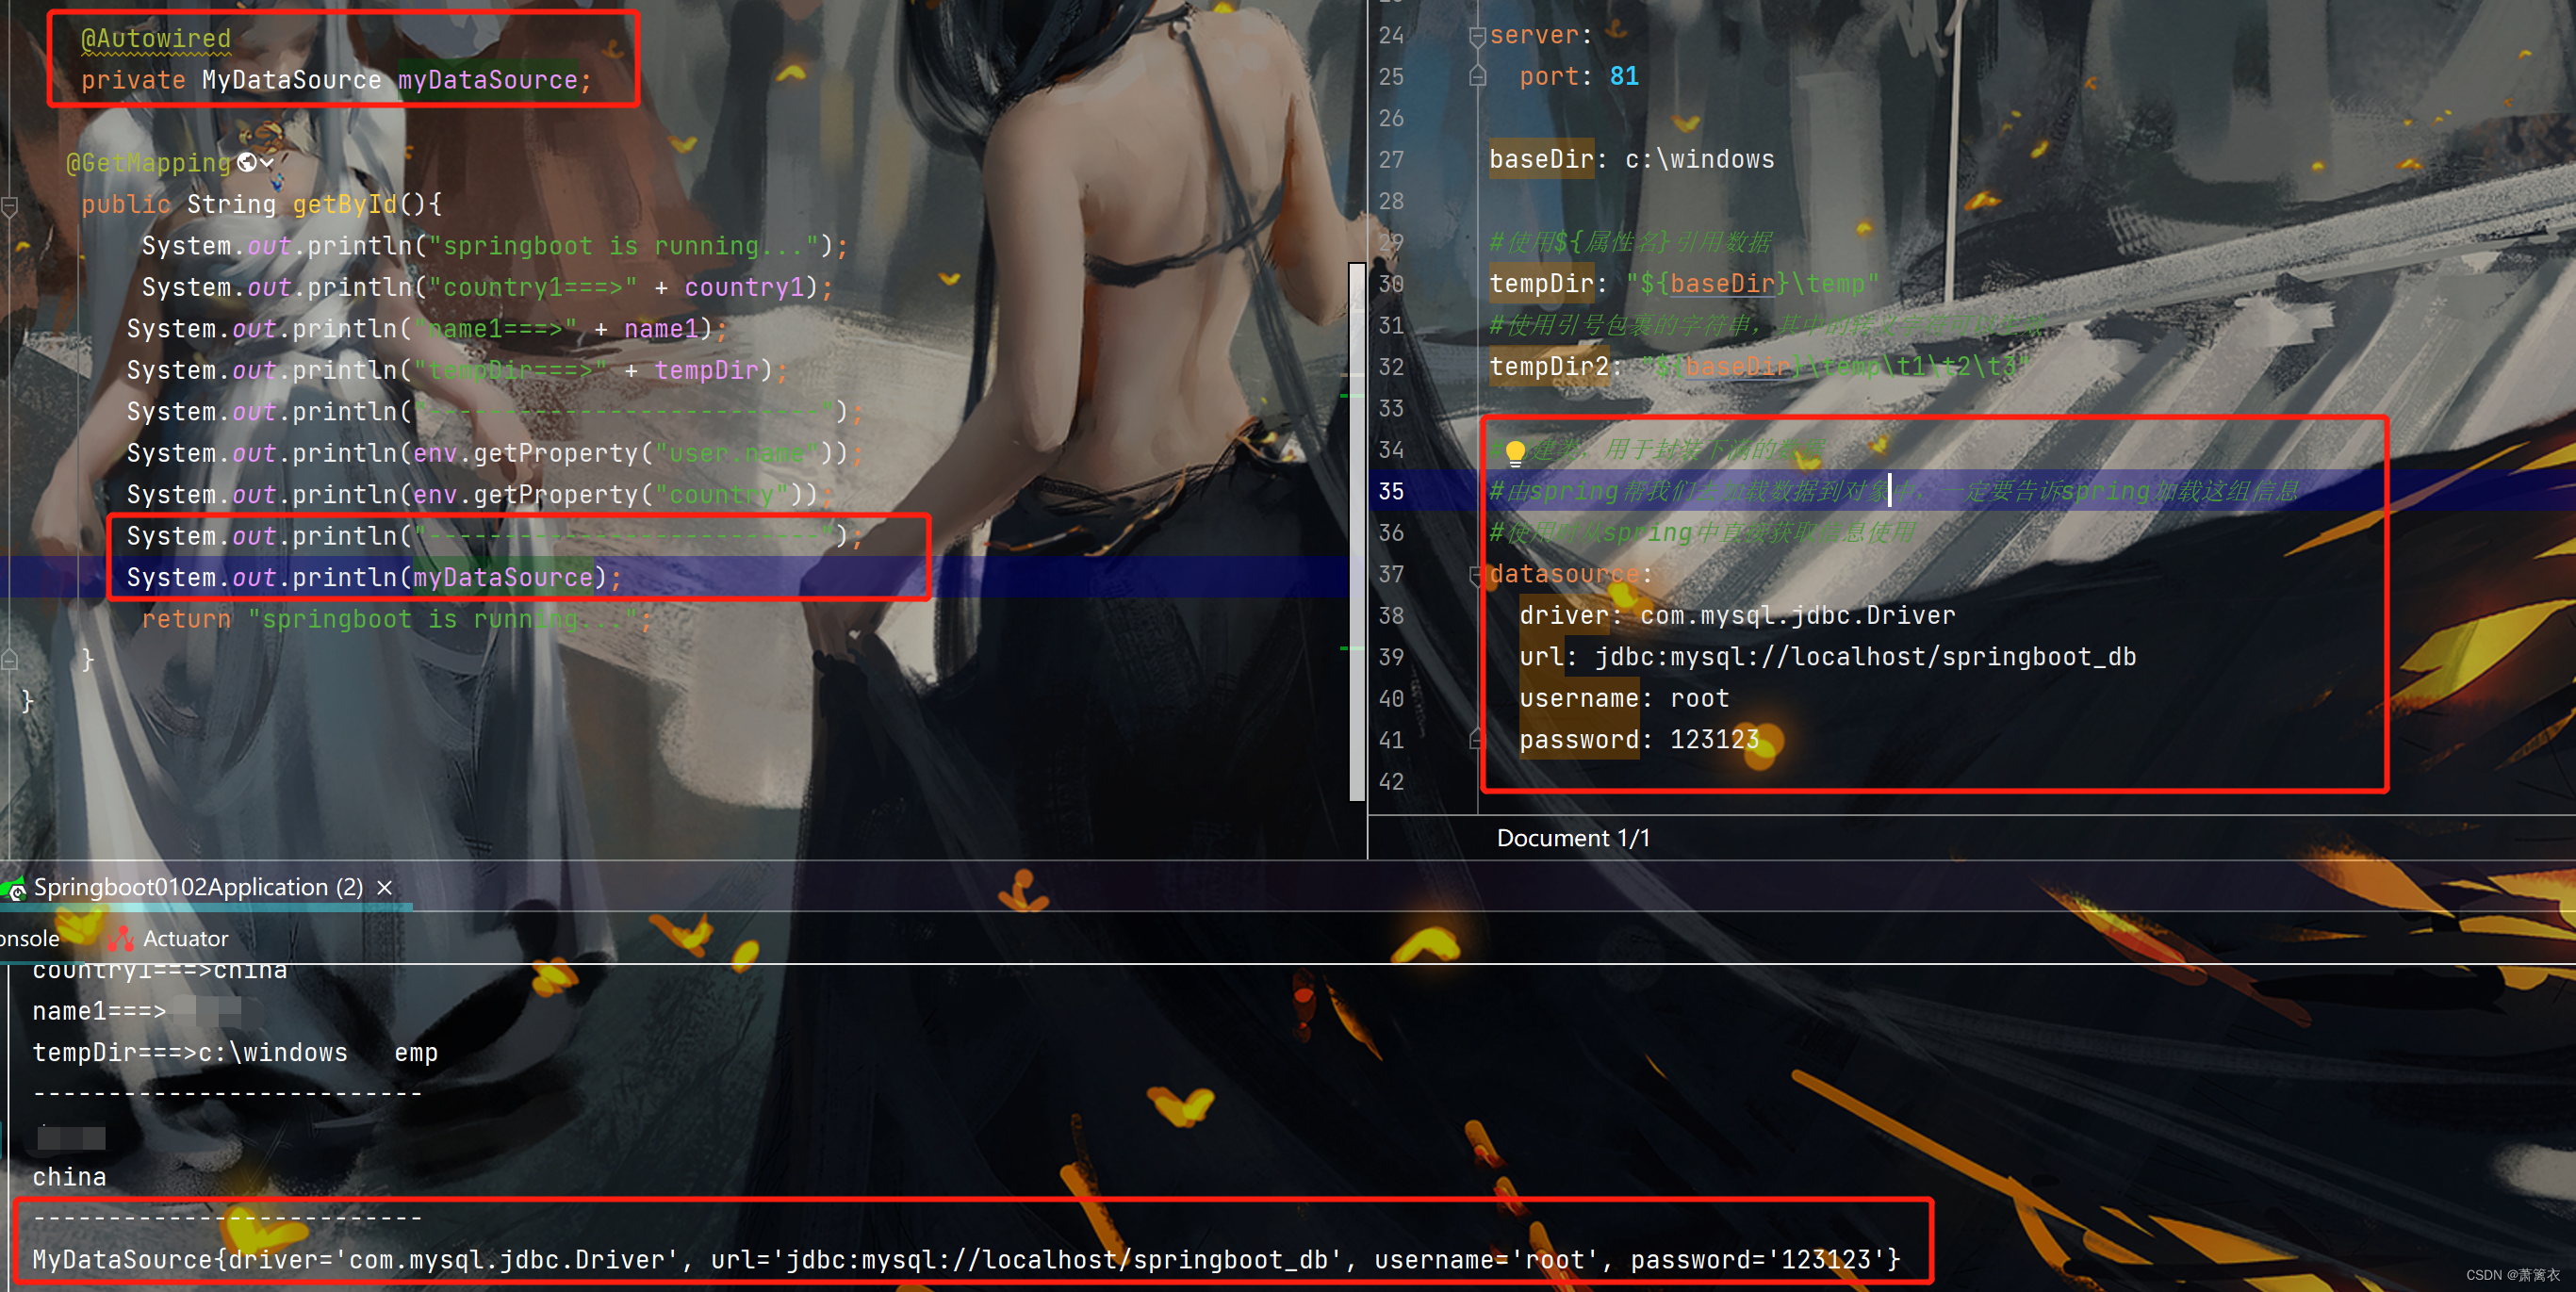
使用 @ConfigurationProperties 注解绑定配置信息到封装类中,封装类需要定义为Spring管理的Bean,否则无法进行属性注入。
版权声明:本文内容由互联网用户自发贡献,该文观点仅代表作者本人。本站仅提供信息存储空间服务,不拥有所有权,不承担相关法律责任。如发现本站有涉嫌侵权/违法违规的内容, 请发送邮件至 举报,一经查实,本站将立刻删除。
文章由极客之音整理,本文链接:https://www.bmabk.com/index.php/post/111724.html

