
ActiveMQ是什么:ActiveMQ是基于JMS规范实现的一种消息中间件。
JMS(JAVA MESSAGE SERVICE)是一种规范,API。
JMS接口间的关系如下:
工厂创建连接,连接创建会话,会话创建消息、生产者和消费者,生产者向目标对象发送信息,消费者从目标对象订阅信息。

下面是ActiveMQ中Queue模式和Topic模式的对比。
Queue模式
- 生产者
public class AppQueueConsumer {
    private static final String url = "tcp://127.0.0.1:61617";
    private static final String queueName = "testQueue";

    public static void main(String[] args) throws JMSException {
        //创建工厂
        ConnectionFactory connectionFactory = new ActiveMQConnectionFactory(url);
        //创建连接
        Connection connection = connectionFactory.createConnection();
        // 启动连接
        connection.start();
        // 创建会话 false指是否在事务上处理,Session.AUTO_ACKNOWLEDGE为应答模式,这里是自动应答
        Session session = connection.createSession(false, Session.AUTO_ACKNOWLEDGE);
        //创建一个目标
        Queue queue = session.createQueue(queueName);
        //创建消费者
        MessageConsumer consumer = session.createConsumer(queue);
        //创建监听器
        consumer.setMessageListener(new MessageListener() {
            @Override
            public void onMessage(Message message) {
                TextMessage textMessage = (TextMessage) message;
                try {
                    System.out.println("接收消息:"+textMessage.getText());
                } catch (JMSException e) {
                    e.printStackTrace();
                }
            }
        });
    }
}
- 消费者
public class AppQueueProducer {
private static final String url="tcp://127.0.0.1:61617";
private static final String queueName="testQueue";
public static void main(String[] args) throws JMSException {
//创建工厂
ConnectionFactory connectionFactory=new ActiveMQConnectionFactory(url);
//创建连接
Connection connection = connectionFactory.createConnection();
// 启动连接
connection.start();
// 创建会话 false指是否在事务上处理,Session.AUTO_ACKNOWLEDGE为应答模式,这里是自动应答
Session session = connection.createSession(false, Session.AUTO_ACKNOWLEDGE);
//创建一个目标
Queue queue = session.createQueue(queueName);
//创建生产者
MessageProducer producer = session.createProducer(queue);
for (int i = 0; i < 100; i++) {
//创建消息
TextMessage textMessage = session.createTextMessage("test:" + i);
//发送消息
producer.send(textMessage);
System.out.println(" 发送消息:"+textMessage.getText());
}
//关闭连接
connection.close();
}
}
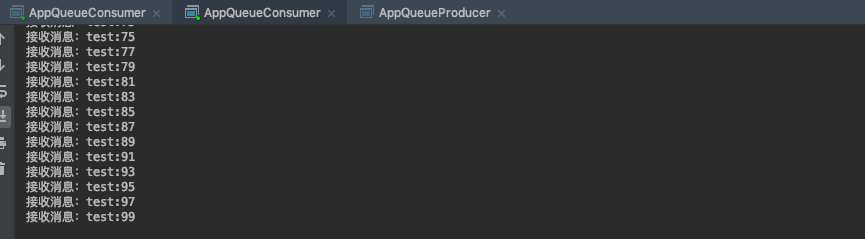
- 运行效果:消费者我开了两个进程测试,如下:可以看到两个进程分摊了发送的信息


Topic模式- 生产者
public class AppTopicProducer { private static final String url = "tcp://127.0.0.1:61617"; private static final String topicName = "testTopic"; public static void main(String[] args) throws JMSException { //创建工厂 ConnectionFactory connectionFactory=new ActiveMQConnectionFactory(url); //创建连接 Connection connection = connectionFactory.createConnection(); // 启动连接 connection.start(); // 创建会话 false指是否在事务上处理,Session.AUTO_ACKNOWLEDGE为应答模式,这里是自动应答 Session session = connection.createSession(false, Session.AUTO_ACKNOWLEDGE); //创建一个目标 Topic topic = session.createTopic(topicName); //创建生产者 MessageProducer producer = session.createProducer(topic); for (int i = 0; i < 100; i++) { //创建消息 TextMessage textMessage = session.createTextMessage("test:" + i); //发送消息 producer.send(textMessage); System.out.println(" 发送消息:"+textMessage.getText()); } //关闭连接 connection.close(); }}- 消费者
public class AppTopicConsumer {
   private static final String url = "tcp://127.0.0.1:61617";
   private static final String topicName = "testTopic";

   public static void main(String[] args) throws JMSException {
       //创建工厂
       ConnectionFactory connectionFactory = new ActiveMQConnectionFactory(url);
       //创建连接
       Connection connection = connectionFactory.createConnection();
       // 启动连接
       connection.start();
       // 创建会话 false指是否在事务上处理,Session.AUTO_ACKNOWLEDGE为应答模式,这里是自动应答
       Session session = connection.createSession(false, Session.AUTO_ACKNOWLEDGE);
       //创建一个目标
       Topic topic = session.createTopic(topicName);
       //创建消费者
       MessageConsumer consumer = session.createConsumer(topic);
       //创建监听器
       consumer.setMessageListener(new MessageListener() {
           @Override
           public void onMessage(Message message) {
               TextMessage textMessage = (TextMessage) message;
               try {
                   System.out.println("接收消息:"+textMessage.getText());
               } catch (JMSException e) {
                   e.printStackTrace();
               }
           }
       });
   }
}
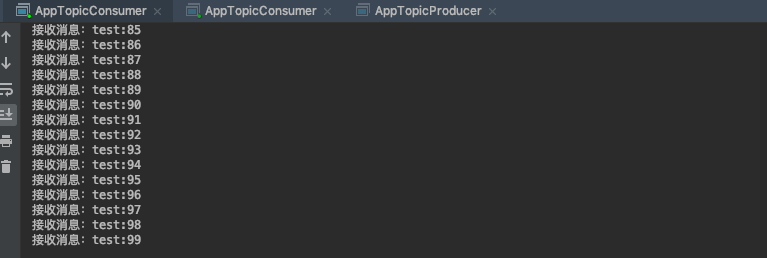
- 运行效果:消费者我开了两个进程测试,如下:可以看到两个进程均订阅所有发送的信息

总结:
- Queue模式会把所有Producer提供的信息,根据Cousumer请求数进行均摊,Topic模式会返回给每个Consumer所有Producer提供的服务,你需要什么就用什么。
注意:
- Topic模式中consumer无法订阅其请求前,生产者send的消息,Queue模式中可以。
版权声明:本文内容由互联网用户自发贡献,该文观点仅代表作者本人。本站仅提供信息存储空间服务,不拥有所有权,不承担相关法律责任。如发现本站有涉嫌侵权/违法违规的内容, 请发送邮件至 举报,一经查实,本站将立刻删除。
文章由极客之音整理,本文链接:https://www.bmabk.com/index.php/post/115830.html

