
1 maven配置如下
<dependency>
	<groupId>org.csource.fastdfs</groupId>
	<artifactId>fastdfs</artifactId>
	<version>1.2</version>
</dependency>
代码结构如下
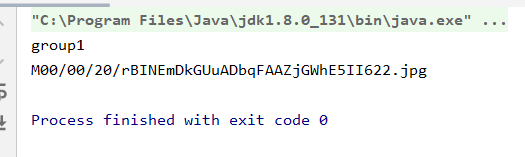
2 main方法如下
import org.csource.fastdfs.*;

import java.io.*;

public class FastDFSDemo {
    public static void main(String[] args) {
        // 上传文件
        testUpload();
        // 下载文件
//        testDownload();
    }

    private static void testUpload() {
        try{
            // 1、加载配置文件,配置文件中的内容就是 tracker 服务的地址。TODO 改成自己的路径
            ClientGlobal.init("E:\\fdfs_client.conf");
            // 2、创建一个 TrackerClient 对象。直接 new 一个。
            TrackerClient trackerClient = new TrackerClient();
            // 3、使用 TrackerClient 对象创建连接,获得一个 TrackerServer 对象。
            TrackerServer trackerServer = trackerClient.getConnection();
            // 4、创建一个 StorageServer 的引用,值为 null
            StorageServer storageServer = null;
            // 5、创建一个 StorageClient 对象,需要两个参数 TrackerServer 对象、StorageServer 的引用
            StorageClient storageClient = new StorageClient(trackerServer, storageServer);
            // 6、使用 StorageClient 对象上传图片。
            //扩展名不带“.” TODO 改成自己的路径
            String[] strings = storageClient.upload_file("C:\\photo\\cat.jpg", "jpg",
                    null);
            // 7、返回数组。包含组名和图片的路径。
            for (String string : strings) {
                System.out.println(string);
            }
            //  http://ip/group1/M00/00/00/wKgZhVwJCTKAQUPoAABIga2I1P4060.jpg
        } catch (Exception e){
            e.printStackTrace();
        }

    }

    /**
     * 下载文件
     */
    public static void testDownload() {
        try {
            // 配置文件 TODO 改成自己的路径
            ClientGlobal.init("E:\\fdfs_client.conf");
            TrackerClient tracker = new TrackerClient();
            TrackerServer trackerServer = tracker.getConnection();
            StorageServer storageServer = null;
            StorageClient storageClient = new StorageClient(trackerServer, storageServer);
            //http://ip/group1/M00/00/05/wKgZhV1wtJWADRS1AAAADrnj5qQ812.txt
            byte[] b = storageClient.download_file("group1", "M00/00/00/ajeSWGDidpeAMrh2AAZjGSgHyGM675.jpg");

            // 下載文件
            download(b);
        } catch (Exception e) {
            e.printStackTrace();
        }
    }

    public static void download(byte[] bytesArray) {
        FileOutputStream fos = null;
        File file;
        try {
            // TODO 改成自己的路径
            file = new File("E:\\myFile.jpg");
            fos = new FileOutputStream(file);
            fos.write(bytesArray);
            fos.flush();
            System.out.println("成功");
        } catch (FileNotFoundException e) {
            e.printStackTrace();
        } catch (IOException e) {
            e.printStackTrace();
        } finally {
            try {
                if (fos != null) {
                    fos.close();
                }
            } catch (IOException ioe) {
                System.out.println("出錯了");
            }
        }
    }
}
3 配置文件如下
配置文件的名字:fdfs_client.conf
# connect timeout in seconds
# default value is 30s
connect_timeout=30

# network timeout in seconds
# default value is 30s
network_timeout=60

# the base path to store log files
# 改这里 文件存储的路径
base_path=/app/fastdfs_document/data

# tracker_server can ocur more than once, and tracker_server format is
#  "host:port", host can be hostname or ip address
# 改这里,防火墙记得关了或者开通端口,安全组也要加入,如果有的话
tracker_server=192.168.25.133:22122

#standard log level as syslog, case insensitive, value list:
### emerg for emergency
### alert
### crit for critical
### error
### warn for warning
### notice
### info
### debug
log_level=info

# if use connection pool
# default value is false
# since V4.05
use_connection_pool = false

# connections whose the idle time exceeds this time will be closed
# unit: second
# default value is 3600
# since V4.05
connection_pool_max_idle_time = 3600

# if load FastDFS parameters from tracker server
# since V4.05
# default value is false
load_fdfs_parameters_from_tracker=false

# if use storage ID instead of IP address
# same as tracker.conf
# valid only when load_fdfs_parameters_from_tracker is false
# default value is false
# since V4.05
use_storage_id = false

# specify storage ids filename, can use relative or absolute path
# same as tracker.conf
# valid only when load_fdfs_parameters_from_tracker is false
# since V4.05
storage_ids_filename = storage_ids.conf


#HTTP settings 访问nginx的端口 改这里
http.tracker_server_port=80

#use "#include" directive to include HTTP other settiongs
##include http.conf
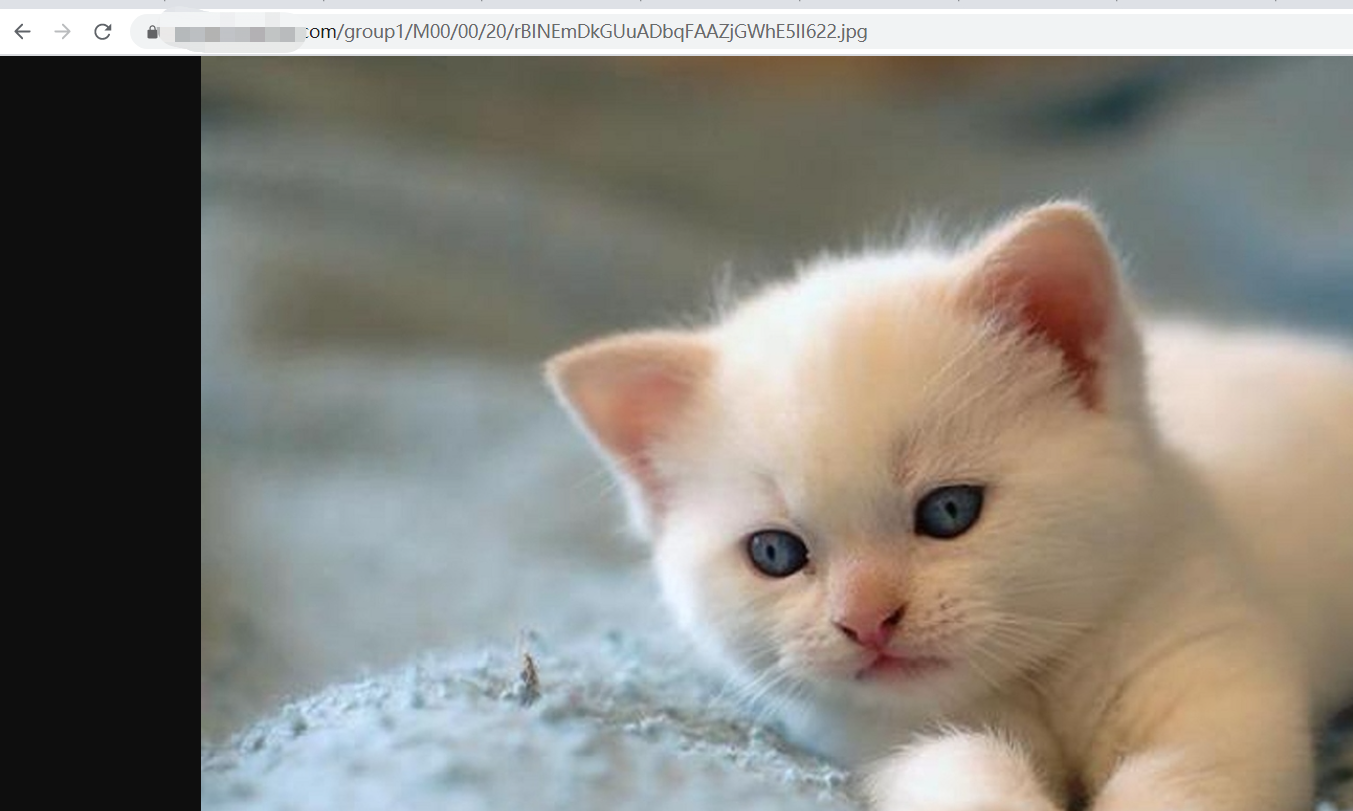
4 测试
浏览器访问,域名已模糊处理,用ip也可访问
版权声明:本文内容由互联网用户自发贡献,该文观点仅代表作者本人。本站仅提供信息存储空间服务,不拥有所有权,不承担相关法律责任。如发现本站有涉嫌侵权/违法违规的内容, 请发送邮件至 举报,一经查实,本站将立刻删除。
文章由极客之音整理,本文链接:https://www.bmabk.com/index.php/post/116391.html

