
0、序
BlueZ 是官方 Linux Bluetooth 协议栈。本文就如何在Jetson nano开发平台中搭建基于Bluez的蓝牙开发环境进行相关的介绍。主要参考SIG联盟提供的《Developer Study Guide – How to Deploy BlueZ on a Raspberry Pi Board as a Bluetooth Mesh Provisioner》,此外还涉及Jetson nano平台Linux内核的更新。上述资料的传送门:https://www.bluetooth.com/bluetooth-resources/
1、相关依赖库安装
1.1、库安装
sudo apt-get install libglib2.0-dev libdbus-1-dev libdbus-c++-dev libudev-dev libical-dev libreadline-dev
1.2、json-c安装
wget https://s3.amazonaws.com/json-c_releases/releases/json-c-0.13.tar.gz
tar -xvf json-c-0.13.tar.gz
cd json-c-0.13/
./configure --prefix=/usr --disable-static && make
sudo make install
2、Bluez的安装
2.1、编译安装
wget http://www.kernel.org/pub/linux/bluetooth/bluez-5.54.tar.xz
tar -xvf bluez-5.54.tar.xz
cd bluez-5.54/
./configure --enable-mesh --enable-testing --enable-tools --prefix=/usr --mandir=/usr/share/man -- sysconfdir=/etc --localstatedir=/var
sudo make
sudo make install
2.2、检查配置文件
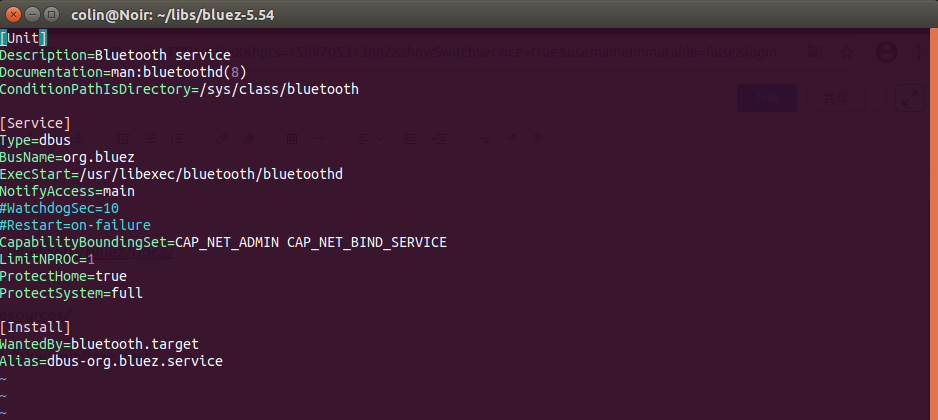
check Bluez service配置文件,确保service配置文件中的ExecStart的值为“/usr/libexec/bluetooth/bluetoothd”
vim /lib/systemd/system/bluetooth.service
2.3、环境配置
备份原可执行程序,并创建以下symlink。
sudo cp /usr/lib/bluetooth/bluetoothd /usr/lib/bluetooth/bluetoothd-550.orig
sudo ln -sf /usr/libexec/bluetooth/bluetoothd /usr/lib/bluetooth/bluetoothd
sudo systemctl daemon-reload
cd ~/.config/
mkdir meshctl
cp ~/bluez-5.54/tools/mesh-gatt/local_node.json ~/.config/meshctl/
cp ~/bluez-5.54/tools/mesh-gatt/prov_db.json ~/.config/meshctl/
2.4、检查安装的Bluez的版本
bluetoothd -v
meshctl -v
mesh-cfgclient -v

安装完上述的相关工具之后,在运行mesh-cfgctl时出现为定义符号的错误,通过将编译链中的动态库更换成自行编译安装生成的json-c的动态库即可。

3、更新Linux Kernel
但是运行meshctl出现以下错误:
Failed to parse provisioning database file /home/colin/.config/meshctl/prov_db.json
free(): double free detected in tcache 2
Aborted
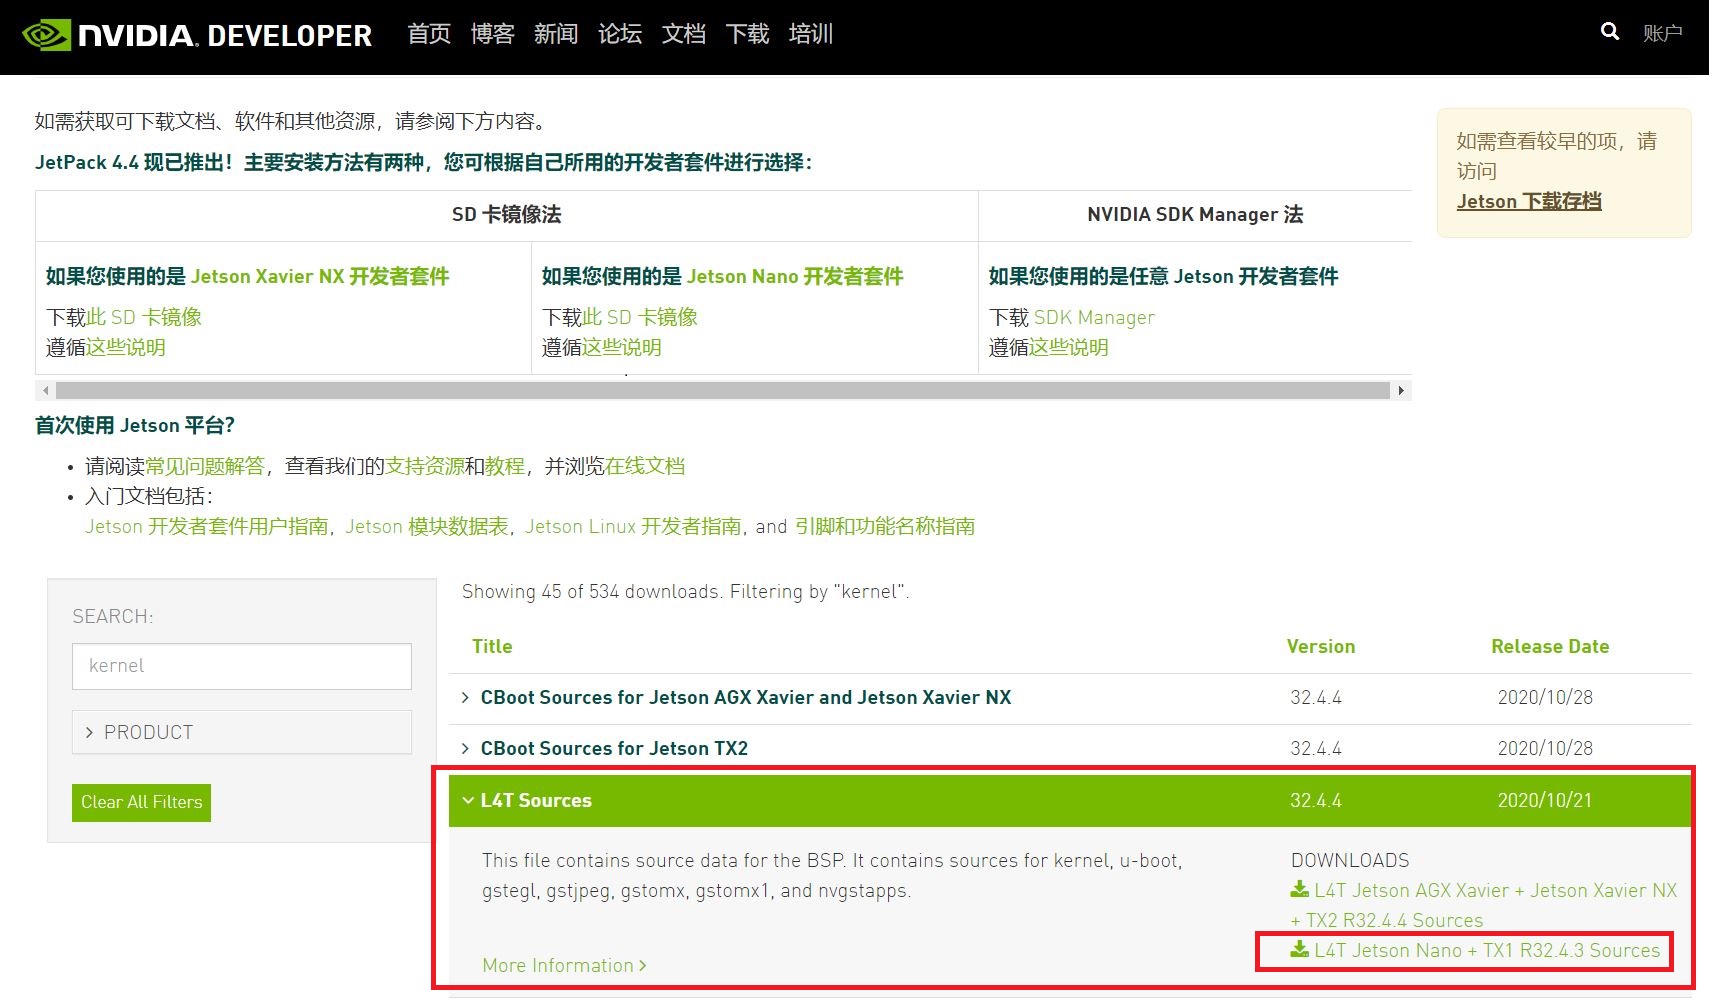
出现上述问题是因为Linux内核并没有正确地安装AEAD-AES_CCM套件,重新配置内核:从NVIDIA Jetson的下载中心下载相关内核及组件源码,注意需要下载与当前使用相同版本的。内核下载传送门:https://developer.nvidia.com/embedded/downloads,如下图所示,注意下载与你正运行的系统版本相同的源码Sources,避免到时候更换kernel之后无法开机。
下载L4T Sources后进入kernel目录,进行内核的配置
1)将原系统的内核配置输出至.config
zcat /proc/config.gz > .config
2)内核配置
make menuconfig
运行命令make menuconfig之后出现以下错误的话是缺少相关依赖库未安装,安装好即可。
colin@Blanc:~/works/Linux_for_Tegra/source/public/kernel/kernel-4.9$ make menuconfig
HOSTCC scripts/basic/fixdep
HOSTCC scripts/kconfig/mconf.o
<command-line>:0:12: fatal error: curses.h: No such file or directory
compilation terminated.
scripts/Makefile.host:118: recipe for target 'scripts/kconfig/mconf.o' failed
make[1]: *** [scripts/kconfig/mconf.o] Error 1
Makefile:565: recipe for target 'menuconfig' failed
make: *** [menuconfig] Error 2
安装依赖库
sudo apt-get install libncurses5-dev
好的,正式进入内核配置:
3.1、内核配置
1)使能Networking support
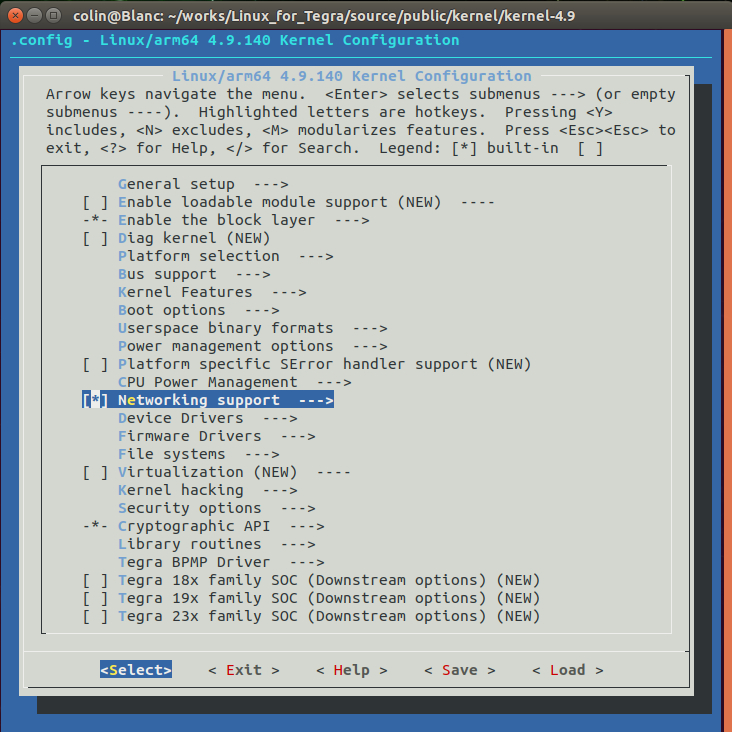
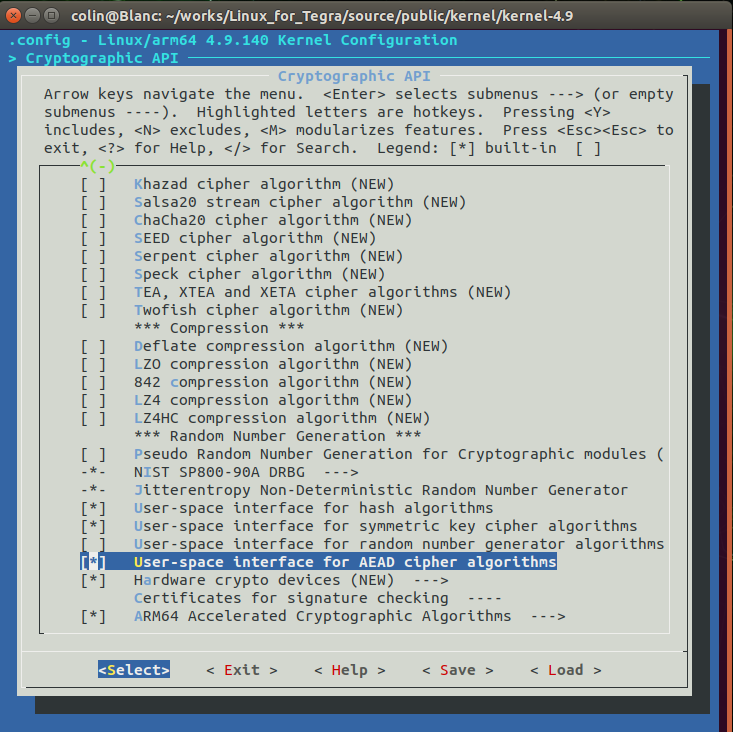
2)使能Crytographic API
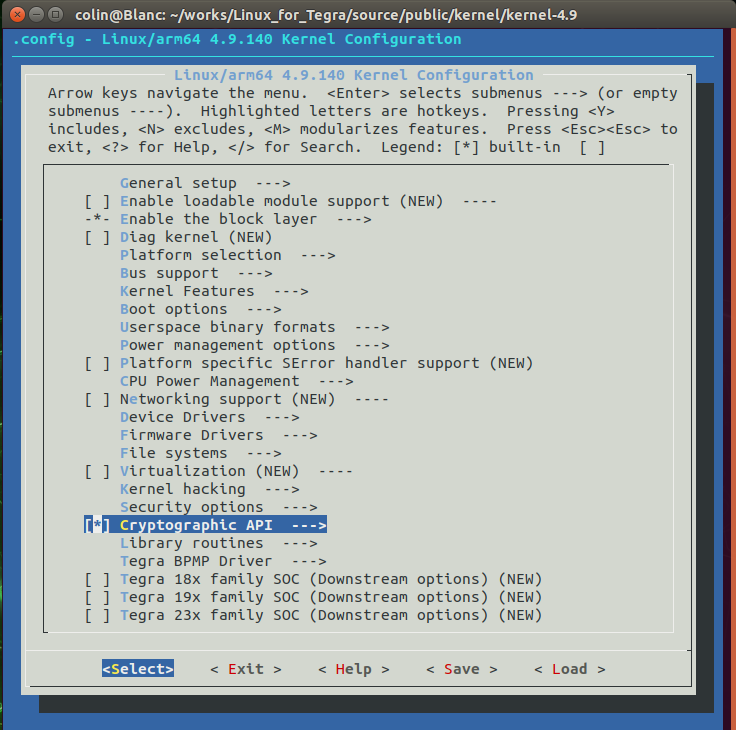
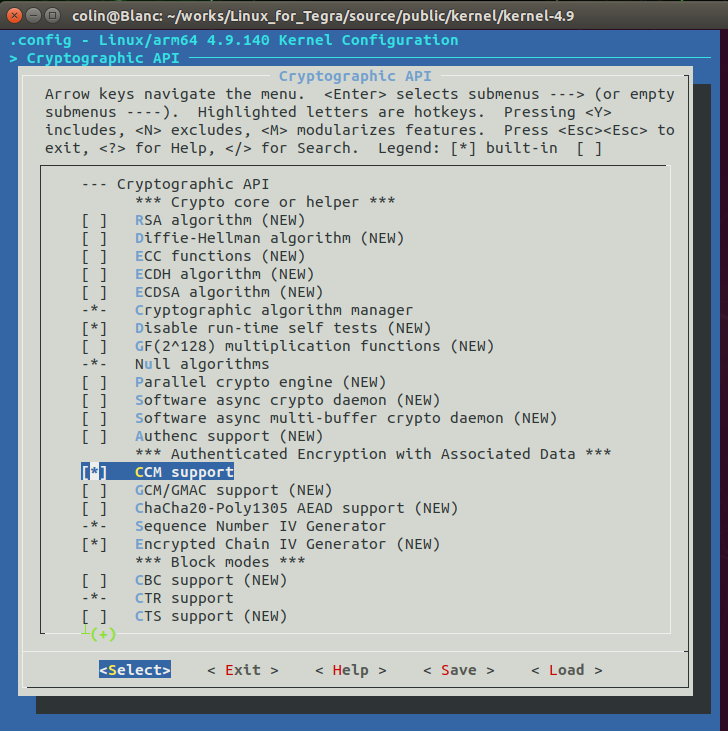
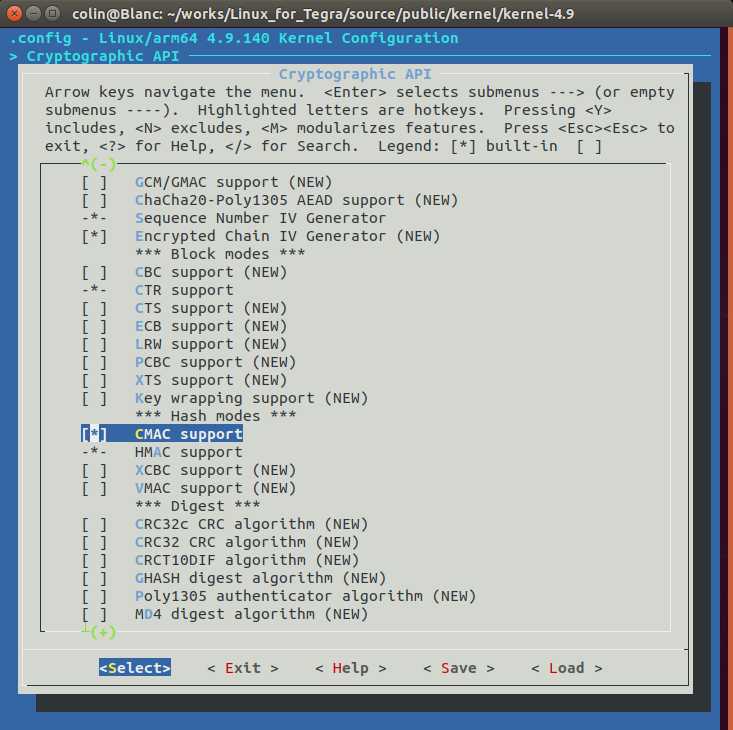
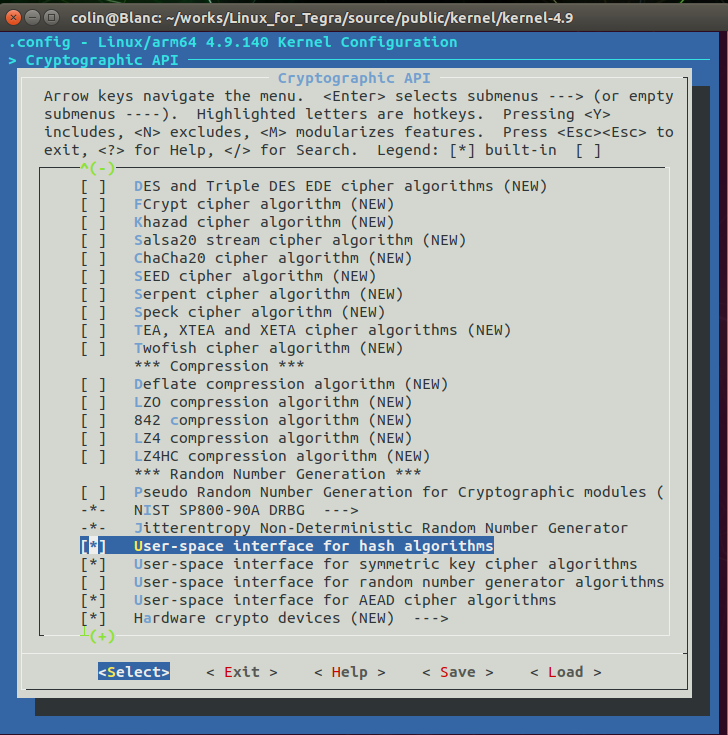
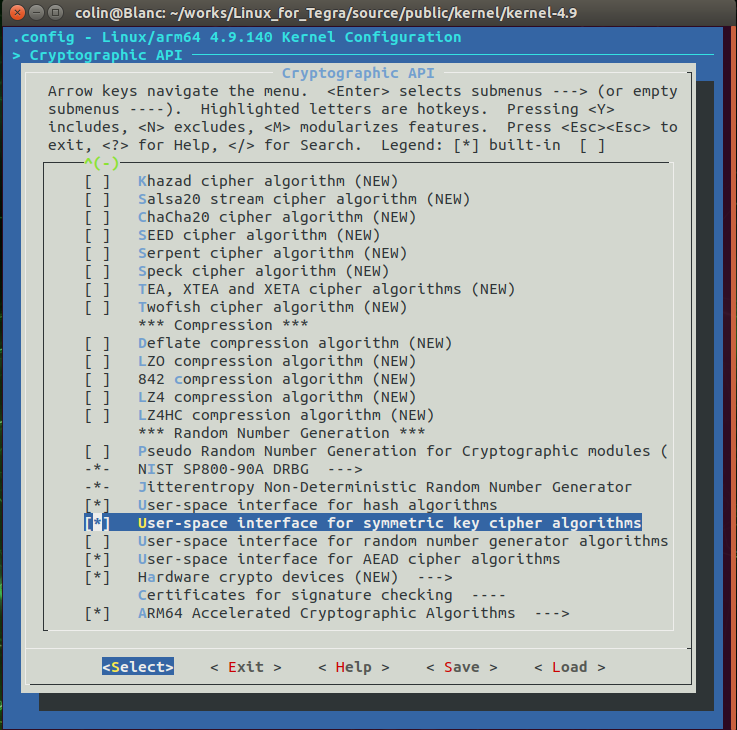
3)进入Crytographic API–>,使能CCM support、CMAC support、User-space interface for hash algorithms、User-space interface for symmetric key cipher algorithms、User-space interface for AEAD cipher algorithms,如下列图片所示:
3.2、编译内核
1) make prepare
2) make modules_prepare

jetson nano是4核的,故:
3) make -j4
3.3、安装modules
make modules// 模块编译
sudo make modules_install // 安装模块到/lib/modules
3.4、替换新内核
sudo cp ./arch/arm64/boot/zImage /boot/zImage
sudo cp ./arch/arm64/boot/Image /boot/Image
3.5、重启and检验
sudo reboot

重启后检查系统的版本,能发现内核print的时间是新的,上图中我是在2020-12-20-15:33重新编译更换的新内核,与此同时正确地安装AEAD-AES_CCM套件,运行meshctl能正常的加载database文件并运行,搞定-OK!。

版权声明:本文内容由互联网用户自发贡献,该文观点仅代表作者本人。本站仅提供信息存储空间服务,不拥有所有权,不承担相关法律责任。如发现本站有涉嫌侵权/违法违规的内容, 请发送邮件至 举报,一经查实,本站将立刻删除。
文章由极客之音整理,本文链接:https://www.bmabk.com/index.php/post/116971.html

