
1.引入依赖
implementation 'org.springframework.cloud:spring-cloud-stream'
implementation 'org.springframework.cloud:spring-cloud-starter-stream-rabbit'
2.创建yaml配置文件
spring:
  application:
    name: rabbitmq-dome
  cloud:
    function:
      definition: source;sink; #函数名称,对应服务中的注入的Bean
    stream:
      binders: #需要绑定的rabbitmq的服务信息
        default-binder: #定义的名称,用于bidding整合
          type: rabbit #消息组件类型
          environment: #配置rabbimq连接环境
            spring:
              rabbitmq:
                addresses: 10.0.1.141:5672 #服务器的地址和端口
                username: xt3dev #用户名
                password: 4V9prcFbRoYxLCMd #密码
      bindings:
        source-out-0: #自定义消息通道的名称
          destination: QUEUE_DOME #exchange名称,交换模式默认是topic,创建时同时会创建QUEUE_DOME.${spring.application.name}队列
          content-type: application/json #设置消息的类型为json
          group: ${spring.application.name} #分组
          binder: default-binder #绑定的binder名称
        sink-in-0:
          destination: QUEUE_DOME
          content-type: application/json
          group: ${spring.application.name}
          binder: default-binder
3.创建生产者类
- 生产者接口
public interface ProducerService {

    /**
     * 发送消息
     * @param message
     */
    void sendMessage(String message);
}- 生产者实现类
注入source bean对象,然后通过创建Sinks对象,使用sinks来发送消息
@Service
@Slf4j
public class ProducerServiceImpl implements ProducerService {

    private final Sinks.Many<Message<String>> sinks =
            Sinks.many().multicast().onBackpressureBuffer();

    @Bean
    public Supplier<Flux<Message<String>>> source(){
        return sinks::asFlux;
    }

    @Override
    public void sendMessage(String message) {
        log.info("生产者发送消息:{}", message);
        Message<String> msg = MessageBuilder.withPayload(message).build();
        while (sinks.tryEmitNext(msg).isFailure()) {
            LockSupport.parkNanos(10);
        }
    }
}
4.创建消费者类
- 消费者接口
public interface ConsumerService {
}- 消费者实现类
注入sink bean消费者对象来监听消息
@Service
@Slf4j
public class ConsumerServiceImpl implements ConsumerService {

    @Bean
    Consumer<String> sink() {
        return message-> {
            log.info("消费者监听到消息:{}", message);
        };
    }
}
5.创建controller类
@RestController
@RequiredArgsConstructor
public class MessageController {

    private final ProducerService producerService;

    @GetMapping("/sendMessage")
    public void sendMessage(@RequestParam(value = "message", defaultValue = "hello world") String message) {
        producerService.sendMessage(message);
    }
}
7.启动项目测试
在浏览器中访问http://localhost:8080/sendMessage?message=hello rabbitMQ
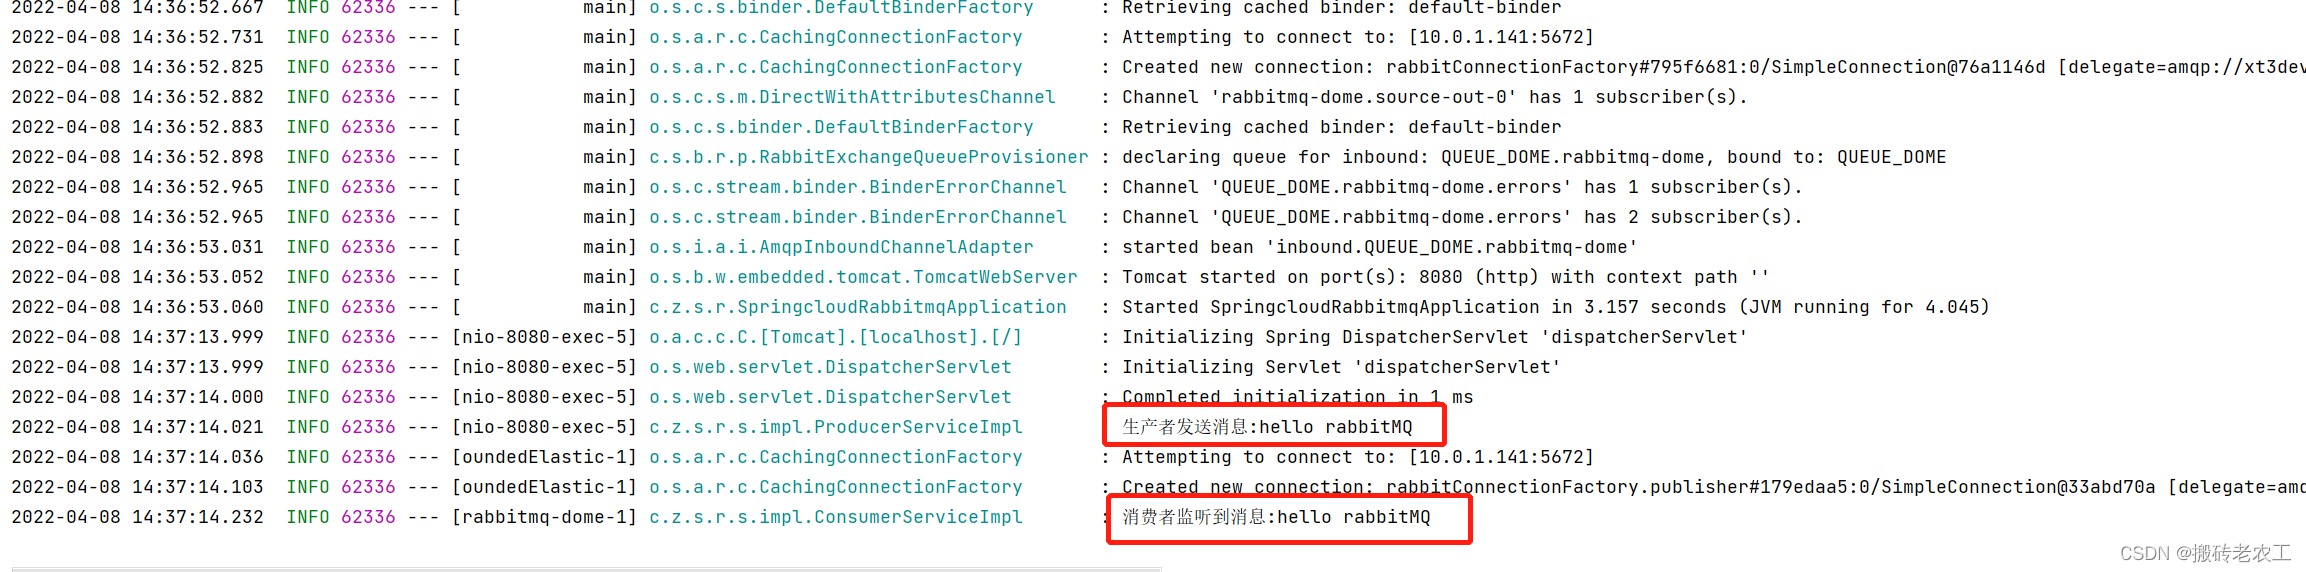
发现生产者发送的消息,消费者收到了。
版权声明:本文内容由互联网用户自发贡献,该文观点仅代表作者本人。本站仅提供信息存储空间服务,不拥有所有权,不承担相关法律责任。如发现本站有涉嫌侵权/违法违规的内容, 请发送邮件至 举报,一经查实,本站将立刻删除。
文章由极客之音整理,本文链接:https://www.bmabk.com/index.php/post/121011.html

