
image not found
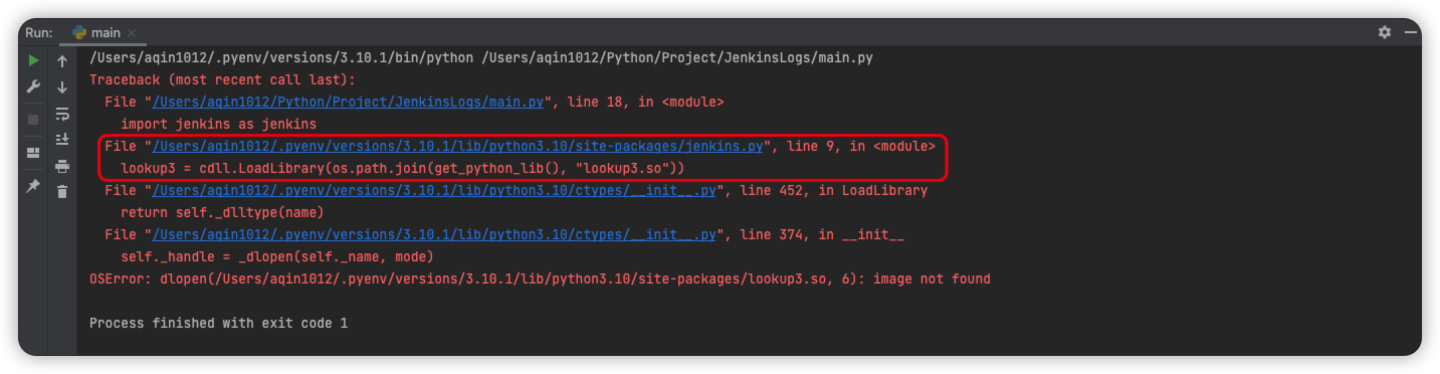
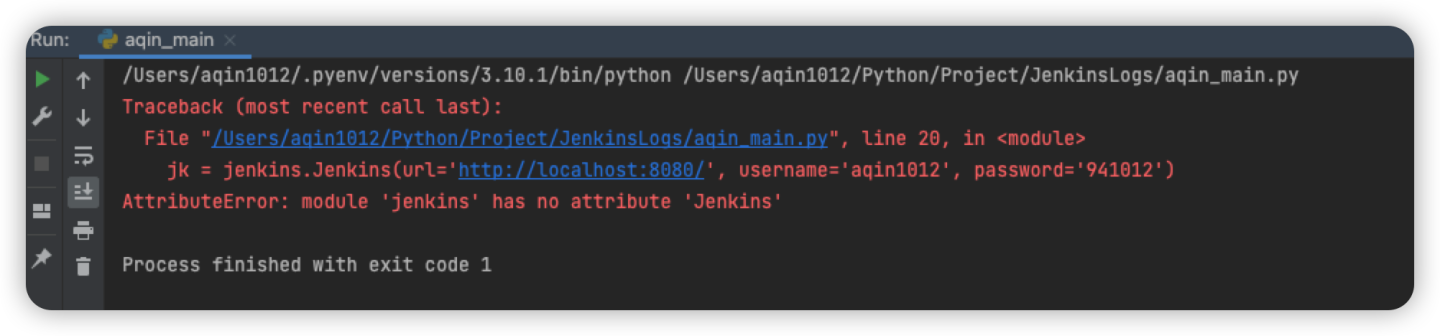
具体报错如下图
找不到lookup3.so那我们执行find xxx -name ‘lookup3*’看看能找到些啥么。。。 xxx指你python安装packages的地址,如下图(图里是我电脑上的地址,你要用你电脑上的) 不出意外的话,能找到个lookup3.xxx.so(由于Mac与一些模块不兼容的问题),然后我们需要把模块代码中的lookup3.so替换成查到的这个lookup3.xxx.so,执行如下代码,打开jenkins.py文件

sh-3.2# cd /Users/你自己python安装的地址/site-packages/

sh-3.2# vim jenkins.py
找到lookup3.so按i启动编辑
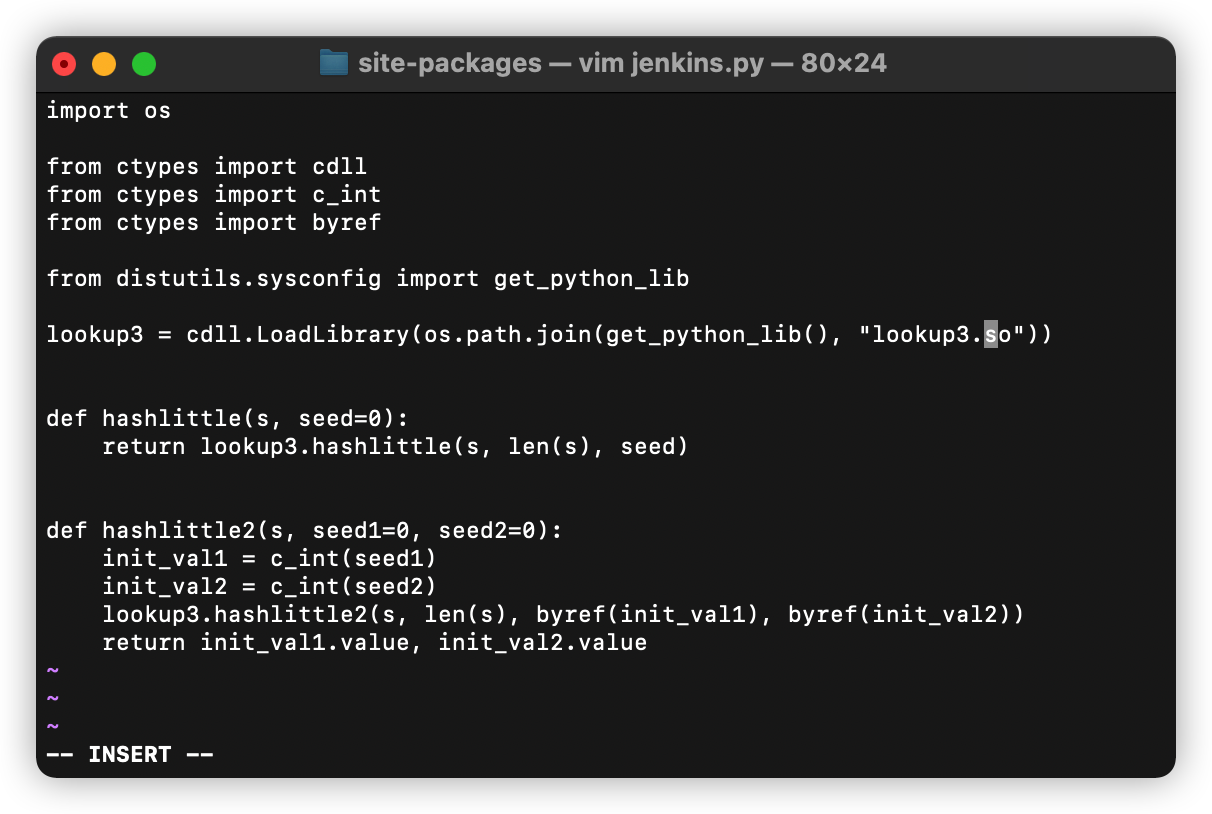
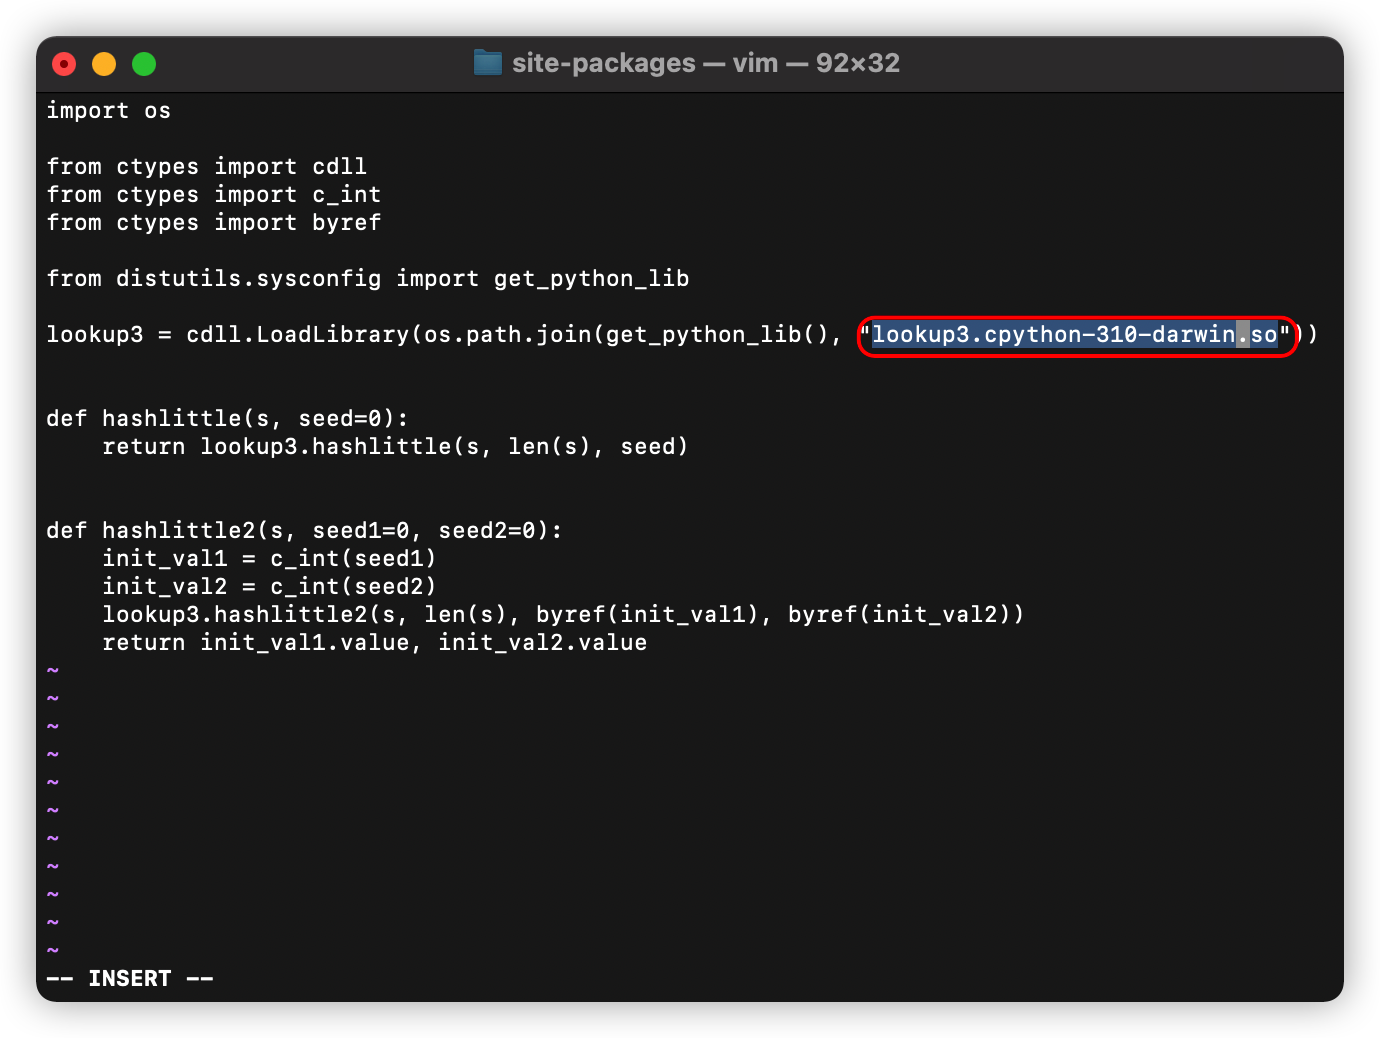
用上面查到的这个lookup3.xxx.so替换掉lookup3.so
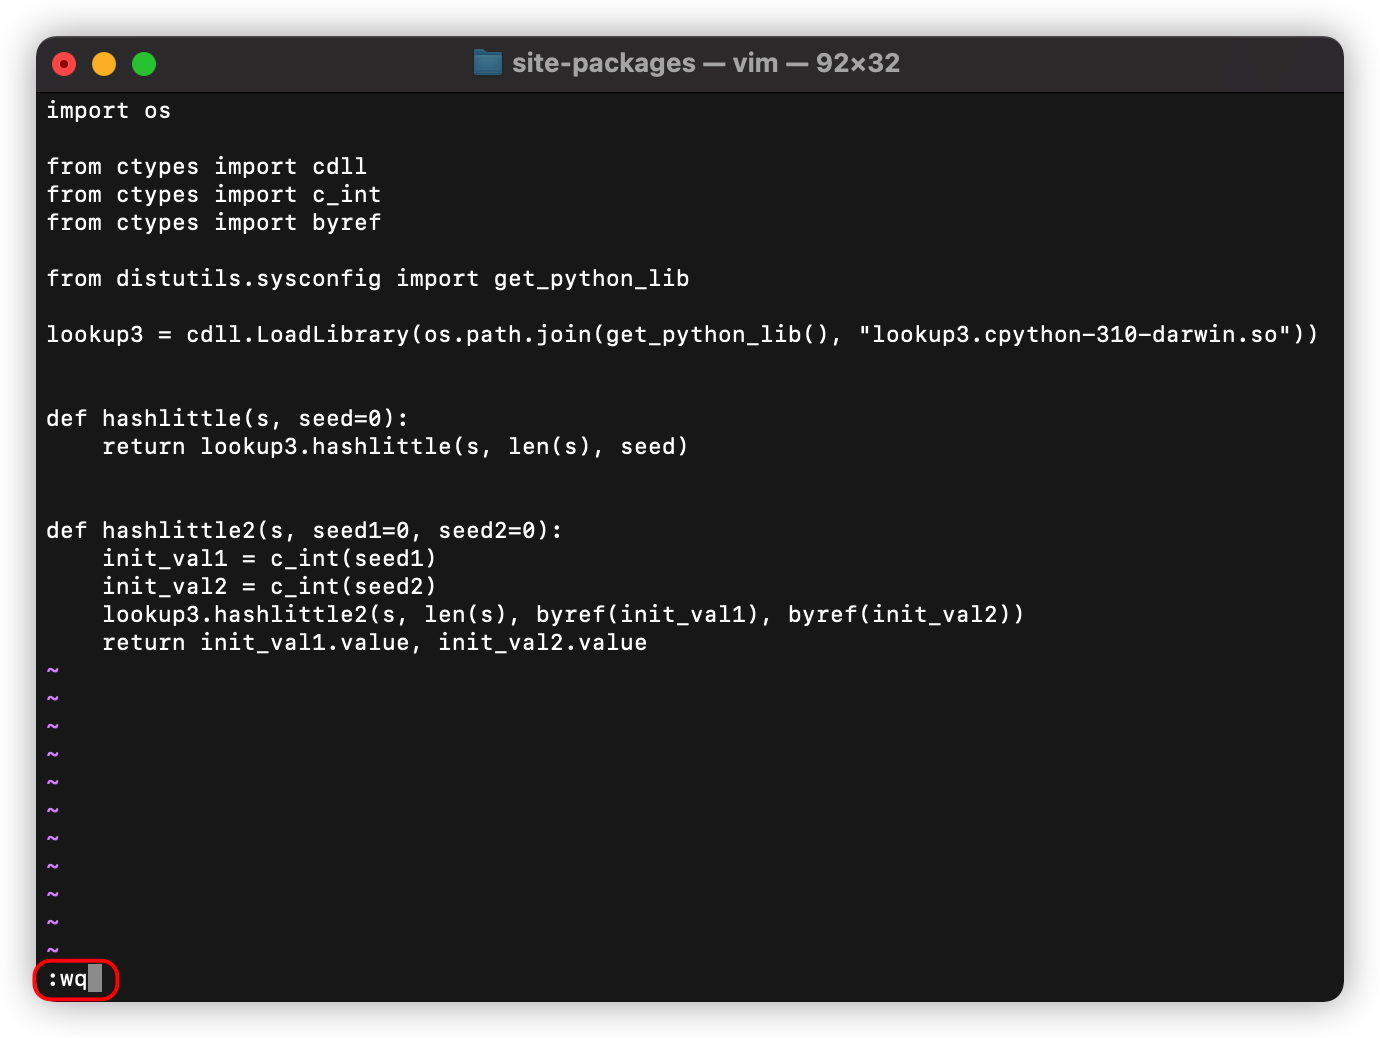
:wq 保存退出
编辑切换为居中
添加图片注释,不超过 140 字(可选)
搞定~
AttributeError: module ‘jenkins’ has no attribute ‘Jenkins’
编辑切换为居中
添加图片注释,不超过 140 字(可选)
出现这个问题可以按下述流程解决(哪步解决后面的就不用看了=[,,_,,]:3)
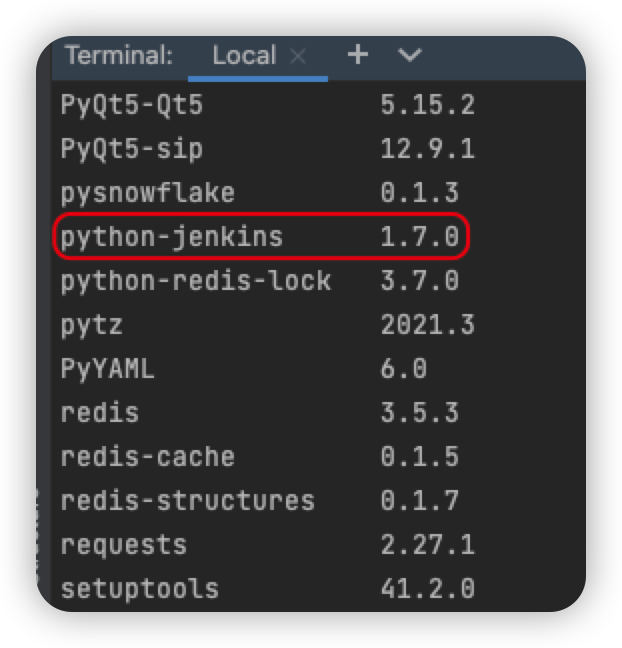
python-jenkins的安装情况
在终端执行pip list查看当前已安装的package
-
有的话,继续进行2的判断
-
没有,执行pip install python-jenkins安装后,再次查看
-
不报错,结束
-
报错,进行2的判断
-
2. 执行文件是否与模块同名
执行find / -name ‘jenkins*’查看自己有没有创建过与模块同名的文件
-
有的话,改下文件名,再执行
-
不报错,结束
-
报错,进行3的判断
-
-
没有,进行3的判断
3. python版本配置
这种情况一般出现在,命令行所使用的python跟编译器所配置的不一样 由于在终端中执行过第一步的检查,所以可以确定的是,终端所使用的python是安装过python-jenkins这个包的,同学可以试下,把.py文件里的代码按顺序一行一行复制到终端,看是否能正常执行(执行过第一步和第二步的检查,在命令行里是不会报错的,我碰到的就是这种情况(╥﹏╥))
执行python -V查看终端python版本

查看编译器配置的python版本

编辑切换为居中
添加图片注释,不超过 140 字(可选)
添加图片注释,不超过 140 字(可选)
检查1和2中的python版本是否一致
-
一致,那不可能报这个错叻(b_d)。。真还报。。重启。。拍主机。。。一步一步检查下来,到这步不可能还报( ̄▽ ̄””)
-
不一致,改一致呗
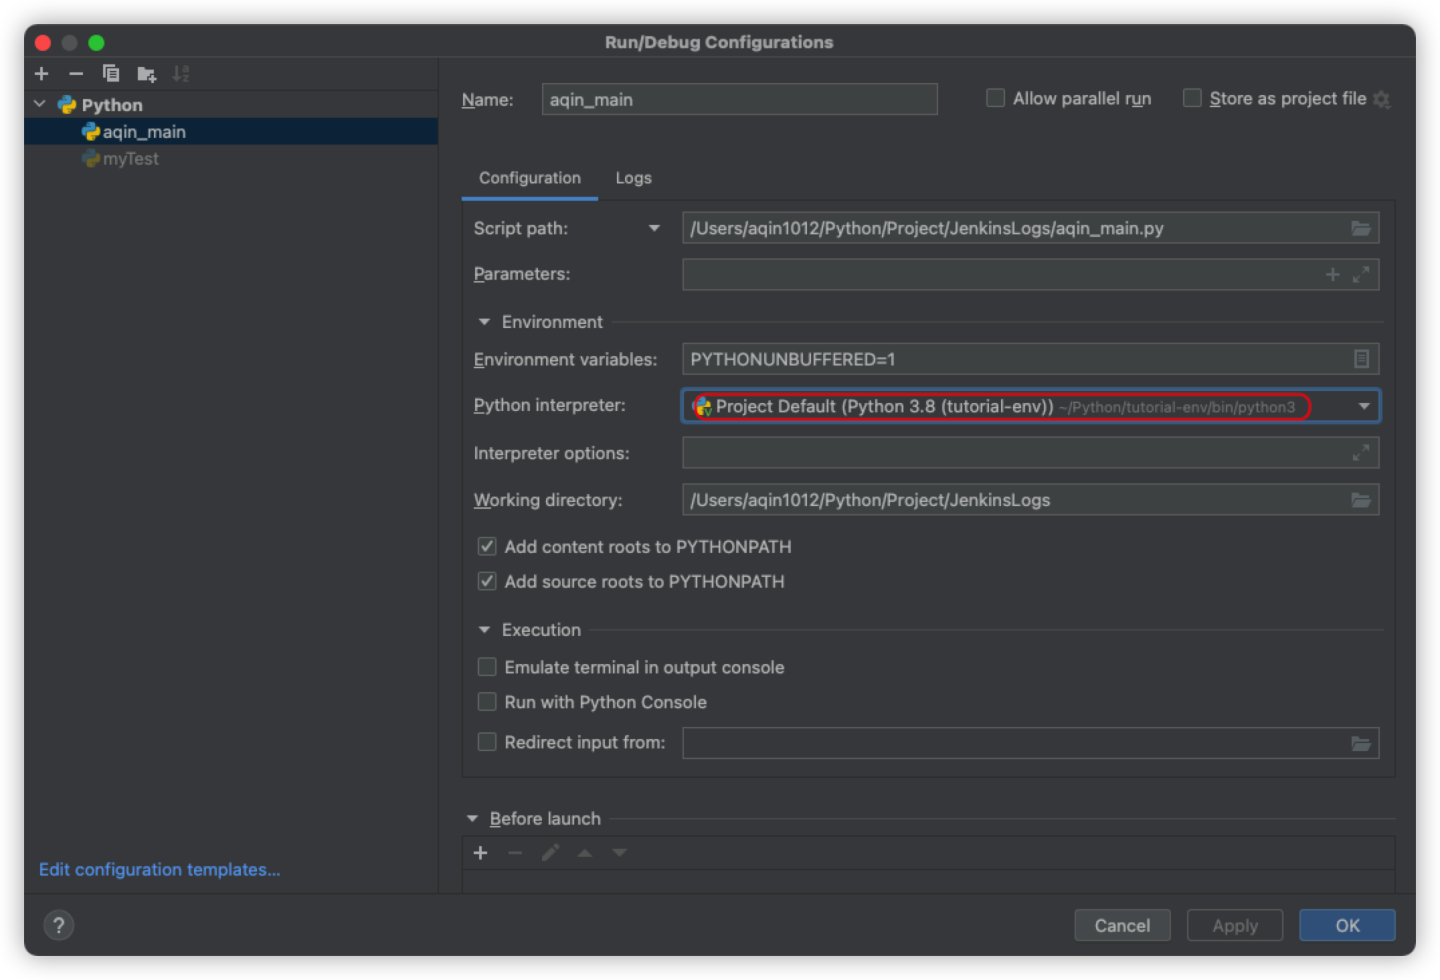
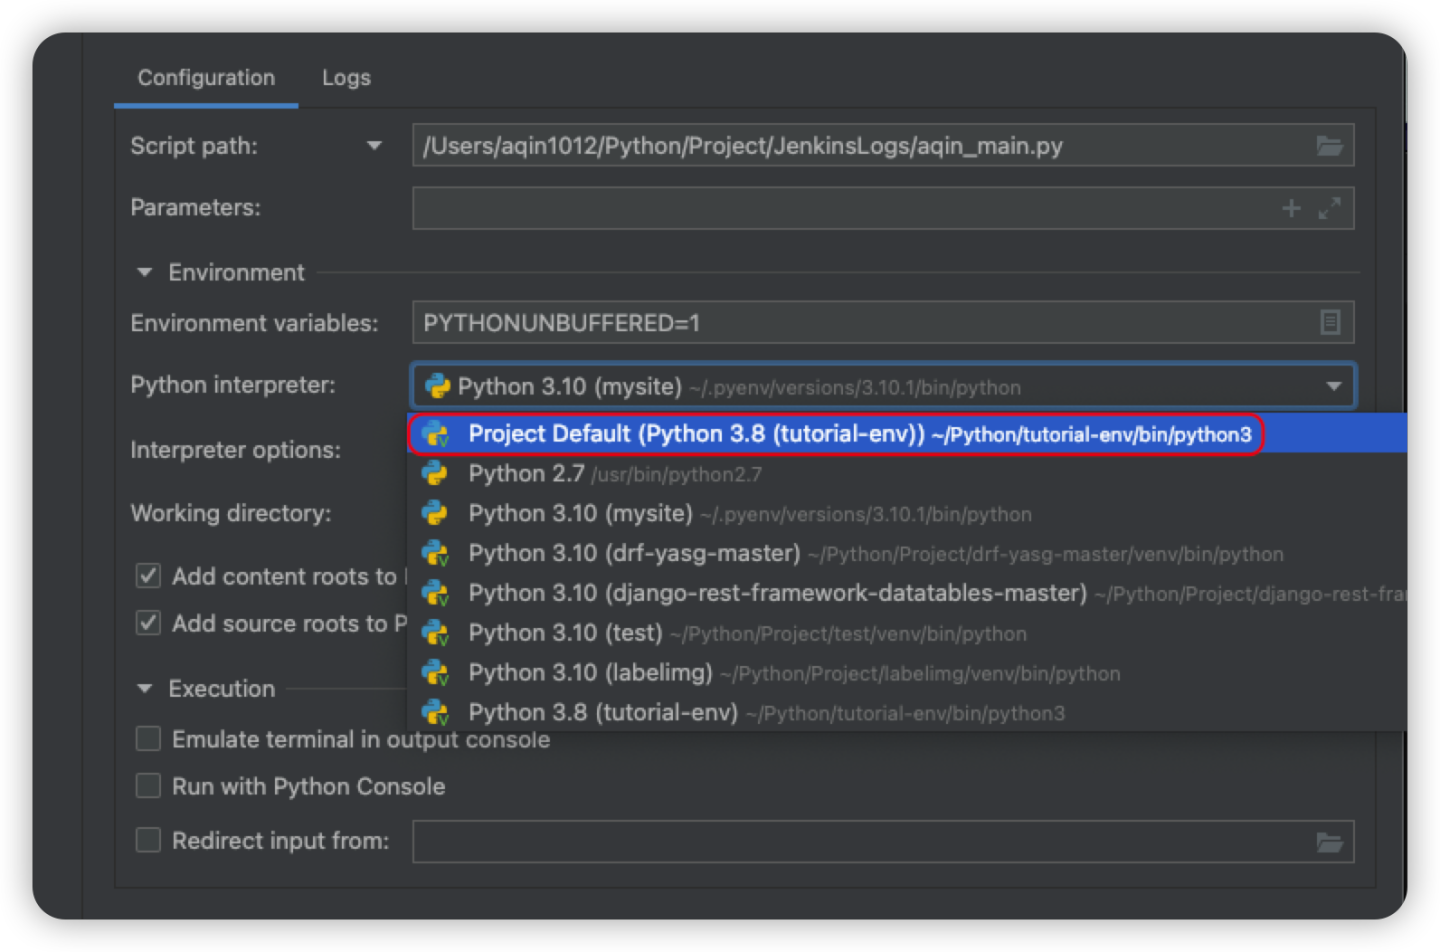
修改pycharm编译器设置
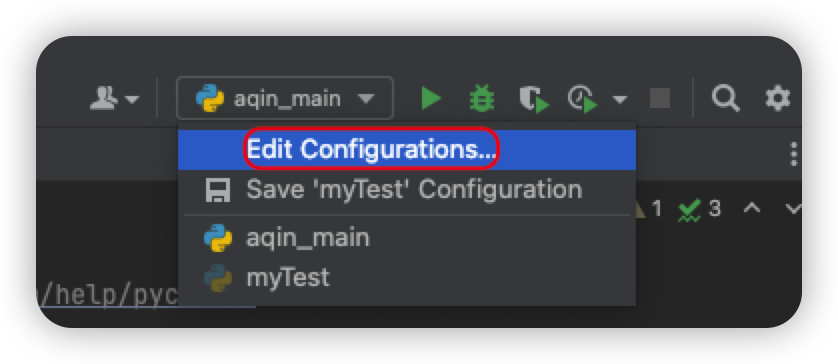
1. 打开Edit Configurations…
2. 在Python interpreter处的下拉框中选择与终端一致的版本
- 下拉框中有一致的版本,点击右下角的OK,完成
- 下拉框中无一致的版本,继续第三步添加新的python编译器
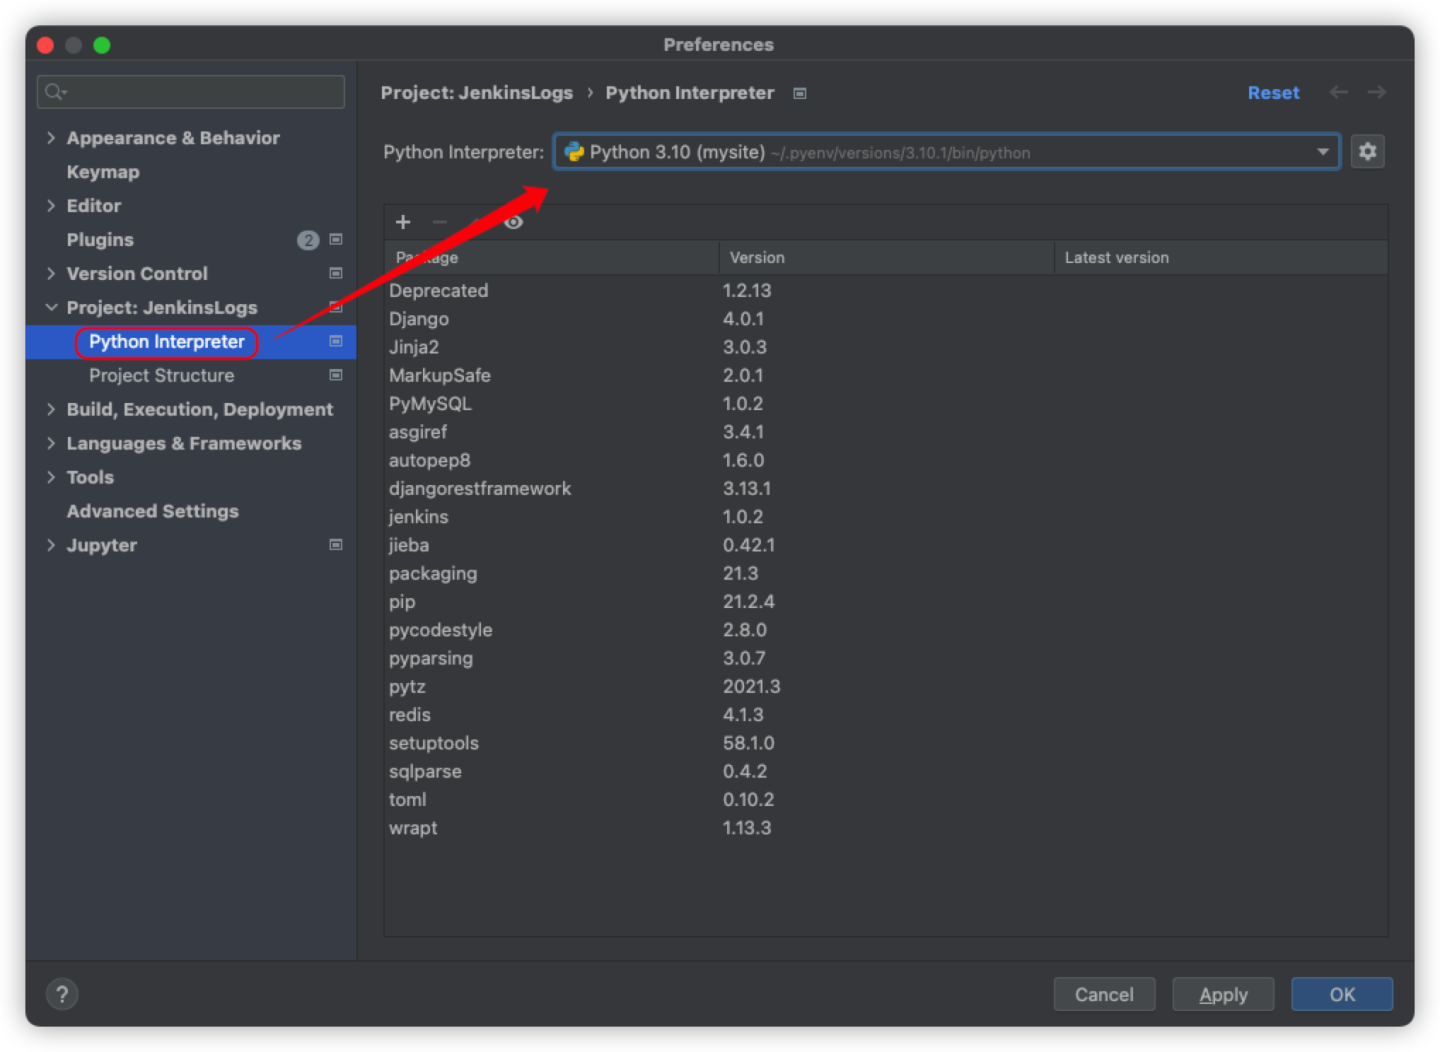
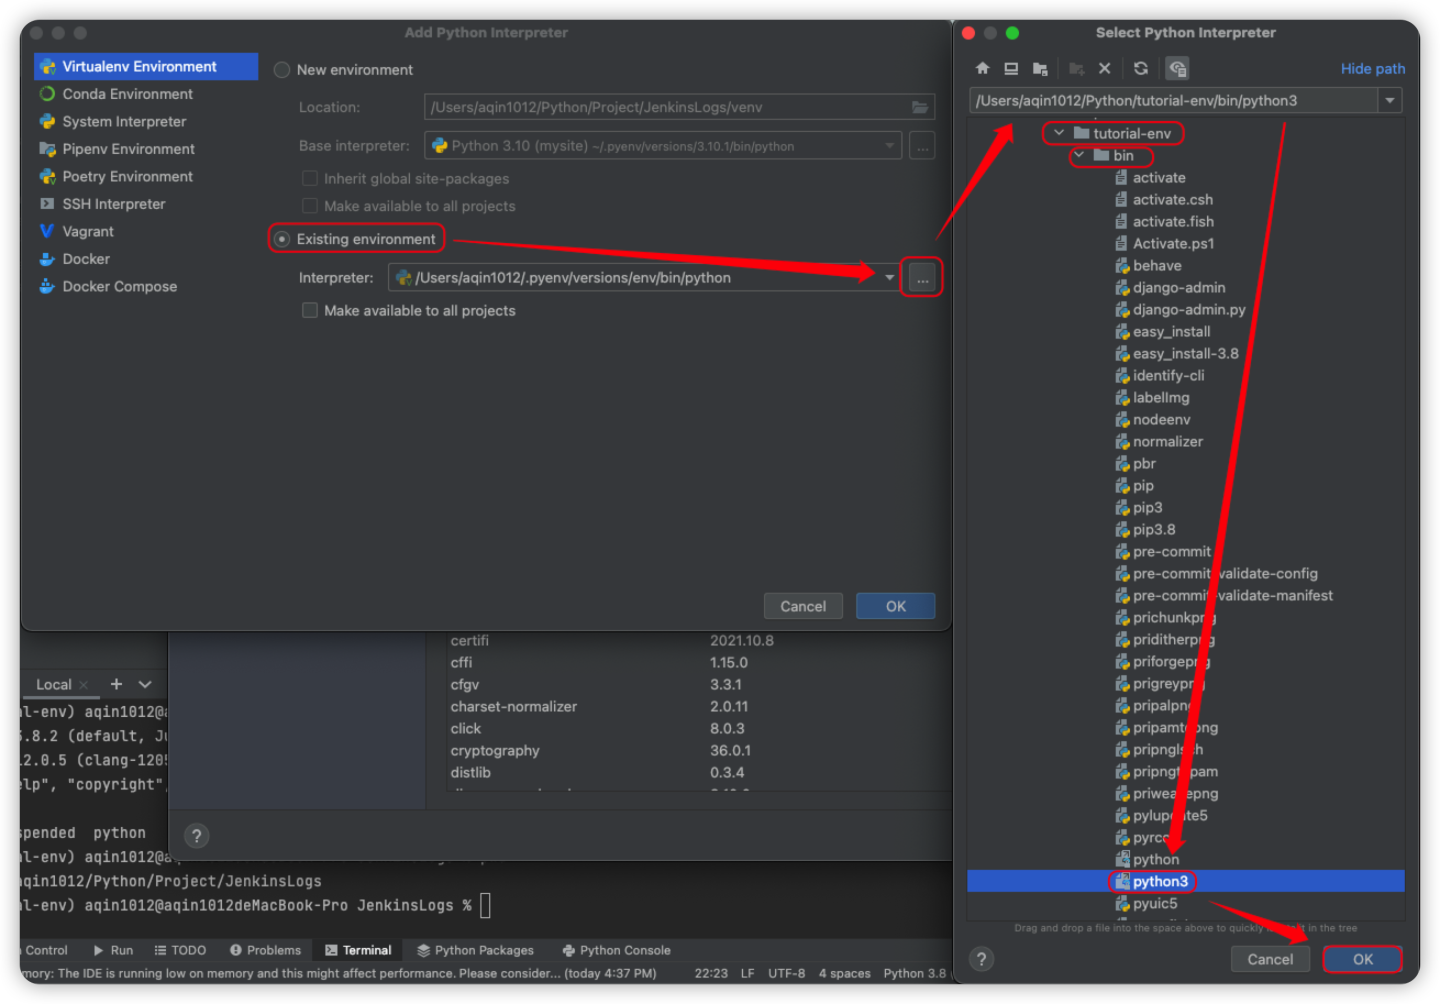
3. 添加python编译器
- 打开Preference
- 添加新的编译器(我这示例用的是虚拟环境,具体需要根据你自己的python安装的实际位置选择)

版权声明:本文内容由互联网用户自发贡献,该文观点仅代表作者本人。本站仅提供信息存储空间服务,不拥有所有权,不承担相关法律责任。如发现本站有涉嫌侵权/违法违规的内容, 请发送邮件至 举报,一经查实,本站将立刻删除。
文章由极客之音整理,本文链接:https://www.bmabk.com/index.php/post/135407.html

